cci logo

Clipping Creations India

  • Home
  • Services
    • Background Remove
    • Clipping Path Service
    • Product Photo Editing
    • Image Masking
    • Drop Shadow
    • Ghost Mannequin Services
    • Color Changes
    • Photo Retouching
    • Car Photo Editing
    • Vector services
    • Color Change Service
    • Multi-Clipping Path
    • Photo Editing Service
    • Image Masking Service
  • About Us
  • Blog
  • Pricing
  • Contact Us
  • Free Trial
Home  »  Tutorial   »   How to Transform a Body Shape in Photoshop Fat to Skinny

How to Transform a Body Shape in Photoshop Fat to Skinny

  • Clipping Creations India
  • April 4, 2023
  •  
    • Tutorial

Photoshop comes with wonderful features that make it one of the most demanding tools in the market for photo editing. Transforming body shape from fat to skinny is now easy with Photoshop. You can do it in a few easy steps – quickly and perfectly.

  1. Firstly, open the image in photoshop, and use quick selection tools to select the area on the image to edit. 
  2. Then the top layer converts the layer to a smart object. 
  3. Use liquify tools to edit the different parts of your photo.
  4. Once done, create a duplicate layer, and then use a clone stamp tool to cover the original photo. 
  5. Once done, check the before and after images to see the results.

However, for better understanding, I will share step-by-step details to make it simple for you to use photoshop fat to skinny features. Let’s get started.

Table of Contents

Toggle
  • Ways To Transform a Body Shape, From Fat to Fit Using Photoshop (Liquify)
    • Step 1: Open the Image in Photoshop
    • Step 2: Use the Quick Solution Tool
    • Step 3: Select the Top Layer
    • Step 4: Use Liquify Tool
    • Step 5: Duplicate the original Photo
    • Step 6- Use Clone Stamp Tool
    • Step 7- Finish
  • FAQs on how to transform a body shape in photoshop
  • Conclusion

Ways To Transform a Body Shape, From Fat to Fit Using Photoshop (Liquify)

Before going through the process, let’s know the possible tools that you must have to achieve a successful result. 

Photoshop Tools You Will Use:

  • warp tool
  • stamp tool
  • pucker tool
  • brush 
  • liquify filter

Step 1: Open the Image in Photoshop

photoshop fat to skinny step 1

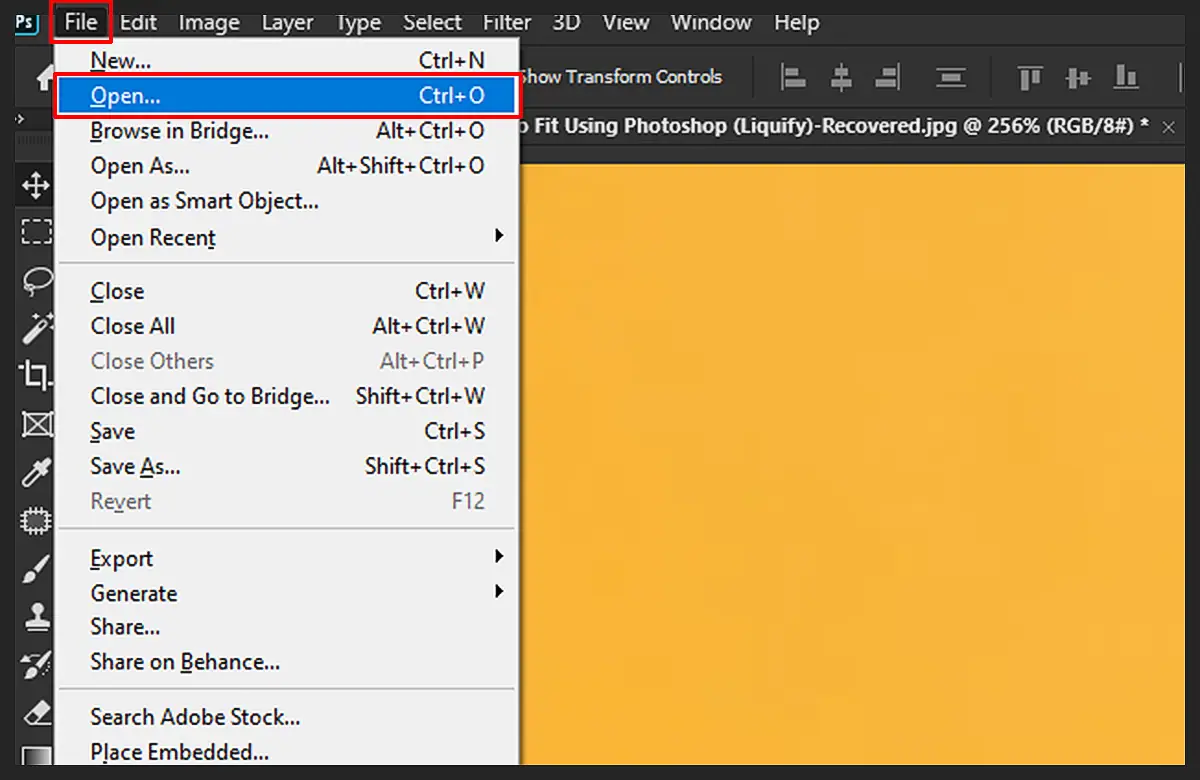
Open the image that you want to transform in Photoshop. Go to “File” and click on “Open” to select the image.

Step 2: Use the Quick Solution Tool

photoshop fat to skinny step 2

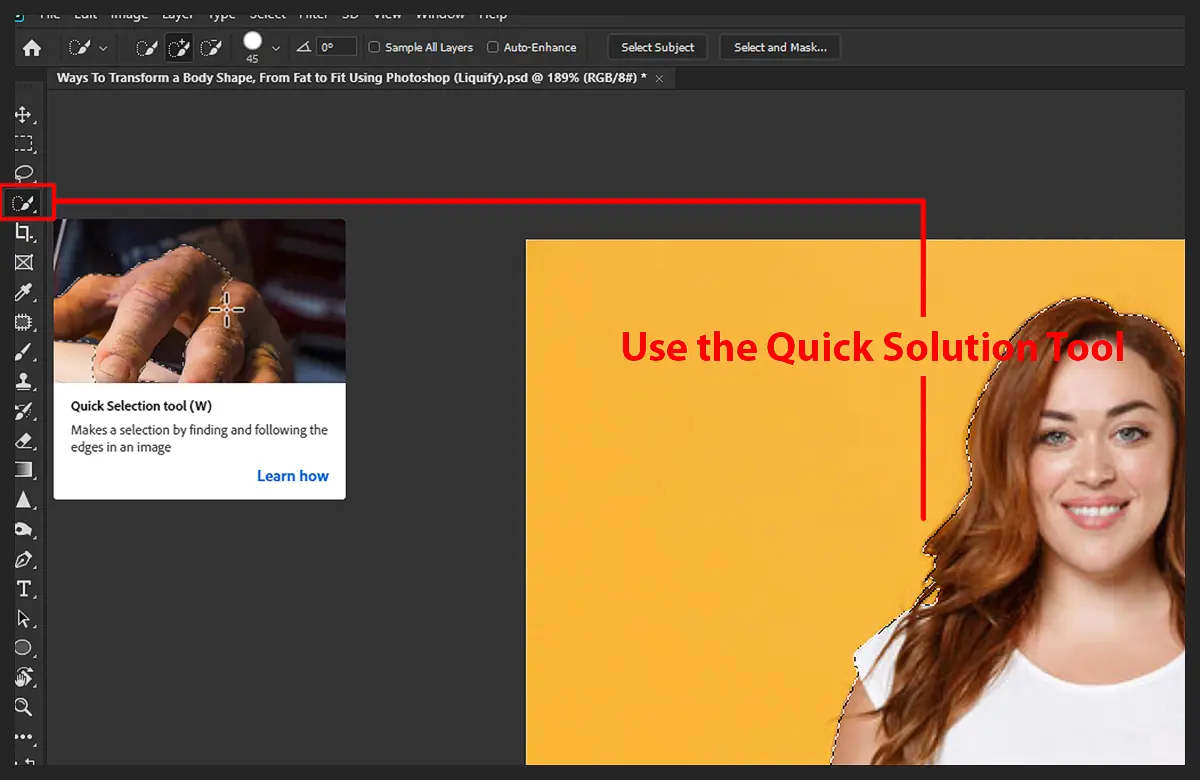
Use the quick selection tool to select the area of the image you want to modify. Once selected, use the keyboard shortcut “Ctrl+X” to cut the selection from the original image. Then use the keyboard shortcut “Ctrl+V” to paste the selection onto a new layer.

Step 3: Select the Top Layer

photoshop fat to skinny step 3

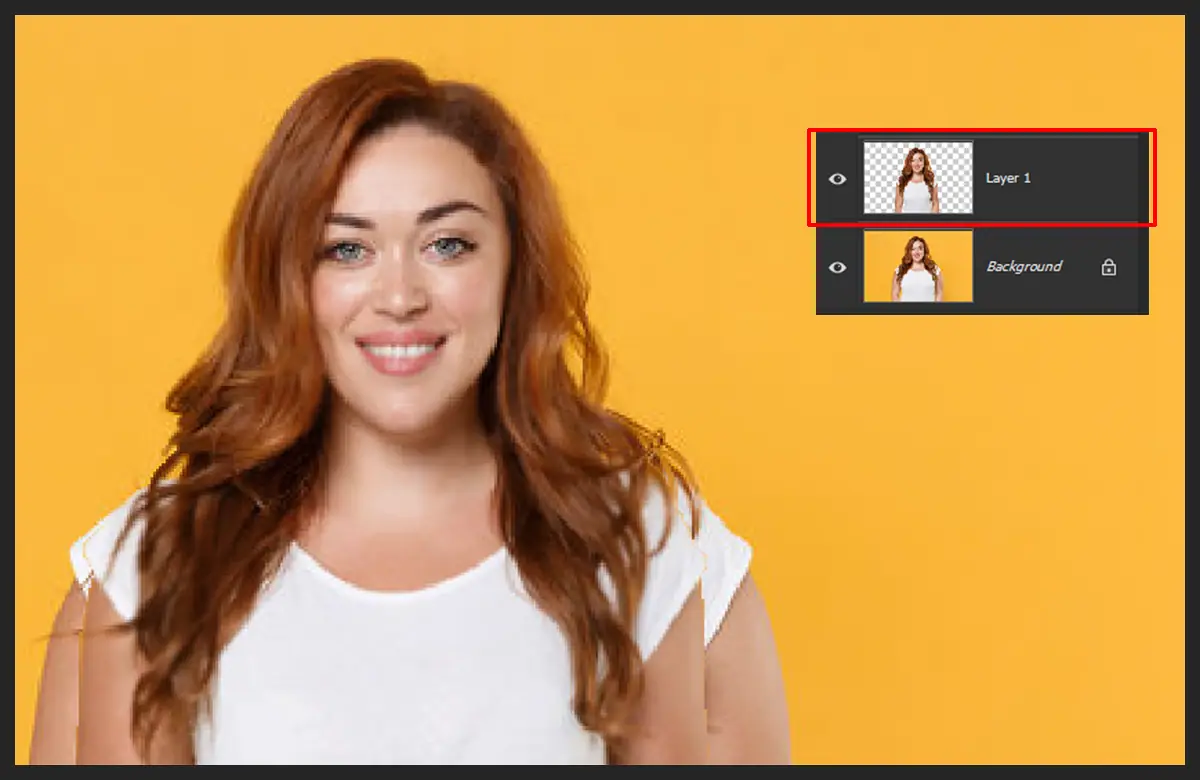
Select the top layer in the Layers panel. Then use the keyboard shortcut “Ctrl+Shift+X” to convert the layer to a smart object.

Step 4: Use Liquify Tool

photoshop fat to skinny step 4

Go to “Filter” and click “Liquify” to open the dialog box. Use the different Liquify tools, such as the Forward Warp Tool, the Pucker Tool, the Bloat Tool, and the Twirl Tool, to adjust the thick parts of the body, like the belly, chest, and thighs, to make them look thinner.

Step 5: Duplicate the original Photo

fat skinny step 5

Duplicate the original image layer by selecting it and using the keyboard shortcut “Ctrl+J”.  You will get a duplicate layer of the original.

Step 6- Use Clone Stamp Tool

fat to skinny in photoshop step 6

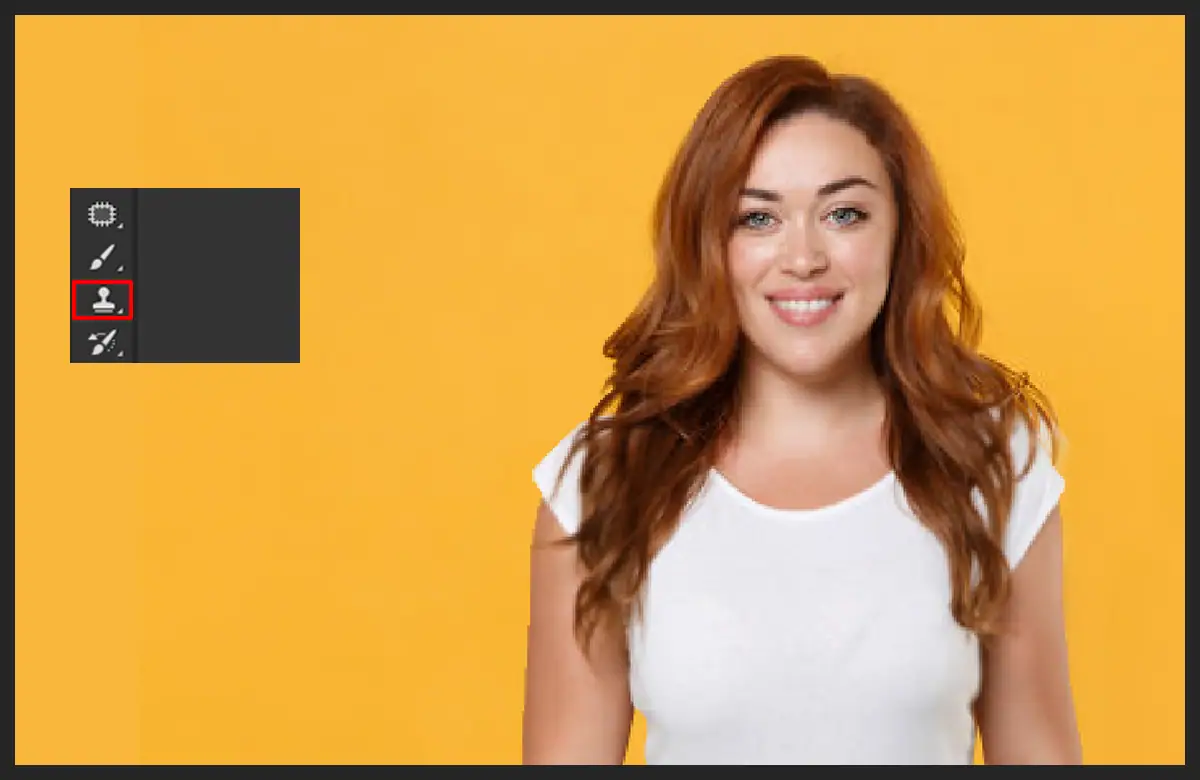
Then use the Clone Stamp tool to cover the original image under the edited image. This will ensure that the edited image appears as the final result while the original image remains untouched.

Step 7- Finish

fat to skinny

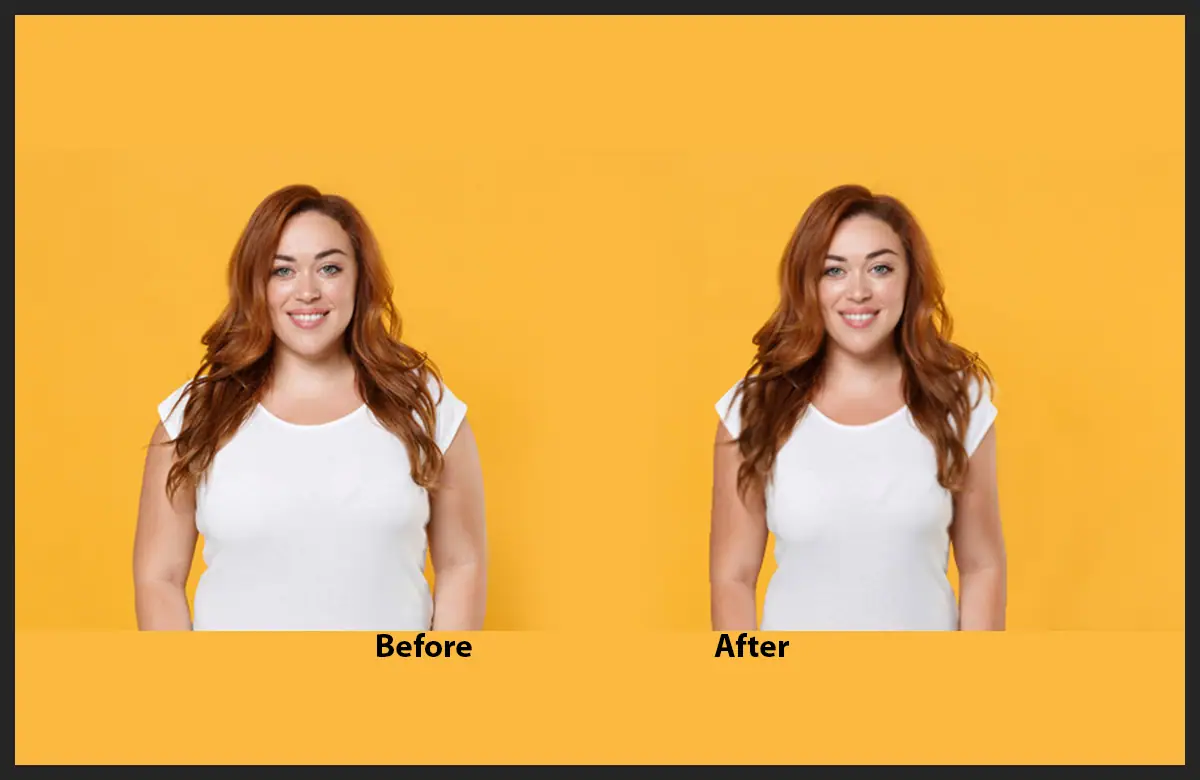
Once you have done, press “ok” to finalize the image. Check the before and after photos to compare the results and perfection.

Read more: Guide to Using Blood Brushes for Photoshop: Everything You Need to Know.

FAQs on how to transform a body shape in photoshop

Here are a few questions frequently asked about body transformation in Photoshop. 

What are some tools in Photoshop that can be used to transform body shapes? 

The Liquify tool is commonly used to reshape body parts, including making someone appear skinnier. The Clone Stamp tool can also be used to remove any imperfections or blemishes.

What are some tips for using Photoshop to transform body shapes? 

It is important to use subtle adjustments and not go overboard with transforming body shapes. Otherwise, you may create an unrealistic image. 

How do you use the Liquify filter in Photoshop to transform a body shape?

You can use the Liquify filter to push, pull, and warp different parts of the body to create the desired shape. It is important to use the tool subtly and naturally to avoid an unrealistic appearance.

Can I make my photo fat to fit from the free version of Photoshop?

Yes, it is possible to use the free version of Photoshop, such as Photoshop Express, to make your photo appear fatter. However, it may require some basic editing skills and knowledge of the software’s tools and features.

Conclusion

Photoshop is a powerful tool that enables users to edit and transform images, including reshaping body shapes from fat to skinny. Using the Liquify tool and Clone Stamp tool, users can make subtle adjustments to different body parts, resulting in a natural-looking image. However, it is important to use these tools carefully and avoid going overboard to maintain a realistic appearance.

(Visited 314 times, 44 visits today)

Post navigation

< Previous
Next >

Leave a Reply Cancel reply

You must be logged in to post a comment.

Top Services:

  • Clipping Path Service
  • Car Image Editing Service
  • Ghost Mannequin Service
  • Product Photo Editing Service
  • Multiple Clipping Path Service
  • Ghost Mannequin Service
  • Color Change Service
  • Drop Shadow Service
  • Color Change Service
  • Photo Editing Service
  • Image Masking Service

Popular posts:

  • How to Move Eyes in Photoshop and Online ToolsMove Eyes in Photoshop
  • See Through Cloth In Photoshop − Best PracticeSee Through Cloth in Photoshop Feature image
  • Easy Steps to Learn Clipping With Gimp [Easier Than…Clipping With Gimp
  • How to Create an Alpha Channel in Photoshop?clipping path service Feature
  • How to Reverse Video in Photoshop: Photoshop Hacks 2025How to Reverse Video in Photoshop
  • How to Export Photoshop Actions in 2025How to export Photoshop actions
  • How To Fix A Lazy Eye In Photoshop 2025Lazy Eye Problem Here’s What to Do,
  • 10 Professional Photo Manipulation Artists You Must FollowPhoto-Manipulation-Artists
  • How to Fix a Dark Polaroid Picture? Easy Solution to…How to Fix a Dark Polaroid Picture?
  • How to Swap Eyes in Photoshop? 2025 All-Inclusive Guide How to Swap Eyes in Photoshop

Recent Post

  • Car Background for Photo Editing – Tips and Tricks for Stunning Car Photos
  • The Benefits of Outsourcing Real Estate Image Editing USA: Smart Move
  • How to Swap Eyes in Photoshop? 2025 All-Inclusive Guide 
  • See Through Cloth In Photoshop − Best Practice
  • How Real Estate Photo Editing Increases Sales in the USA

Categories

  • Photo Editing
  • Tutorial

Archives

  • May 2025
  • December 2024
  • November 2024
  • October 2024
  • March 2024
  • February 2024
  • January 2024
  • December 2023
  • November 2023
  • October 2023
  • September 2023
  • August 2023
  • July 2023
  • April 2023
  • March 2023
  • February 2023
  • January 2023
  • December 2022
  • November 2022
  • October 2022
  • September 2022
  • August 2022
  • June 2022
  • April 2022
  • November 2021
  • October 2021
  • July 2018
  • May 2018
  • April 2018
  • December 2017
  • September 2017
  • August 2017
  • July 2017
  • June 2017
  • May 2017
  • March 2017

About CCI

Here, every pixel tells a story. We offer our unparalleled service and invest our most talented minds at your solution whether you are a photographer or an agency.
We are the gateway to exceptional photo editing services!

Get Your Quote

Quick Menu

  • About Us
  • Services
  • Blog
  • Terms and Conditions
  • Privacy & Policy

Payment Method


Get In Touch

+8801715-491890

hello@clippingcreationsindia.com

Canada Office: 1401-2900 Carling Ave. Ottawa, ON, K2B 7J6

+14168973175

India Office: C-20, Lajpat Nagar 3, New Delhi, Delhi 110024, India

Bangladesh Office: House 1, Main Road, Block G, Bnasree, Dhaka 1219

Copyright © 2012-2025 Clipping Creations India | All rights reserved.

  • Facebook
  • Twitter
  • Instagram
  • Pinterest
  • LinkedIn

Live Chat