Image Masking Service start at $0.35
Image Masking Service
As the digital marketing trend is rising, different types of photo processing requirements are also growing. Masking seems to be a pretty complicated editing technique and requires 1-3 years to master. In that case, is an image masking service a safe passage?
Creative Image Masking Service
The Secret To Unlocking Your Imagination!
Photo masking carries the most importance for eCommerce, small online businesses, and photography agencies. But hiring a team of professional editors means you’ve to invest $1,000-$1,500 for each photo editing computer and provide salaries.
Besides, you need to spend time leading the creativity of the workforce.
So, considering the above facts, picking a masking service is a no-brainer. But before getting your first FREE edit, check out this A2Z guide on image masking.
Image Masking Vs. Clipping Path – What Are the Differences?
Both clipping path and image mask are popular editing techniques used to isolate a picture’s objects. While they may appear to be similar, there are some key differences between these two approaches.
|
Factors
|
Image Masking
|
Clipping Path
|
|---|---|---|
|
Purposes
|
Isolate one or multiple complex objects with lots of details
|
Isolate one or multiple simple outlined objects
|
|
Object Types
|
Hard edges
|
Soft edges
|
|
Process
|
Manual
|
Manual
|
|
Learning Curve
|
Requires 8-24 months of experience to master
|
Around 1-3 months of practice to learn the process
|
|
Object Examples
|
Models with fuzzy hair, pets
|
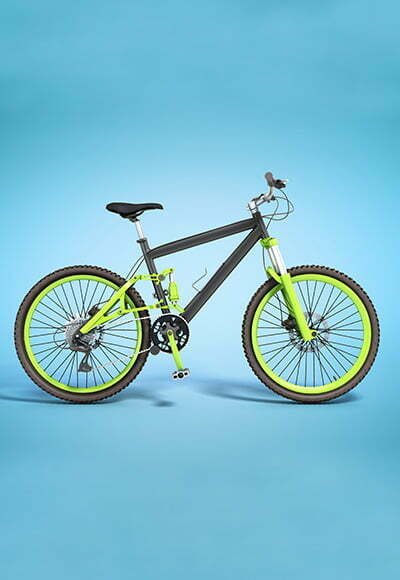
Toys, bicycles, furniture
|
|
Disadvantages
|
A lot of time-consuming editing techniques
|
Doesn't provide sound editing output in the case of transparent or fuzzy objects
|
|
Advantages
|
Non-destructive approach to hide or show objects of a photo Allows making changes without erasing a layer or object Makes overall advanced-level editing easier
|
Non-destructive approach to hide or show objects of a photo Allows making changes without erasing a layer or object Makes overall advanced-level editing easier
|
If breaking down the above chart, image masking is a more complex technique that involves using various tools in Photoshop to select objects you want to isolate manually. This technique is used when dealing with images with lots of detail.
On the other hand, a clipping path is comparably more straightforward editing to create a closed vector path to isolate objects.
Though both editing strategies are meant to provide seamless access to customize an image, there are pros and cons.
Image masking can be more time-consuming and requires a higher level of skill. However, it offers more flexibility and can produce more accurate results.
The clipping path is quicker and easier to use, but it can sometimes result in less accurate results.
So, which technique should you use? It really depends on the image and your own personal preferences.
Image masking is the better option if you’ve got the time and patience and require deep customization in the future. And if you don’t advance editing of your images at a later stage, the clipping path may be the way to go.
4 Reasons Why Image Masking Is Essential
Masking is one of the most important image-processing techniques. The reasons are pretty obvious, such as:
Remove or Change the Background
Like the clipping path, masking also allows you to remove or replace the background behind a photo object. However, because of the layers, you get step-ahead access to get or edit the background again anytime.
Used for Creating Composite Images
Composite photos are created by blending two or more images. This technique is often used in digital advertising and product design. Image masking allows you to do such edits more accurately.
Allows Image Quality Improvement
It can be used to remove imperfections from a photo. For instance, if you want to make a specific portion of the image sharper (which may miss due to a focus issue), you do this through the masking process.
Make Realistic Color Alteration
The color alternation opportunity you can get from masking works like magic! You can replace any object color (shared in the later section) and make it looks realistic.
Suppose you can change a blue car color to red to display it on your online store without needing a new car photo. It can also save you money to rearrange the photoshoot in other scenarios.
10 Image Masking Styles for Making Undefeatable Marketing Content!
The area of using image masking is vast. To differentiate each image masking need, people categorize them accordingly. However, these segmentations aren’t based on any Photoshop rule.
Instead, they depend on the characteristics of an image, its objects, and its purposes. Let’s dig deeper into the 10 types of photo masking one by one.
Alpha Channel Masking
Ever seen single-color (usually black, white, gray, etc.) vector graphics such as icons or logos? Many of them are created following the alpha masking method. This masking technique allows you to display the shape of an object rather than its colors.
Though Photoshop artists prefer building a vector graphic from scratch, alpha masking seems to be a time-efficient way to process bulk edits in this case.
You just need to select a particular object of an image, isolating the item pixel by pixel from the background. Then remove the selected layer color to black, using color adjustment tools like brightness, contrast, hue, etc.
A notable advantage of alpha image masking over the clipping path is it allows you to decrease the edited image size more than the raw file.


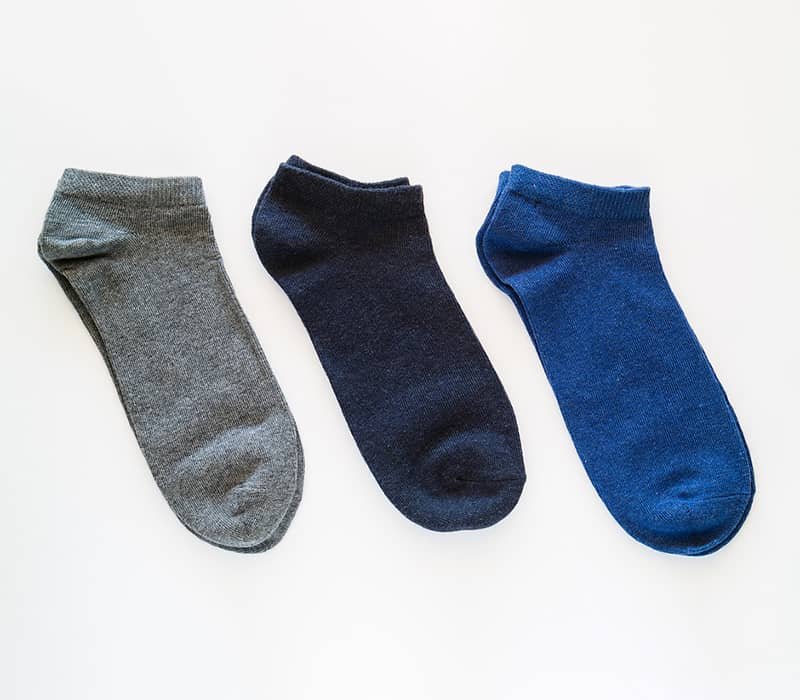
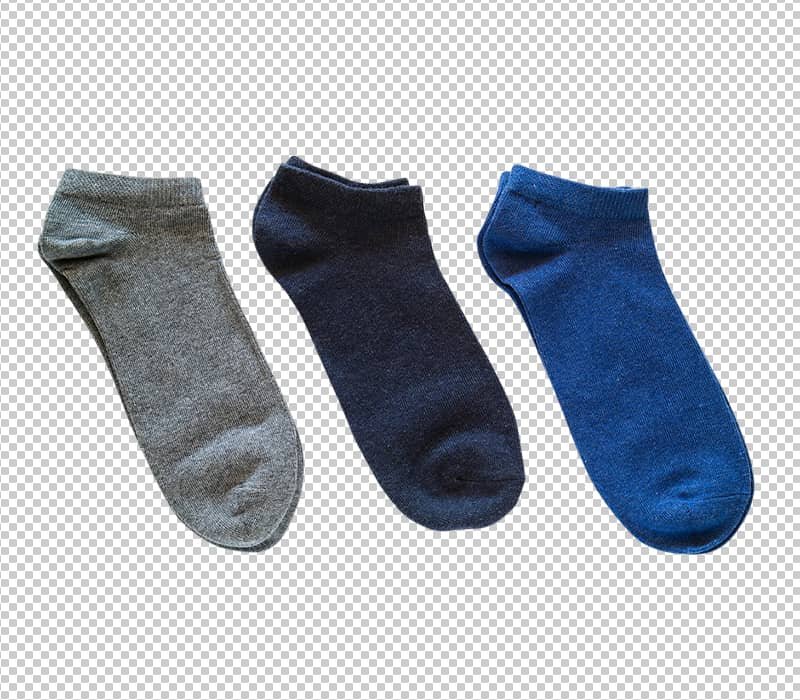
Background Masking
As the name suggests, this masking is used for removing the backgrounds of a certain type of image.
Usually, the editing strategy is followed if the image has a single object with a visible transparent background (images that shows gray-white checkboxes behind the object.) You can use the “Background Eraser” tool in Photoshop to do this trick.
Clipping Masking
It’s a combination of clipping paths and general multi-layer image masking techniques. The process of this editing involves creating distinguishable clipping paths for each object and the background.
Then use the regular masking in each layer and connect them to others. In that way, you get more accessibility and thoroughly customize all layers in the PSD file.


College Masking
If you need to clip an object from a photo and add it in a different/new image, you’ll need to follow college masking. It’s a commonly used Photoshop trick, especially for movie banners, flairs, etc., where multiple blending objects from different images are required to create a new image.
Count Marvel’s Avengers movie banners as an example.
Without extracting and adding objects, you also need to make some adjustments so that it doesn’t look artificial in the new image. These afterward retouching include color adjustments, pixel density, sizing, contrasting, etc.
Color Masking
It’s a bit similar, yet advanced image masking to the alpha. Instead of a single color, a Photoshop or Illustrator editor adds 2-5 colors in the final image. These multi-color image transformations are common in NFT, gaming, e-sports, and other retro cultures.
You can consider it a better alternative to Canva Duo-Tone, which can’t provide the expected result it’s built for.
With color image masking service, you can transform a regular human photo into a retro-type cartoon image. This sort of image is now widely used for online business marketing of SaaS (software as a service) products.


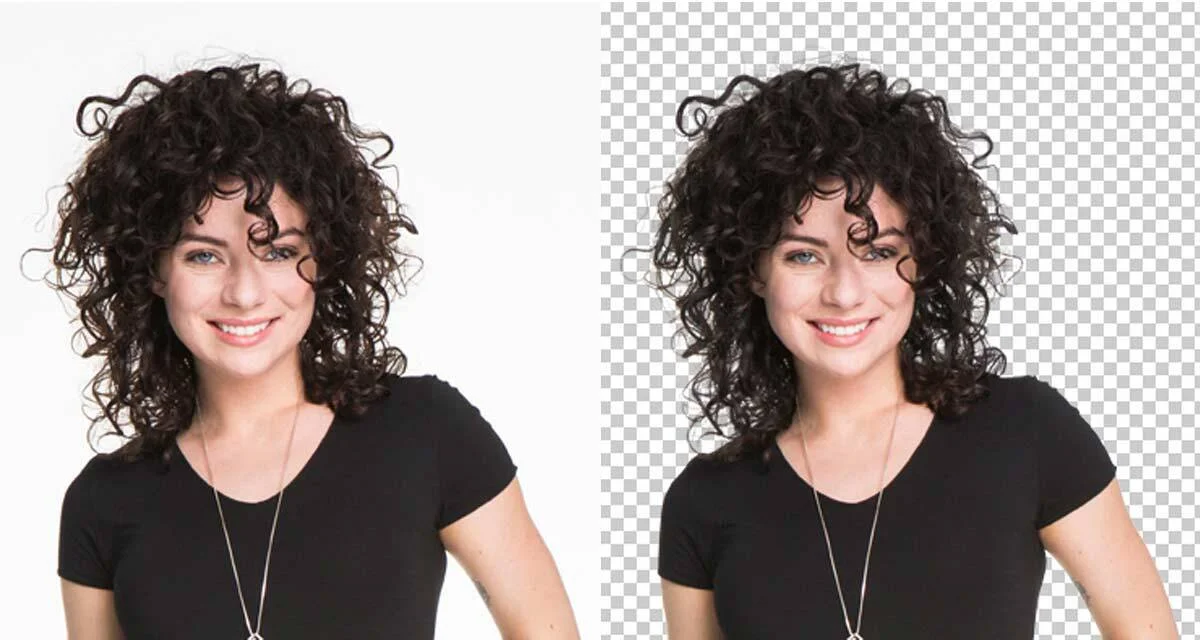
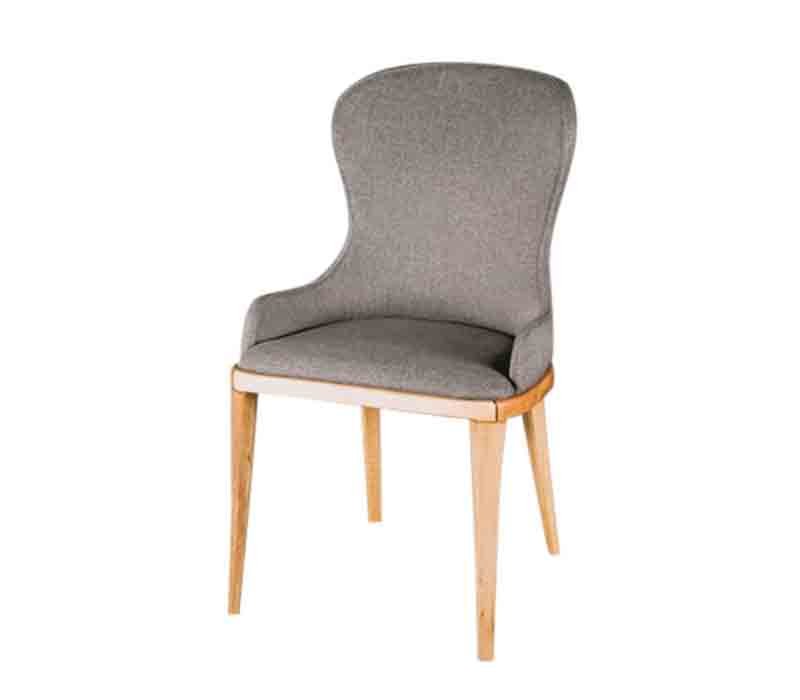
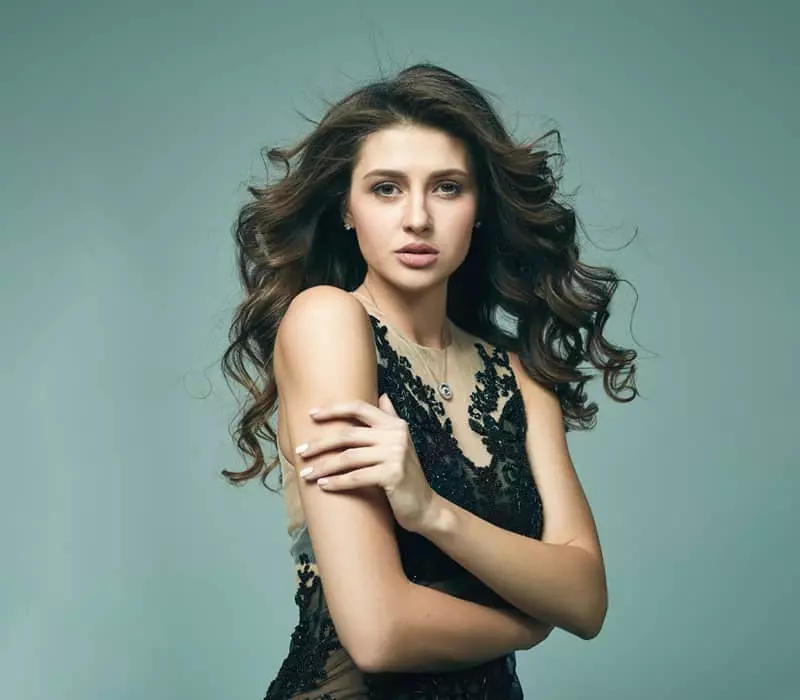
Hair and Fur Masking
When it comes to removing the background of photos with human hair, animals, wooly dresses, etc., the clipping path can’t provide the expected results. It’s because the path creation tool in Photoshop can only follow hard edges, which doesn’t provide a precise cutting for the above image types.
Hair and fur masking gives you relief in this regard. The particular masking is suitable for catching these soft edges and later enables you to remove or customize the background and so on.
Layer Masking
A layer mask is simply a black-and-white version of a picture to define the area to be masked. The white areas of the layer mask are the areas that’ll be visible in the final image, while the black areas will be hidden. Layer masks are very flexible and can be used to create very complex masks.
Like the alpha mask, layer masking is also widely used. The purpose of this masking is to separate each object of an image. You can then hide, show, or blur any of the layers as your requirement for both retouching and exporting.
Without regular background removal, this technique is also quite helpful for adjusting all objects of a single image separately.
For example, if the lights on a photo model are a bit low and you want to increase them without affecting the context or other objects, layer masking is the best solution.

Refine Edge Masking
For smoothing out the rough edges of an image object, there is a tool in Photoshop named Refine Edge/Mask. Therefore, most graphics designers call it by this name. It’s required to enable the tool manually when editing. But to do so, you’ve to select the object you want to process.
First, you need to generate a layer mask of the object. Then go under the “Select” tab and hit the “Mask” option, which opens the “Refine Edge” window.
Although the functions of this method are nearly the same as the hair masking, it gives you a more natural-looking output with complex object parts.
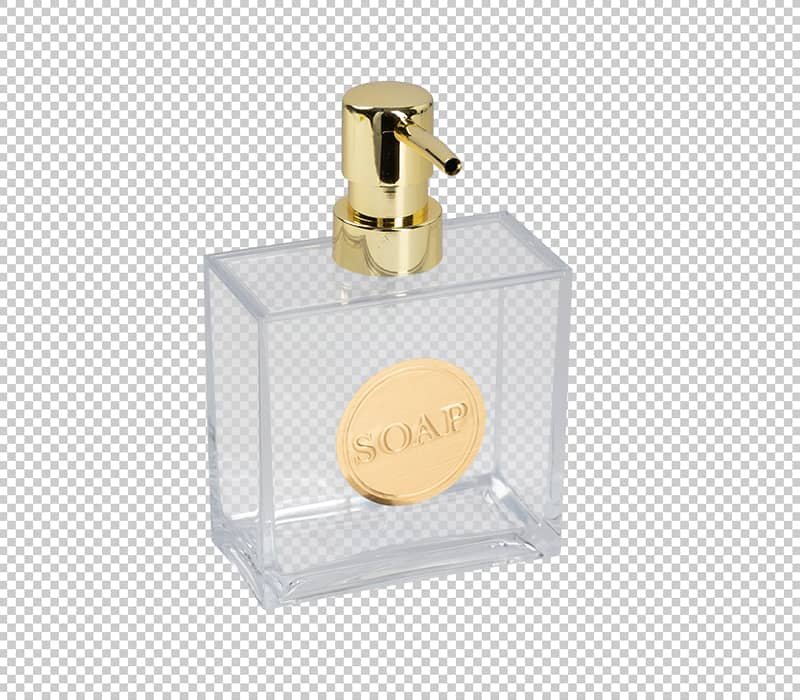
Transparent Masking
Whether it’s a product or model photography, there can be a transparent object in the image, like a water glass, mirror, eyeglass, or just water.
And when it comes to eliminating background from this sort of image, it becomes more challenging than others. Besides, if using typical masking approaches, you might end up with poor results.
To meet this requirement, you can adopt this advanced and non-destructive masking method. For instance, this masking delivers better results if you want to remove the background of a waterfall or ice-bucket challenge photo.
Translucent Masking
The object type is the key differentiating factor between translucent and transparent image masking. Translucent masking is used for photo objects that can pass less amount of light through them. Plastic frames, tissue, a wine full of glass, etc., are a few examples of translucent objects.
Because of the trait, photos with this sort of object appear to have spread light rays all over or in some areas. Hence, these require more effort and concentration when it comes to masking the image.
How to Do Image Masking on Photoshop?
Image masking is an advanced editing technique and has many parts to get done. It’s not possible to discuss the complete tutorial in a single post. However, you can get a basic idea from this beginner masking guide.

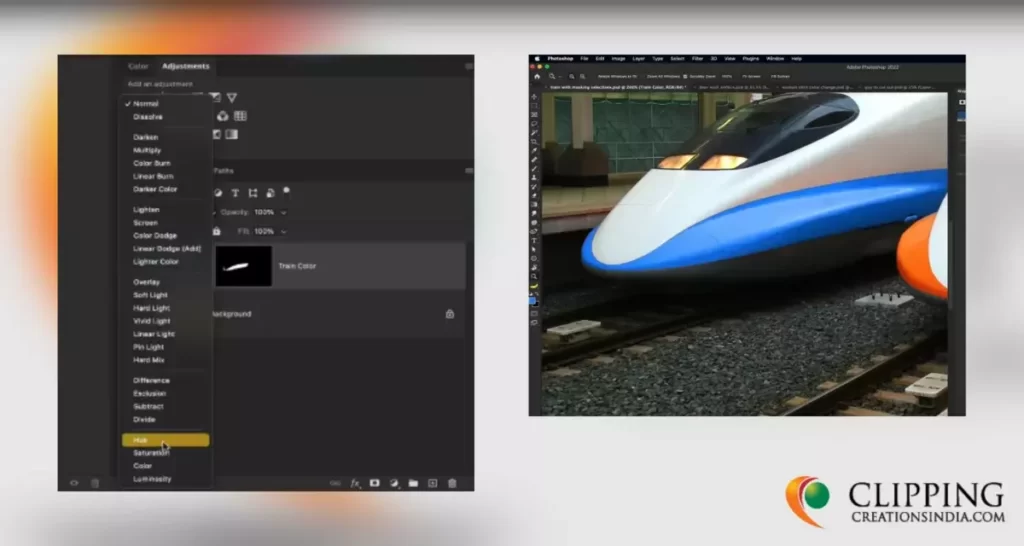
You’re gonna mask this image with 2 trains, assuming you need to change the color of any of the orange stripes to bluish. There are a number of ways you can do this.
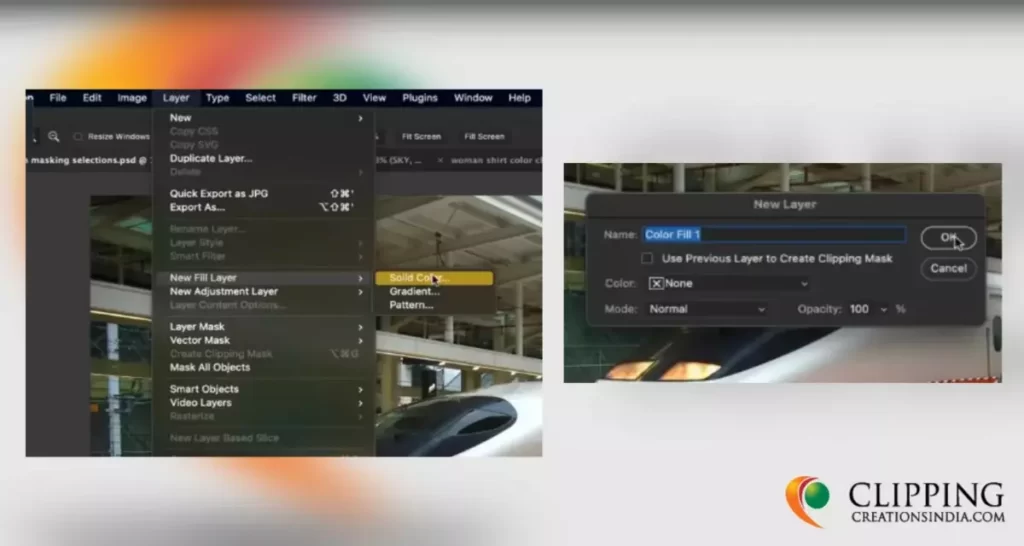
Step 1: Creating a Mask
The first thing you’ve to do is load the orange area as a Selection on your Photoshop interface. To do so, click on the “Select” tab from the upper panel and hit “Load Selection.” On the next window, you can name it “Train color,” as I’ve shown, and click “OK.”

Then select the striped part of the train you want to change. Go to the “Layer>New Fill Layer> Solid Color.” Type any name you want on the next popup and hit “OK.”
It’ll then open the “Color picker” window and allow you to choose your required color manually. Whenever you confirm a color and hit enter, Photoshop will automatically create a mask, which you can see on the lower right of the screen under the “Layers” window.
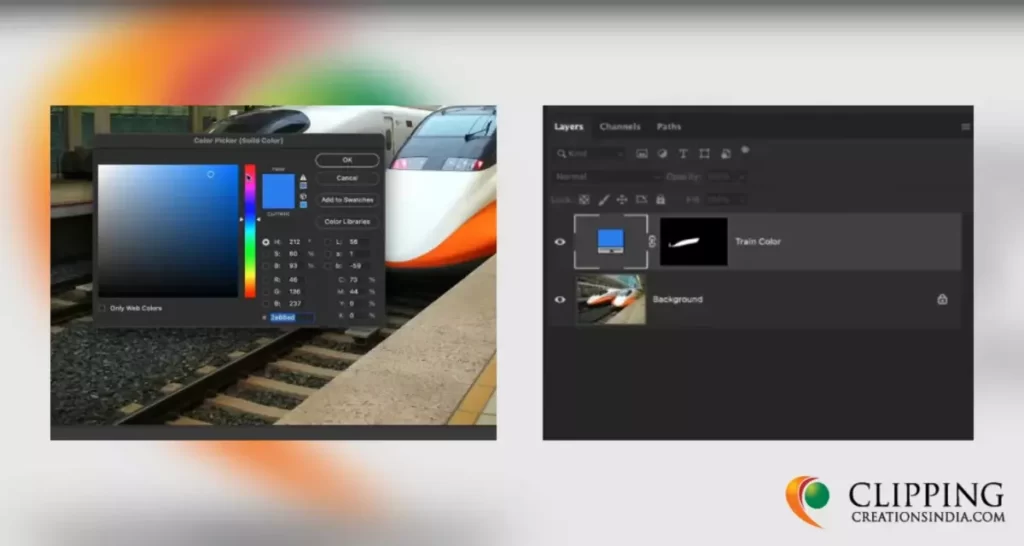
Till now, you’ve created the first mask, but it doesn’t seem to be realistic as it lacks the shape and shades of the train.
Step 2: Inverting the Layer
To give it a natural look, you’ve to select the newly created layer and invert the color to black if, by default, it’s white.
You’re supposed to see the new layer under the “Layers” window again. It selects the layer color (in the screenshot, it’s Blue.) Change the selection to the white box beside the blue box or the color you just created. Click on the white panel to select it.
If the selection has been changed, you’ll see the white tick marks around the box (which previously were around the blue box.)
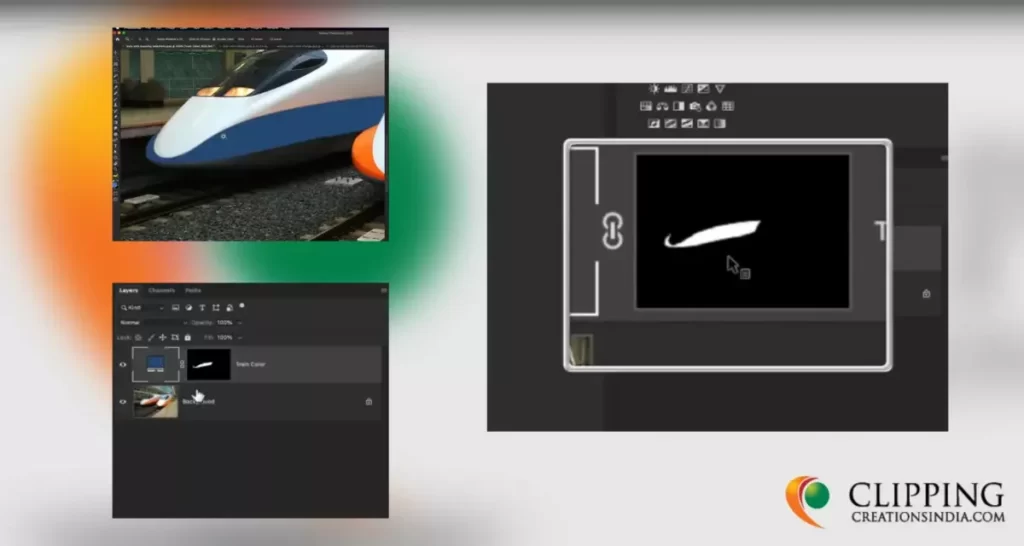
“Note that the colored box is filled with the created layer. And the white box is the mask of the layer.”
Next, use the (hotkey + command) for Mac or “Ctrl + I” to invert the selected mask color. It’ll fill the mask with black. When you invert the color, the filling color will disappear as well.
Step 3: Finalizing the Mask Color
Open the dropdown menu of the Color Fill layer. Then select the blend mode of “Hue,” and you’ll get a blue stripe, as displayed in the below image.
Depending on the image type, you may sometimes need to select other filling options.
Outsource Image Masking Services Vs. Hiring In-House Editor
Once, people used to think of hiring a private editor to tackle editing needs like image masking. However, the outsourcing ratio has drastically risen in the last few years. Here are the most influential factors that flipped the buyer behaviors in the market:
Top-Notch Quality of the Finished Product
As mentioned above, image masking is a pretty advanced level of editing. A good image outsourcing agency usually has a team of experts in the field. Therefore, no matter the level of complexity, you get flawless edited image output.
Comparably Inexpensive
One of the main considerations when deciding whether or not to outsource image masking services is the cost. Unlike the clipping path, the pricing is a bit higher because of the difficulty.
However, when ordering bulk image masking, the cost of outsourcing is comparably less than hiring an in-house editing team.
The average cost of hiring a Photoshop expert is around $30-$90 per hour nowadays, depending on the experience and region. It’s a lot compared to a dedicated editing company’s pricing.
Takes Less Turnaround Time
When you need fast bulk image masking support, outsourcing this work is often the best option. A reputed company hires a floor full of editors to support hundreds of clients regularly.
So, professional image masking services have the manpower and resources to get the job done quickly within your timeline, which a single editor can’t tackle.
Customization Level
A private editor will always have some limitations at a certain stage. That’s where the importance of team play is undefeatable.
Since an agency has hundreds of professionals, they can exchange expertise whenever it requires to settle required edits.
Why Clipping Creations India Is the Best Image Masking Service Provider?
Clipping Creations India has been providing image masking services to its clients for over 10 years. They consider us the best editing agency in the niche because we’ve got –
250+ editors to meet your deadline no matter what’s the order size
Highly skilled and experienced editors in all types of masking images, such as layer, alpha, color, transparent, translucent, etc.
Large bulk processing capacity, amounting to 10,000 photo edits per day
Most advanced software to mask images perfectly, including Photoshop, Pixlr X, Lightroom, etc. We also use tool hand tools like graphic tabs and pens for deep editing.
Competitive prices without compromising on quality, starting from 35 cents, including bulk order discounts
24/7 dedicated customer support team for taking care of your queries anytime
Unlimited revision during and after editing
Trial edit options for first-time clients.
We offer a 95% satisfaction rate with a portfolio of 10k+ happy clients worldwide. To be a part of the Clipping Creations India family, reach out to us with any queries.
Step 1: Apply for Free Trial
On the upper right of the header, click on the “Free Trial” button. Upload an image that you want us to edit under this free trial. Also, type your name, email, phone number, and instruction so that we can reach out to you for further details.
Step 2: Get Approval
After receiving your requirement and image file, one of our team representatives will get to you for a short chat via mail. Upon getting your response, our editing team will start the post-processing.
Step 3: Image Delivery
Hurrah! At the final step, our team will get back to you again when the editing is done. We’ll share the file via a cloud storage link.
How to Get a Photoshop Image Masking Service FREE?
Clipping Creation India already has a portfolio of thousands of satisfied clients in multiple countries. But we understand the insecurity of a first-timer when ordering services online.
Thus, we edit your first image for free to help you identify our service quality with a friendly client support team for all updates. Get your free image masking service now.
You can also check out our other photo editing services:
FAQ About Image Masking Service
The following information provides answers to the most common questions that customers regularly have about Image masking services.
How much does an image masking service cost?
In general, an image masking service charge starts from $0.60 to $0.90 per file. However, at Clipping Creations India, you can get this service for as low as $0.39.
How much time does it take for image masking?
For simple image masking, such as creating an object layer mask, it may take up to 5-10 minutes if done by pro editors. A complex task like transparent object masking can take up to 30-60 minutes.
What type of file format is required for image masking?
A PSD (Photoshop Documents) is the best file format for image masking, making editing more accessible and less time-consuming. Besides, PNG and high-quality JPG files are also acceptable.
Which Photoshop tools are used for image masking?
There are multiple tools you need to use for image masking in Photoshop, like Mask, Fill Layer, Selection, Pen tool (for complex images), etc.
Is masking the same as clipping path?
The purpose of image masking and clipping path are almost similar and mostly used for background removal services. However, for complicated photo edits, image masking gives more advantages than clipping paths.
What is the purpose of a clipping mask?
Linking between two object layers is a common use of a clipping mask. For example, using a clipping mask, you can connect a text layer with a shape layer.
Rounding Up
In conclusion, masking is an essential part of image editing and can be used for various purposes like removing backgrounds, creating cutouts, isolating objects, etc. This advanced editing technique can open more doors for businesses that use images as their primary marketing material.
At Clipping Creations India, we provide image masking services to get the best out of your image content. To get your first image masking free, submit your request now.
Our latest portfolio here!


Get Connected With Us


