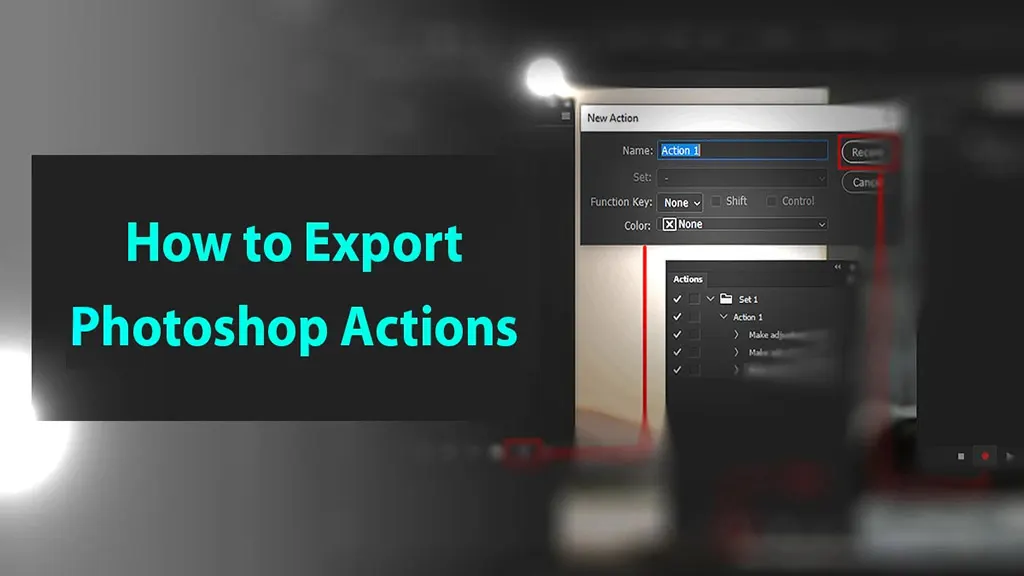
How to Export Photoshop Actions
- July 23, 2025
Photoshop actions are a game-changing tool for professional to beginner photographers or designers. You can use this action from Photoshop’s action panel to automate editing tasks that save you time! Again, you can create a custom action for bulk photos with similar requirements. Want to export a Photoshop action with others through another computer or editor? Then you can easily do this by following these easy steps—
- Open the action panel.
- Create a Custom Action file.
- Save the action file.
- Select the action file to export.
- Share to export.
You’re going to be so confused with a short tutorial everywhere! That’s why I have prepared a step-by-step guideline with more details that’ll help you export action in a minute! Just read the article and feel the magic.
How to Export Photoshop Actions: Step-by-Step Guideline
This section will describe every step of exporting an action in Photoshop. You can easily export actions in Photoshop by following the easy steps given below-

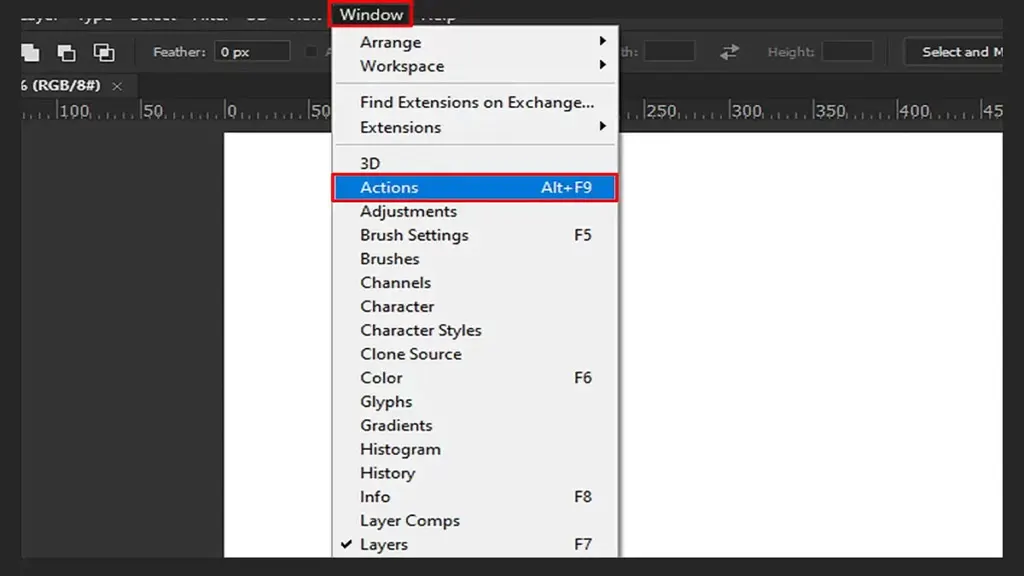
Step 1: Open the action panel
First, open the Photoshop app and search for the action panel. To find the action panel, go to the window or press “ALT F9.”
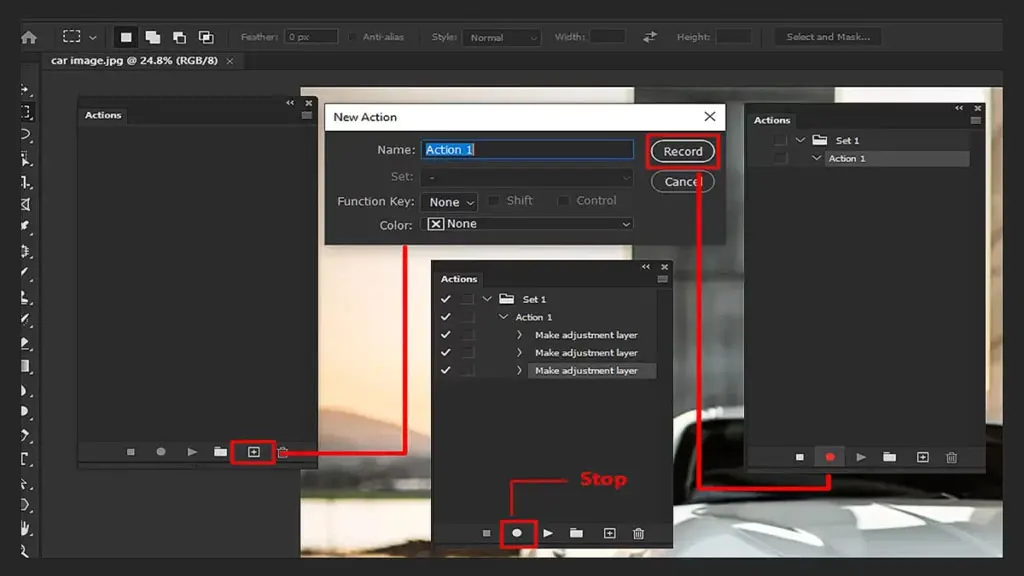
Step 2: Create a Custom Action file
If you want to share your custom action, you need to create it first. If you already have a selected action to share, skip this step and move to the next step.
So, here you must create a folder with a filename. like, setting the file name as “Expaction” on.” Now, click on the plus icon to find a record option. It’ll start recording what you’ll edit on a selected image. After final editing, you must stop the recording with the stop icon. Save it with the Save option.
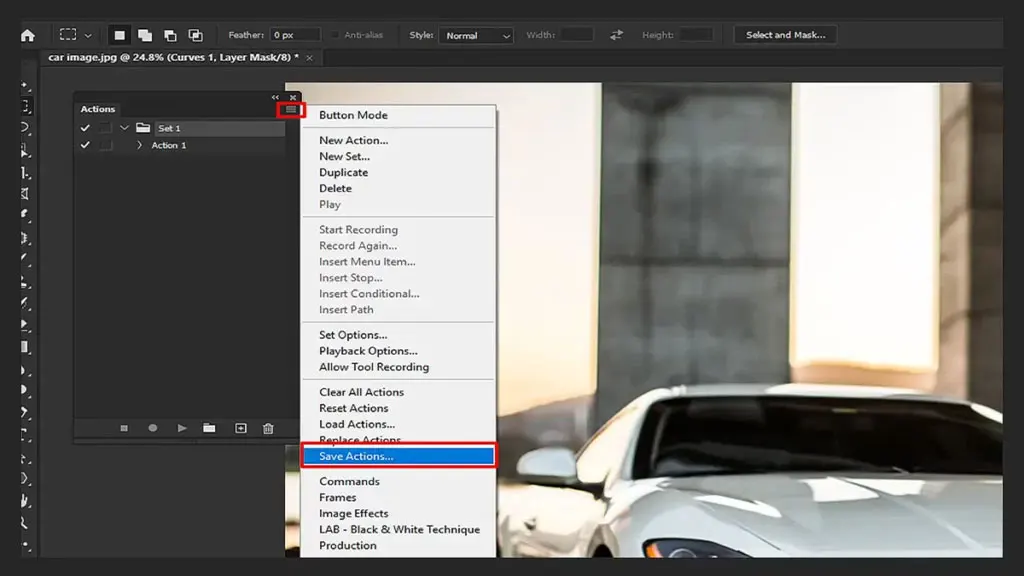
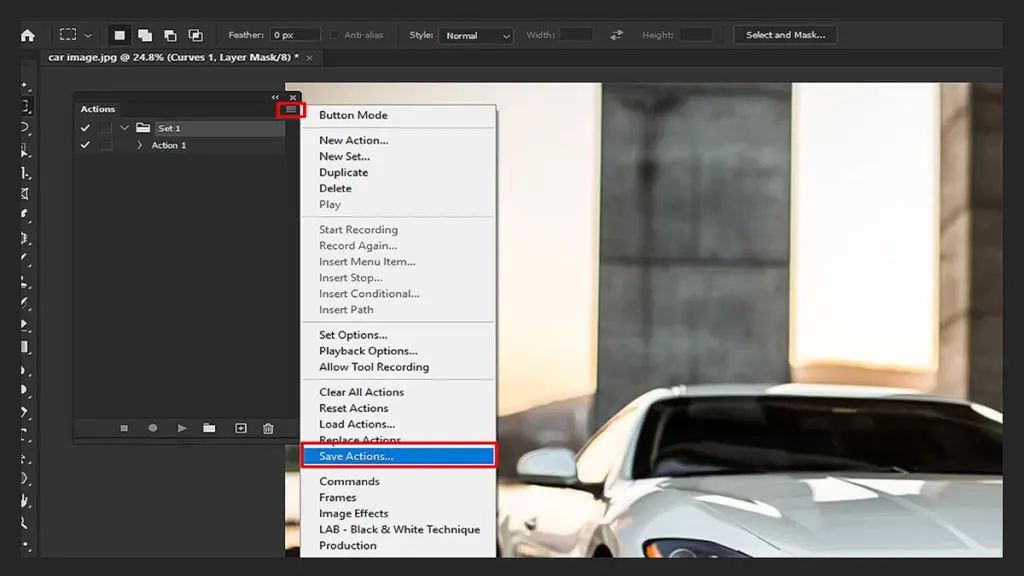
Step 3: Save the action file
After that, open your desktop and go to the file. Then create a new layout and save it again. In this way, you can find the action file more easily during export.
Now, play the action from the action panel to ensure it’s all right for export. Again, all saved and loaded actions will appear here. You may notice the selected export file will save as a “.atn” file.
Step 4: Select the action file to export
It’s time to focus on the main step. Here you go! Just open the action folder and select the action you want to export.
Before exporting the file, you need to copy the action, as it sometimes requires the original file for further use! So, duplicating the file is always safe. Now, paste the .atn file into your computer.
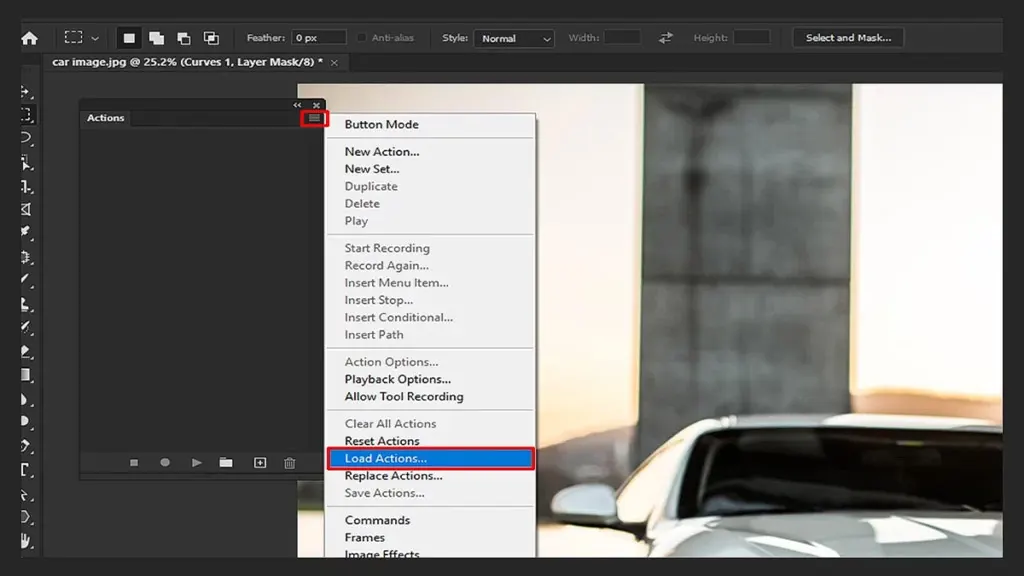
Step 5: Share to export
Now, it’s time to share with another computer or editor! Drag and drop it into the place where you’ll use it next time. Locate the file in the action folder for further use. You can import the action in Photoshop by loading it, then selecting the Save option.
How to Export Actions from One Computer to Another
Are you having trouble exporting actions from one computer to another?! Then, follow these easy steps, including sharing and exporting, and do it in a few minutes.
Step 1: Open Photoshop
First, open Photoshop on the computer from which you want to export the action.

Step 2: Select the action
Now, select the action folder that you want to export.
Step 3: Save the action
After that, choose the “Save Action” option from the panel. You’ll see the box on the screen where the filename is required. Choose a suitable file name that will obviously save as a “.atn” file.
Step 4: Send the action through email
After saving the action, choose a proper email that is open on your other computer. Now, send the action to this email account.
Step 5: Open Photoshop on the destination computer
After sending, you need to check whether the destination computer received it. Open the Photoshop app on the destination computer.

Step 6: Load the action
Finally, find the Action Panel and click on “Load action.” And, with this step, you’ll successfully export an action to another computer.
How to Export Actions from One Mac to Another Mac
Follow these easy steps to export action from one Mac to another—
Step 1: Open Photoshop
First, open Photoshop on your Mac and open the Actions panel.
Step 2: Select the default action
Here, each custom action will appear in a set. So, scroll down until you find a set. Remember, the set will have a folder icon and an arrow pointing down. That means it is open. Now, you can see the folder labelled “Default Action.” Click on the folder.
Step 3: Save the action
Moving to the top of the action palette, you’ll see an arrow option. It’ll show you the menu. Just click on it and choose to save the action.
The main thing you need to do is save the action again on your desktop. Remember, the file will save in the “.atn” file. It’ll be straightforward to find on the desktop when exporting an action.
Step 4: Copy the action
Now, copy the action on your other Mac. Locate the action in a suitable folder. Go to the preset and save it in the “Photoshop Actions Folder.” [Preset>Photoshop Action Folder”]
Step 5: Load the action
The final step is to load the action onto another Mac. Go to the action palette by clicking on an arrow. Now, you’ll see an option called “Load Action.” Just select the file you’ve saved above.
Pro tip: If you just want the custom action but have already selected another action with a set, don’t worry. After loading the action on your other Mac, delete these from the set.
Here, you can see that each custom action will be newly added to the action panel. You don’t have to search for it in the other file or on the desktop. When you open Photoshop, the action will be visible here! Read more: How to Transform a Body Shape in Photoshop: Fat to Skinny.
Conclusion
Photoshop has updated the action for designers and photographers to make it more user-friendly. Though you may face some problems when exporting actions from one device to another!
But this guideline can give you some relaxation! I tried to give you an A-to-Z guide to solving common mistakes. This guideline will help you out. Don’t forget to share whether this article is helpful or not. Will we see you in the next article?