How to Create See-Through Clothes in Photoshop: Easy 7-Step Guide
Photoshop offers many features that enable designers and photographers to transform and enhance their images. But see-through cloth in Photoshop is something else!
You can add special effects, improve color, make 3D effects, and even see-through clothes with the help of these features. Now, you must be wondering how someone can see through cloth in Photoshop, right? Well, you can; you just need to have a little bit of editing skill. Check this guide out, and you’ll know how it’s done in 7 steps.
Step-By-Step Guide to Creating See-Through Clothes in Photoshop?
As mentioned before, you need at least a little editing skill. But don’t be disheartened if you don’t have it because this see-through clothes Photoshop tutorial is going to give you that. So, without any further ado, let’s dive right in!

Step 1 – Select the Right Image
If you’re a first-timer, it’s best to choose an image where the model is wearing slightly transparent clothing. When you see the patterns in the cloth, it’ll be easy for you to edit with accuracy. The model wearing light-colored clothing will be a plus. Moreover, if the cloth in the image has complex edges, it’d be tough for a beginner to select them properly. Therefore, make sure to pick clothes that have straight edges, such as a T-shirt.
However, you can still edit the image if the model isn’t wearing transparent, straight-edged, and light-colored cloth. You just need to have good editing skills.
Step 2 – Load the Image in Photoshop
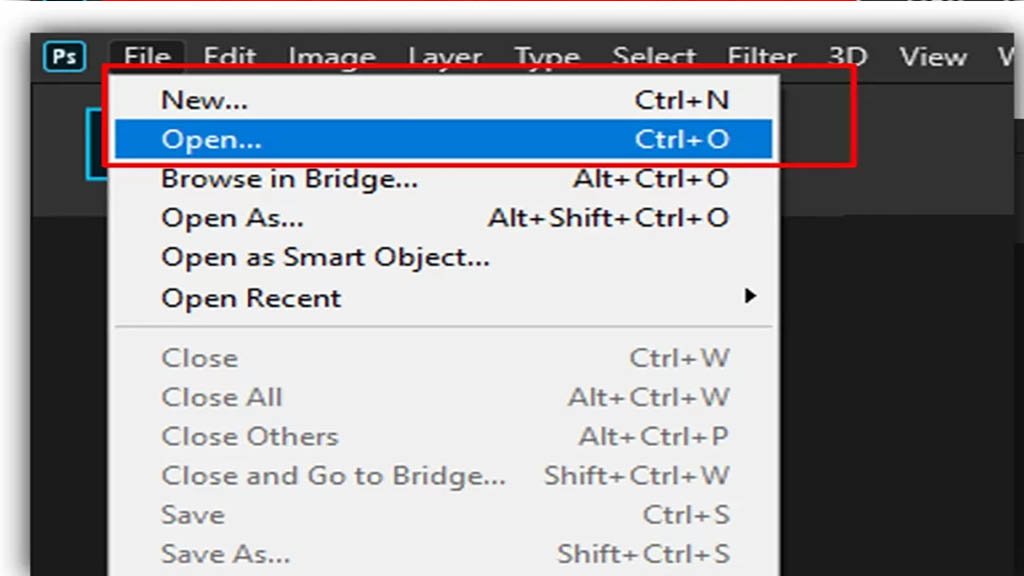
Once you’ve selected an image, it’s time to insert the image into Photoshop. There are several ways to open an image in Photoshop. The simplest way is to open Photoshop, drag the image directly from the folder, and drop it onto the Photoshop canvas. Or, you can go to the “File” option, located in the top-left corner. From there, click on “New.” A new window will pop up; type the file name, select it, and click “Open.” Your chosen image will open in Adobe Photoshop.
Step 3 – Choosing the Right Tool
To see through images, you need to draw a path around the cloth. And this edge selection can be made using different tools. You can use the lasso tool, pen tool, magic wand tool, etc. But the reason we’re choosing the pen tool is that it delivers high-quality pixel separation, which makes the image look pretty good.
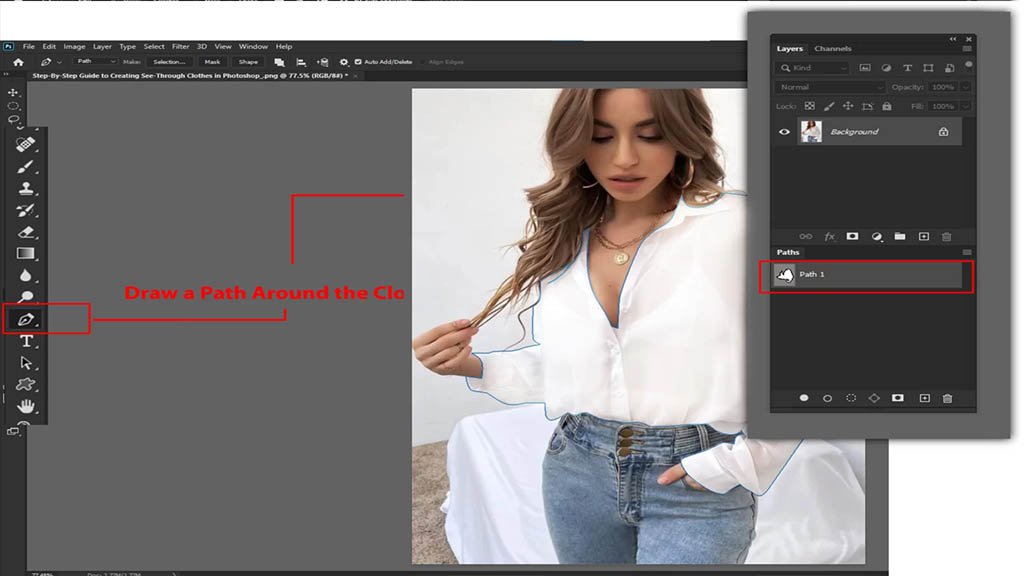
Step 4 – Draw a Path Around the Cloth
Select the Pen Tool, which should be located on the left bar. Pressing “P” on the keyboard should also activate the pen tool. Now, zoom the image so that you can properly select the edges. However, don’t zoom too much, as that can make selection hard. 200% should be good to go with. Now, slowly start drawing a path around the cloth. If you don’t know how to use the pen tool, let us give you a brief. Keep the pen on the edge of the cloth, right-click the mouse, keep it pressed, and draw small paths along the edge. You might not be able to do it properly at the first couple of tries, but with practice, you’ll get a better grip. If you want, you can use the Lasso Tool to select the edge as well. Press “L” on the keyboard to activate the tool.
Step 5 – Refining the Edges
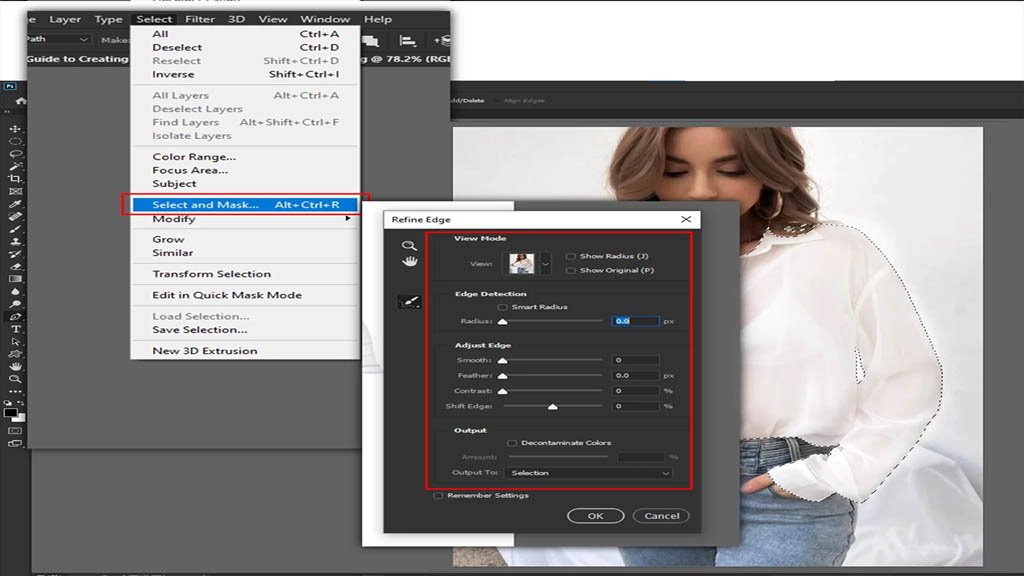
When you’re done drawing a path around the cloth, it’s time to refine the edges. Doing so will yield a better result. To do that, click on the “Select and Mask” option on the top bar, and you’ll see a white transparent layer on the image. On the properties tab, there is an option named “View Mode.” Select that, and you’ll see the path you drew in different layers. In the properties bar, there are many adjustment options. You can adjust the opacity, radius, contrast, feather, etc. Check the left bar: there are three brush icons. These are the refined edge brush tools. Select a brush, and then brush over the edges that you want to refine. You can change the size and type of brush to suit your needs. Once you start brushing and see the output, you’ll know what type or size of brush you need.

Step 6 – Create a New layer
After refining the edges when you’re satisfied with the adjustment, create a new layer and then copy the selected area. So that you can only work on what you’ve selected, the shortcut to copy the selected area on a new layer is pressing “Ctrl + J.” A new layer will be created automatically.
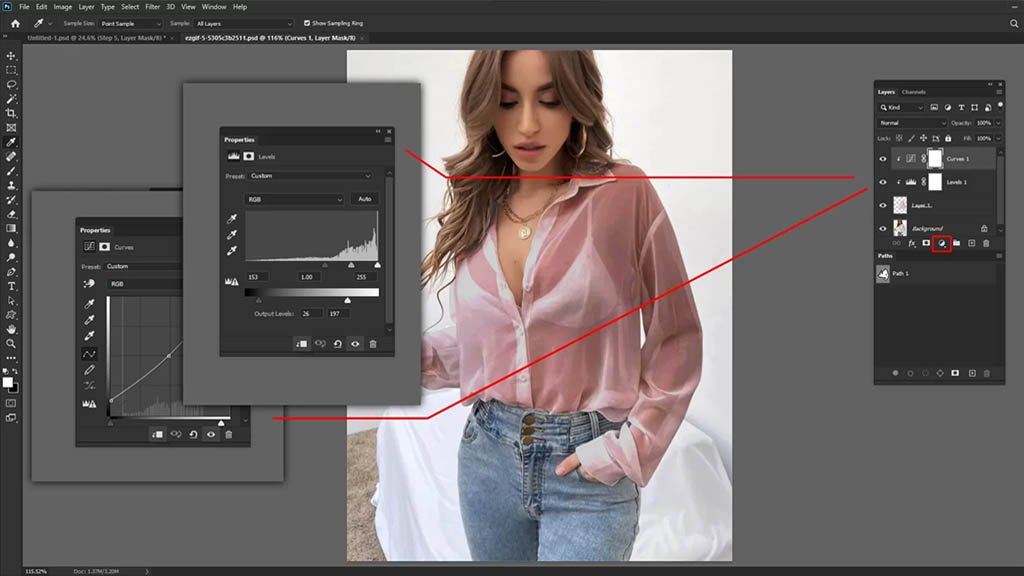
Step 7 – Add Transparent Effect
Select the portion around which you’ve drawn the path, and then click on the icon looking a little bit like the moon. It’s located in the middle of the right tab. Check the image below. Click on the moon-like icon and then select levels. And then, keep adjusting the RGB high and low to get the see-through cloth effect.
Conclusion
Well, that’s how you can get see-through cloth in Photoshop. You might not achieve the desired effect on your first couple of goes. And that’s totally fine. Editing needs time and patience. Stick to it and keep practicing, and you’ll get the desired result over time.
FAQ's
You can make clothing transparent in Photoshop using the X-ray image editing method so that you can see the background or the human body behind it. Depending on what you choose to show underneath the clothing, the X-ray technique can be used for both artistic and humorous reasons!
You can use the free GIMP picture editor or Photoshop. To make certain portions of the picture transparent, go to the picture toolbar and select a transparency color. The element you want to make invisible can be selected after the transparency hue has been decided.
The new X-T1 IR. It has a novel feature that allows it to “see” infrared light, which our eyes cannot. However, one particular side effect of infrared imaging is the ability to occasionally see through clothing. Not always, and the clothing has to be relatively lightweight to begin with.