Professional Car Photo Editing Tutorials in Photoshop: Tips for Stunning Images
- March 16, 2023
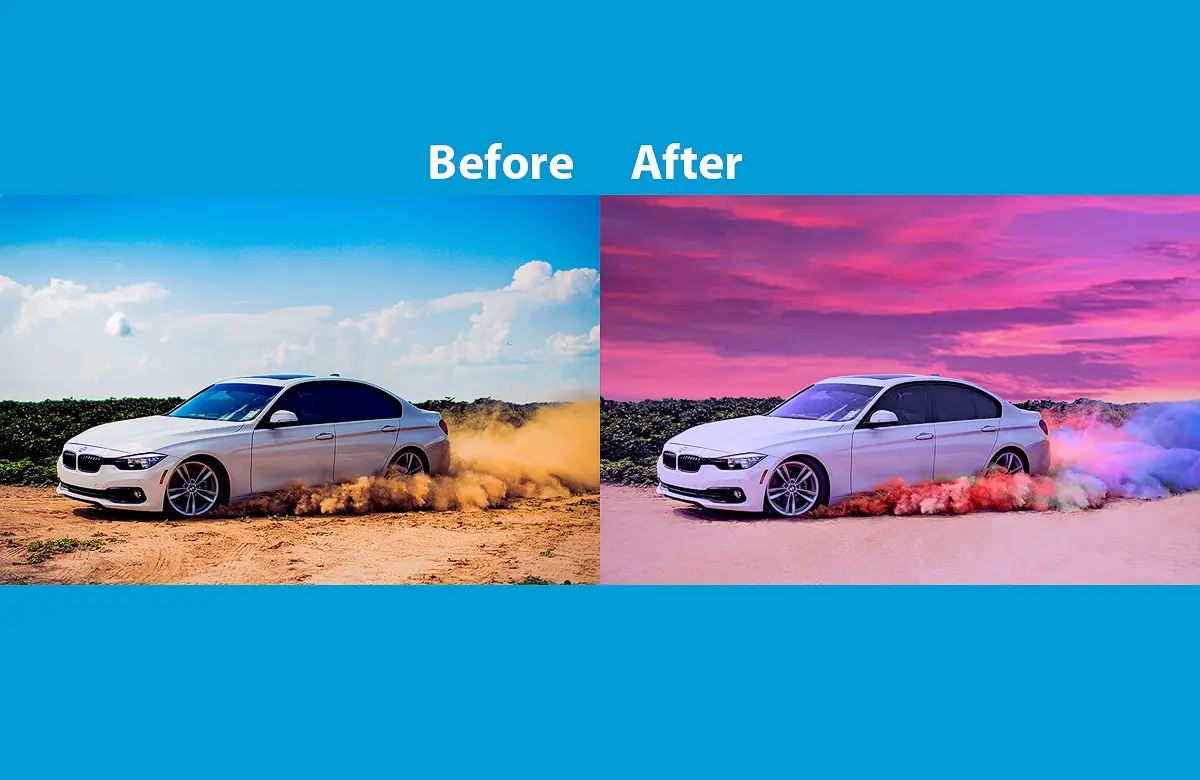
An enhanced car photo is necessary to increase automobile sales. In this article, we will go through car photo editing tutorials in Photoshop.
The automotive industry is growing, and professional car photography and editing have been integral to its growth. An excellent car photo can significantly facilitate any brand’s image and attract potential customers.
However, taking a good car photo is never enough. You need to enhance it using your professional car photo editing techniques. So, continue reading to learn about those techniques and how-tos of editing a car photo in Photoshop.
How to Edit a Professional Car Photo in Photoshop? − Step-By-Step Guidelines
You can give any primary car photo a professional look using Photoshop. Below are the steps for editing a professional car photo in Photoshop.
Step 1: Import the Car Image
Go to your desktop’s Start menu and open Photoshop. Now navigate to the File menu in the top left corner and click Open. A new window will appear. Go to the image’s location, select it, and click Open.

Alternatively, press Ctrl+O (windows) or Command+O (mac) and navigate to the location on the new window prompt. Or, you can just drag and drop the image in Photoshop.
Step 2: Crop and Straighten the Image
After importing the image, the first step is to crop and straighten the photo. This step is essential to remove unwanted distractions from the image and improve its composition.

Use the Crop tool to eliminate distracting elements and ensure the car is the main point of focus in the image. And use the Straighten tool to level the picture horizontally and vertically and make the car look more symmetrical.
Step 3: Adjust the Exposure and Contrast
The next step is to adjust the exposure and contrast of the image. We make this adjustment to bring out the details in the image and give it a vivid and lively makeover.
Use the Levels or Curves tool to adjust the brightness and contrast of the image. Increase the contrast to make the colors vibrant and the shadows defined.

You can also play with the Exposure tool based on the picture. If the image is too bright or overexposed−tone the exposure down. Similarly, if it’s too dark or underexposed−tone up the exposure until the image has detailed highlight and shadow areas.
Step 4: Remove Any Blemishes
Car photos often have blemishes, such as scratches, dust, or reflections. These blemishes can distract the customers from properly viewing the main attraction of the image−the car.

Use the Clone Stamp tool to remove unnecessary objects. You can also use the Healing Brush tool to remove blemishes and give the picture a complete retouch.
Be careful not to overdo it, as removing too much detail can make the image look artificial.
Step 5: Enhance the Colors
The next step is to enhance the colors of the image. This helps to create a more vibrant and striking image that stands out from the competition.
Use the Saturation/Hue or Vibrance tool to increase the color intensity and create a more vivid look. You can access these tools by going to Image, then Adjustments. Never go overboard with these tools.

Moreover, you can use the Color Balance tool. Play with the slider to fine-tune the balance of the picture’s colors.
Step 6: Sharpen the Image
The final step in car photo editing is to sharpen the image. Sharpening can bring out the details of the image by making the picture crisper and more defined.

Use the Sharpen tool to edge the image. And remember not to overdo it, as the picture might look unnatural.
A 360-Degree Image of the Car is the Future
With the right equipment and software, you can create stunning 360-degree images allowing viewers to see every angle of the car. 360-degree car photography is an effective way to showcase a vehicle’s features and attract potential customers.
You can take the picture using a specialized 360-degree camera, such as a Ricoh Theta or Insta360. However, if these cameras are not an option, you can use a DSLR camera and take pictures of the car from every angle.
But this would require consistency of the angle and your photography skill.
You can then use software to stitch the images together to create a 360-degree view. Software like Pano2VR, 3DVista Virtual Tour Suite, or Kolor Autopano Giga can make the stitching process easier.
You can also create a 360-degree image in good old Photoshop. But that takes moderate to advanced skill. Worry not if you don’t know how to make a 360-degree image in Photoshop.
Here’s a step-by-step guide tailored by the experts for you.
Step 1: Capture Multiple Images
First, you need to capture multiple images of the car from different angles. The more photos you capture, the smoother the final result will be. Use a tripod to keep the camera steady and mark the position to be consistent between shots.
Step 2: Import Images to Photoshop
Open Photoshop and import all the images you want to use for the 360-degree image. You can do this by going to File, followed by Scripts, and finally, Load Files into Stack. Select all the photos needed and click Open.
Step 3: Align Images
After importing the images, select all layers in the Layers panel and go to Edit, then Auto-Align Layers. Choose Auto for the alignment option and click OK. This will automatically align the images based on their content.
Step 4: Merge Layers
With all layers still selected, go to Layer, then click on Merge Layers. This tool will merge all the layers into a single layer.
Step 5: Convert to a 360-Degree Image
Select the merged layer and go to Selected Layers. Then go to 3D > Spherical Panorama, and select New Panorama Layer. This will convert the layer into a 360-degree image.
Step 6: Edit and Export
You can now edit the 360-degree image if you want, and once done, save it. Go to File, then Export, and click Export As to export the image.
Read more: How to Photoshop a Car Into a Picture in 8 Easy Steps.
Frequently Asked Questions about Car Photo Editing Tutorials in Photoshop
We will answer some of the commonly asked questions regarding car photo editing in photoshop.
What is the best lighting setup for taking car photos?
Shoot during the “Golden Hour” of sunrise or sunset to get the perfect light. Use a tripod and long exposure to capture the details and reflections of the car. And use professional photography equipment such as softboxes, umbrellas, or diffused light for artificial lighting to avoid harsh shadows and highlights.
Can you fix a blurry car photo in Photoshop?
Yes, you certainly can with Photoshop. However, you can only partially fix a blurry image. So, starting with a sharp and well-focused photo is best rather than relying on post-processing to fix it. That said, use the Sharpen tool, Unsharp Mask tool, or the Shake Reduction filter to improve the picture.
What are the best camera settings for taking car photos?
The best camera settings for taking car photos depend on the lighting conditions, the background, and desired effect of the image. Generally, use a low ISO to reduce noise and a narrow aperture to increase the depth of field and keep the car in focus. Moreover, photographers usually apply a slow shutter speed to capture more details of the vehicle. Shoot in RAW format to have more flexibility in post-processing.
Conclusion
We are at the end of our car photo editing tutorial. Hopefully, you can now edit a professional car photo using Photoshop.
It’s a rule of thumb to start with a great photo whenever you’re editing something. So, always choose the best picture with the perfect color, lighting, and car angle. You can then later give the image your desired look.
And finally, Photoshop offers some powerful tools that can alter the looks of an image. So, use them with discretion.