How to Create an Alpha Channel in Photoshop?
- January 2, 2026

Every print editor needs to have a piece of good knowledge of how to produce a nascent channel in Photoshop. There are several ways to create a nascence channel in Photoshop. All you have to do is learn about the tools and pollutants used to produce the special goods of Photoshop. First, select the textbook position and magnify the named option. At this point, you can extend and change the choices made to open the channels. In this way, you can elect the channel you want, ultimately saving. However, this nascence channel companion takes you through the way to produce an nascence channel blur and produce it fluently, if you need a commodity to blur. Check the top-quality image masking service, then. You need to go to the channel, click channel settings, select it, and click Save. Pull it gently down to the asked position. You can destroy it by filtering or darkening it. Also, add about nine pixels. However, you have to go to the unclear sludge and get it changed if you want to make further changes. You can also try other pixels from an idol to six.
Create an alpha channel in Adobe Photoshop
Let’s learn how to create an alpha channel in Photoshop in an effective way. The alpha channel isolates objects from an image and allows you to use them in other programs. In image processing, its significance is huge.
Follow this step-by-step guide on how to create an alpha channel in Adobe Photoshop:
Step 1: Open Adobe Photoshop
Open Adobe Photoshop and load the image you want to create an alpha channel for. Select the image wisely.
Step 2: Select Layer
Select the layer in which you want to create an alpha channel. If the layer is locked, double-click on it to unlock it.
Step 3: Create New Channel
Click on the “Channels” tab in the Layers panel to view the channels.
From there, click on the “Create New Channel” button at the bottom of the Channels panel. This will create a new channel called “Alpha 1”.
Step 4: Select the Brush Tool
Select the “Brush” tool from the toolbar and choose a soft-edged brush with a low opacity.
Paint the areas that you want to be transparent in the “Alpha 1” channel using the brush tool. The painted areas will appear black in the channel.
Also, don’t leave out the areas that you want to be opaque in the “Alpha 1” channel. Paint the area also using the brush tool. The painted areas will appear white in the channel.
You can also use different shades of grey to create semi-transparent areas in the “Alpha 1” channel. The darker the grey, the more transparent the area will be.
Step 5: Save File
Save the alpha channel by going to “File” > “Save As”. In the “Save As” dialogue box, select “Photoshop” as the format and check the “Alpha Channels” box.
Name the file and click “Save” to save the image with the alpha channel.
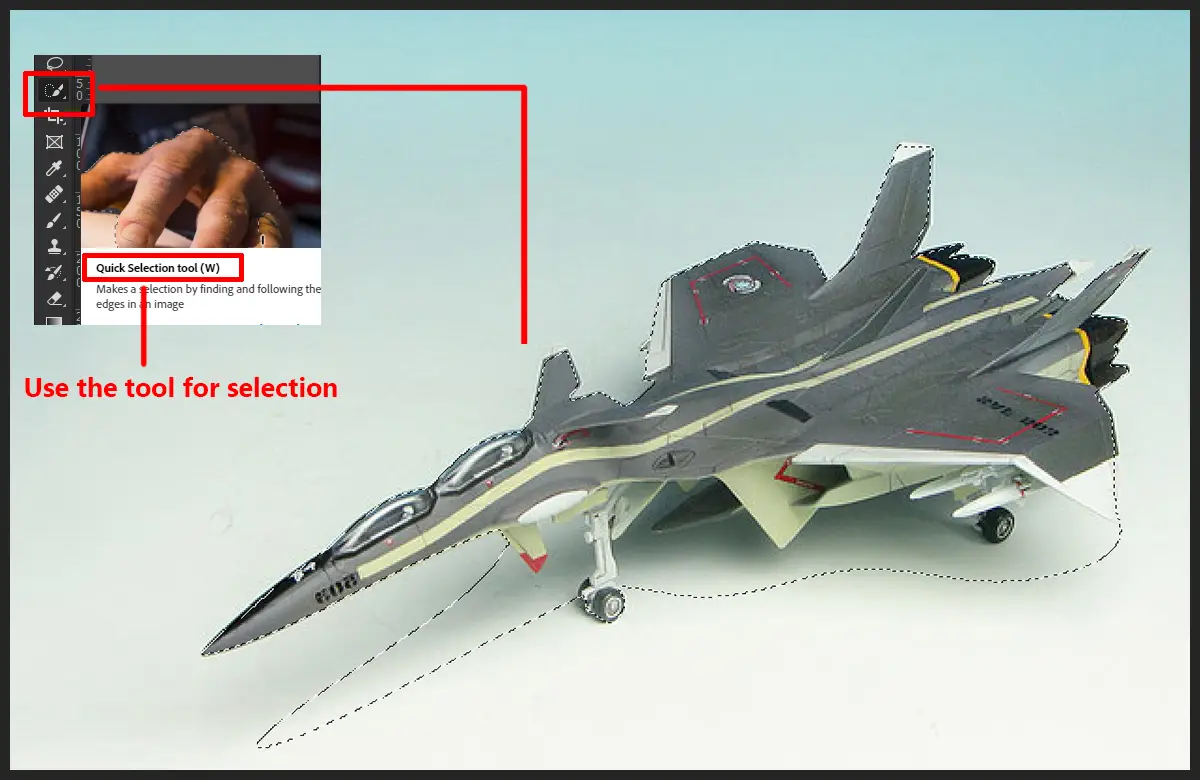
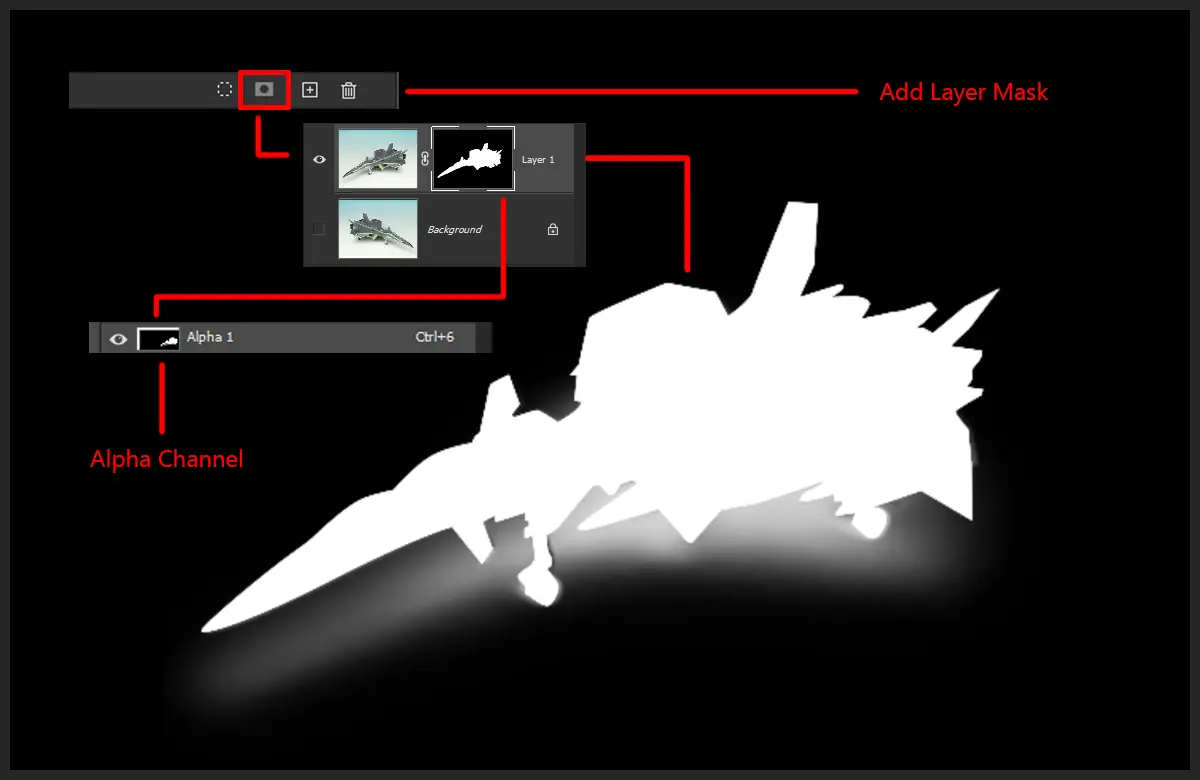
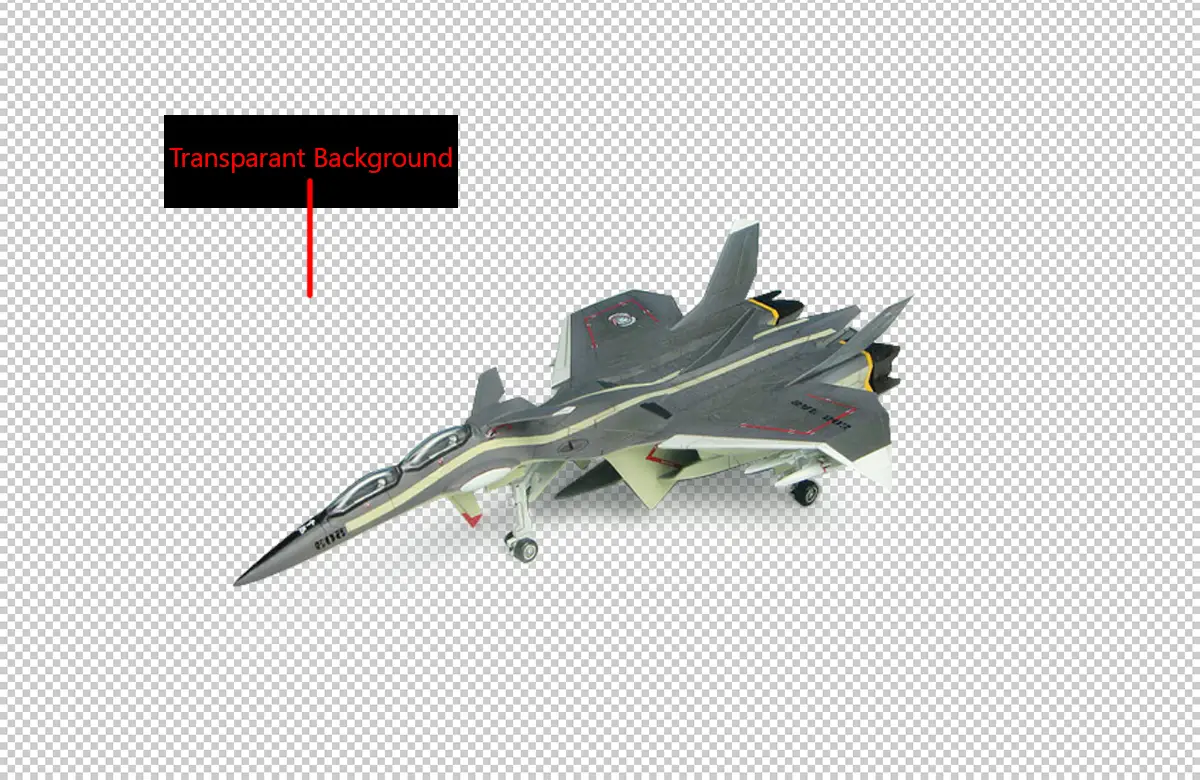
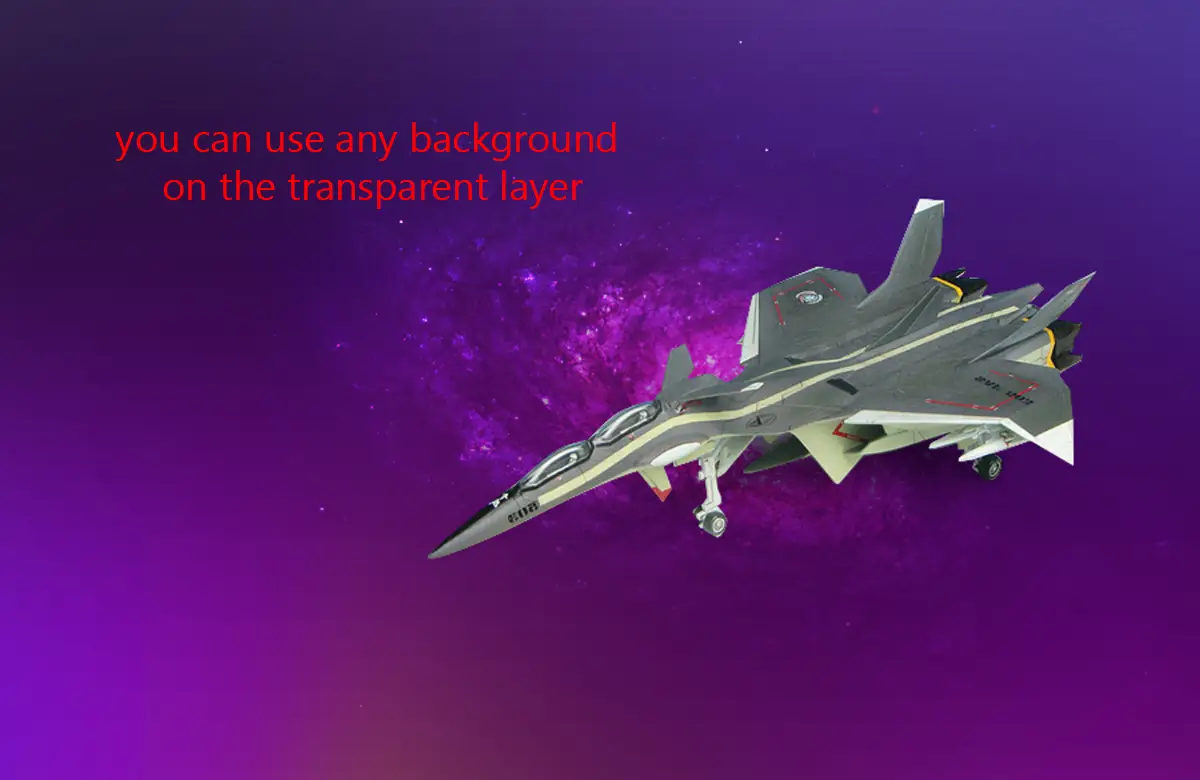
Another advance way of Alpha Channel
Step 1: Select the object using the quick selection tool.
Step 2: Add layer mask.
Step 3: Then you’ll have a Transparent background.
Final Step: Select any image to change the transparent layer.
That’s it! You now have an image with an alpha channel that can be used for various purposes such as compositing and masking.
The alpha channel or grayscale mask is accessible. All you have to do is create a black and white tone that describes colour printing. They begin to create mask selections that allow you to keep the image separate and have smooth colours. It may be necessary to isolate the colour or background. You must cut and paste the grayscale images into the layer mask and download the mask to save as an Alpha channel.
In essence, images start with creating an alpha channel using layers and a duplicate. Before copying, turn the eye icon on the double layer. Then, you open the primary and then copy the layers to the screen. You have to disconnect the layer to be copied and the channel you want to record. When you are done, you will notice that a grayscale image replaces the screen. You can then download the grayscale image as a mask. Loading a grayscale is easy. Copy grey, select all grey shades, copy it, and use it as it is. Finally, you can add layer palettes and add a layer on the mask. Hope you enjoy it and can now create an alpha channel in Photoshop.
Conclusion
Mastering alpha channel creation in Photoshop is a fundamental ability for professionals in image editing, graphic design, and digital compositing. Proficiency in channels, layer masks, and grayscale selections enables precise object isolation, transparency control, and professional-grade outcomes. Whether you use the fundamental approach via the Channels panel or the sophisticated method with selection tools and layer masks, alpha channels offer unparalleled flexibility for editing. Regular practice helps you optimize your workflow and improve your ability to produce crisp, high-caliber visuals for print and digital media. Mastering alpha channels enhances image editing capabilities and unlocks more sophisticated Photoshop methods.
