How to Photoshop a Car Into a Picture in 8 Easy Steps
- March 3, 2025
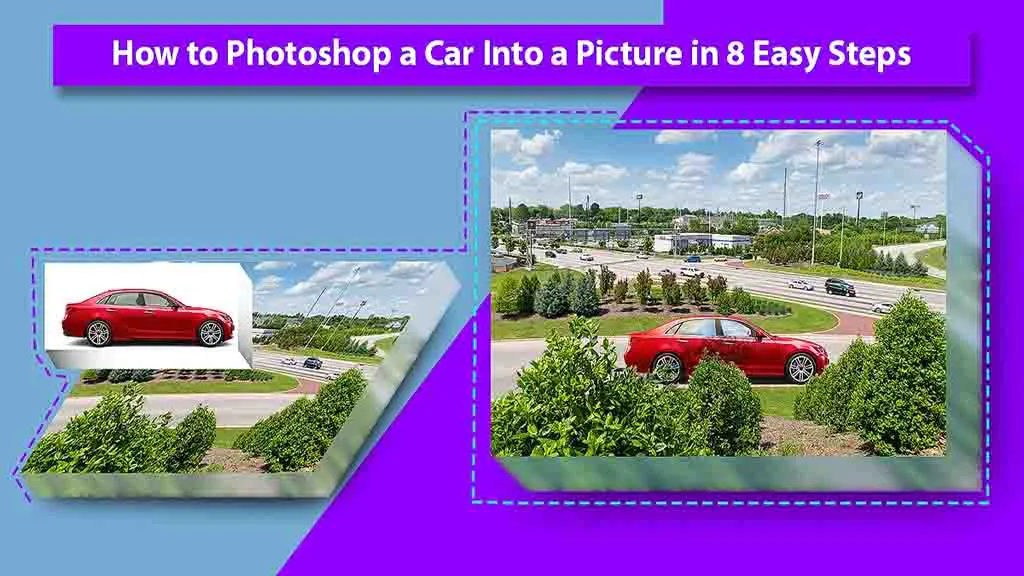
Complex images are always the hardest to crop, especially when they are cars. Advertisements, promotions, contests, etc., all have used pictures of cars that are poorly edited. Is there actually a way to know how to Photoshop a car into a picture without making it look like a sticker?
It’s simple. All you have to do is make a car cutout and place it on a plain background. Then edit the shadows and reflections. You will need to adjust the hues and tones frequently. And finally, you need to blend to bring everything together. In the following, we’ll take you through an 8-step guide to make edited car pictures look as realistic as possible.
How to Cut Out a Car in Photoshop? − Easiest Process Anyone Can Follow
Before you add a car picture onto an empty background, you need to know how to carefully cut out a car in Photoshop without leaving any excess.
Here’s the list of things you need to do —
- Select the pen tool and then press the Caps Lock
- Create straight-line paths for flat edges.
- Create curved line paths for curved edges.
- Make a clipping path around the entire car and close it.
- Click and drag on the final anchor point to complete the cut-out.
How to Photoshop a Car Into a Picture? – Step By Step
Now that you know the basics of working with car photos in Photoshop, let’s get into how to add a car to a plain background. Follow these steps carefully —
Step 1: Select Your Images
Before you fire up Adobe Photoshop, you need to carefully select the images you’re working with. You will need one clear and adequately sized picture of a car and another picture of the background you want to paste the car onto. When browsing through photos, it’s important to look for images that are high resolution, don’t have cropped-out parts, and have good lighting.
If you’re a beginner at editing photos, try to look for photos that you know are easy to work with. This means avoiding photos that have a lot of shadows, mismatched patterns, and a crowded background. We recommend browsing morgueFile, Flickr, Unsplash, and stock.xchng for free stock photos.
Step 2 – Load the Images into Photoshop
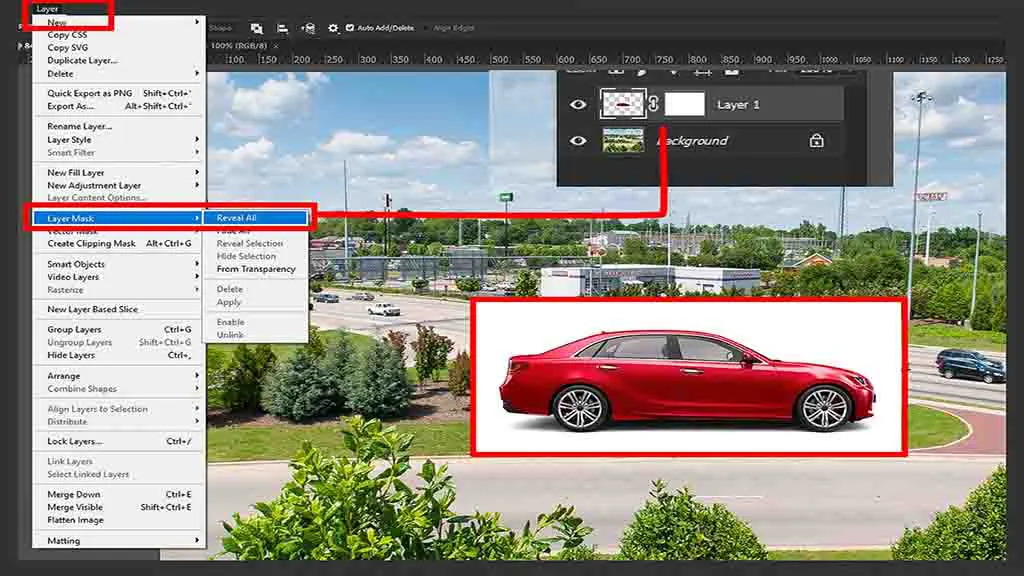
After you’ve chosen your images, load the background picture into Photoshop and then load the car image on top of it. To do this, you have to select the new document option and bring the background picture. Then, select the car image and add it to the background. While the car image is still selected, go to Layer > Layer Mask > Reveal All.
A layer mask will appear, and now you have to erase the excess background of the car image with the brush tool. Make sure you only have a rough cut out of the car image left on top of your background image. The cut-out does not have to be clean, as it needs to be cropped further using another tool.
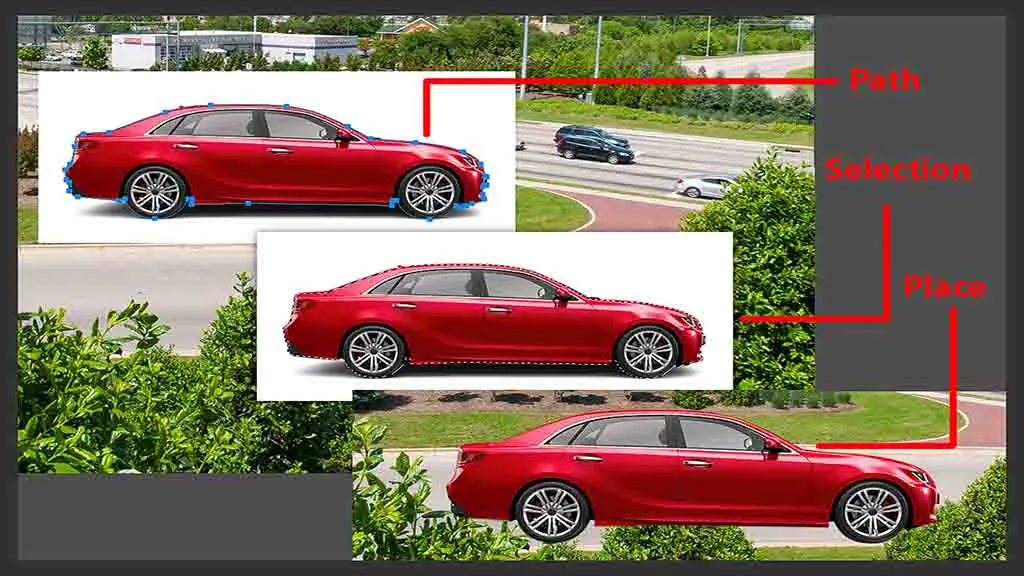
Step 3 – Make a cutout of the Car
Click on the Paths option and then click on the pen tool. Using this tool, carefully trace around the car, making sure to pay attention to the curves.
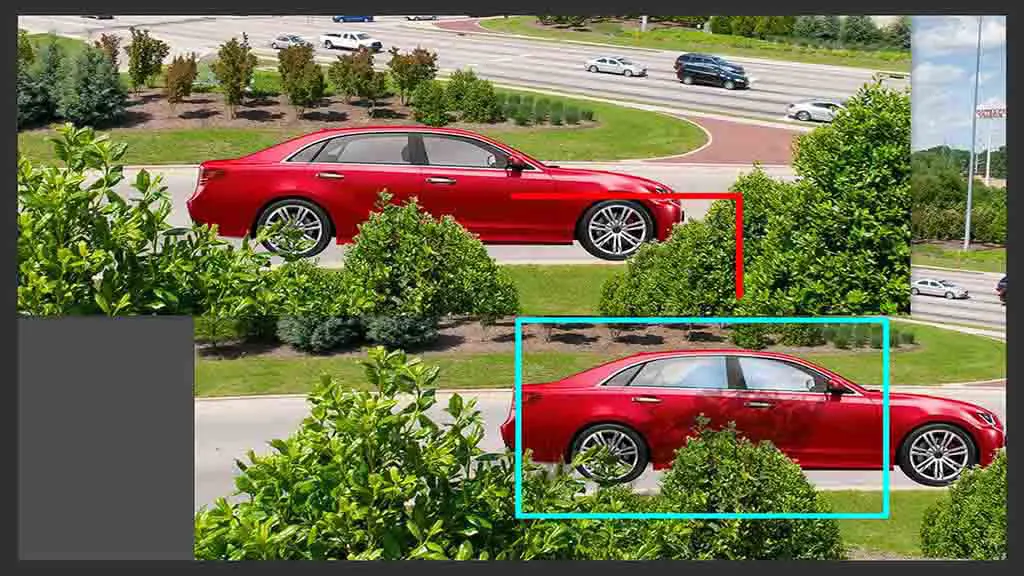
Now right-click on the path and select ‘Make Selection.‘ You should now see a clean cut-out of your car image. Resize the car cutout 000 to your preference and drag it to your desired place in the background image.
Step 4 – Make Reflections of Objects on the Car
Since almost all cars have a glossy exterior, you will need to adjust some surface reflections to make the overall edit look more realistic. Observe the background image. If it’s a daytime setting, you will need to brighten the shadows in the car image and make the reflections whiter. And if there are objects (e.g., trees, birds, or clouds), you will also have to make similar shadows of them on the surface of the car.
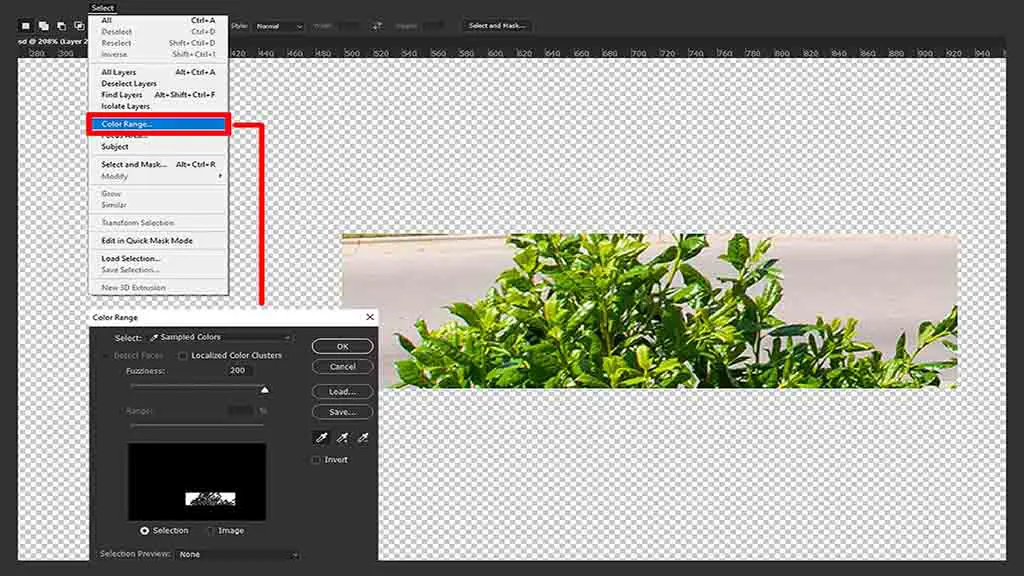
For example, there is a tree in the background image. You first have to make a copy of this tree using the clone tool. Or, you can find a PNG of a similar tree on Google. Then, go to Image > Adjustment > Curves to darken the shadows. Now, click on Select > Color range to increase the fuzziness of the image to 200.
Create a layer of this image and click Layer > Matting > Remove White Matte to make the branches thinner. Decrease the opacity of the layer and resize it to fit the surface of the car.
To retouch the tree layer, add a mask to it and then use the brush tool to erase unwanted parts of the layer. Now, the shadows of the tree should look like a reflection on the car’s surface.
Step 5 – Readjust Black Point (Optional)
If your background does not seem to blend in with the car image, one adjustment you can make is to increase the black point. Select the background layer, go to Image > Adjustment, and move the left slider to increase the black point. You should also adjust the black point of the car image to make both photos look cohesive.
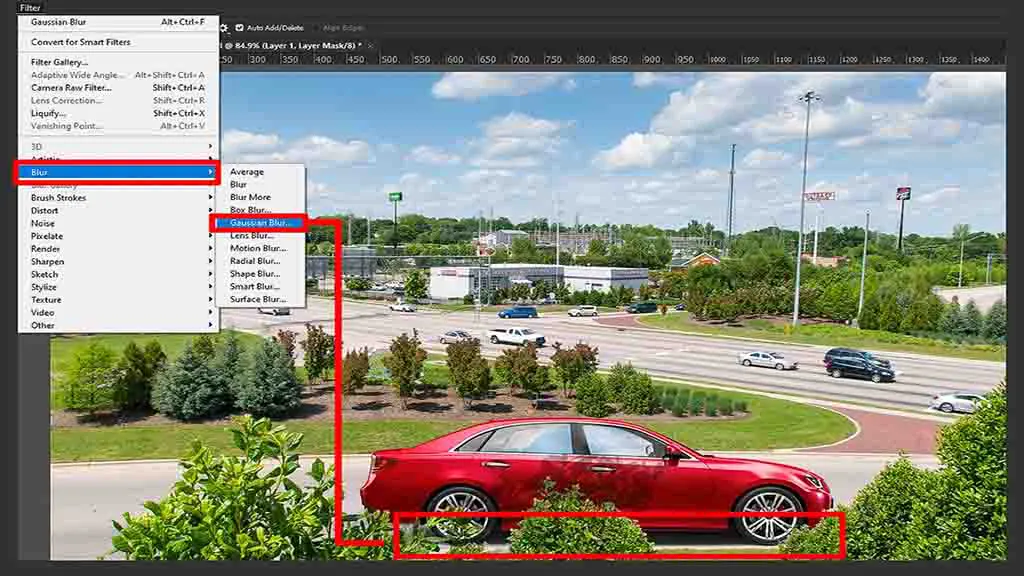
Step 6 – Make the Car’s Shadows
Select your car layer, then click Select > Load Selection to make a selection around it. Create a new layer, then fill the selected area with black. Click on the New Layer, select Filter > Blur > Gaussian Blur, and increase the radius to 12 pixels. If you’re using a picture of a moving car, choose motion blur instead. Now use the move tool to reposition the layer so it appears as a shadow behind the car, facing away from the light source.
Then add another layer on this blurred layer by selecting Layer > Add Layer Mask > Reveal All. Once the mask appears, take the brush tool and remove the excess black parts from the layer. You can repeat this step several times until you have made shadows along the underside of your car cutout.
Step 7 – Make the Tires Darker and Readjust the Windshield
Create a new layer on top of your car layer, then select the brush tool. Adjust the tool to 20 pixels master diameter, 20% opacity, and 0% hardness. Then, mask all the visible parts of the tires.
As for the windshield, use the eyedropper tool and select the color that is mainly part of the reflections of your car image. Then form a new layer on top of the car image and use a 0% hardness brush to mask only the windshield. Now, reduce the mask’s opacity to 80%. Your windshield should now look more cohesive with the background and the rest of the car.
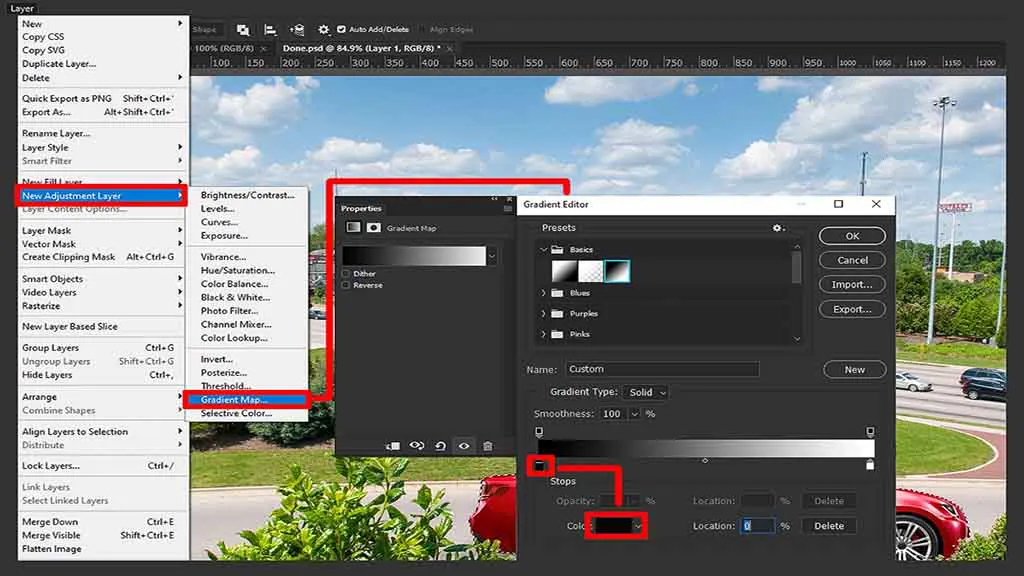
Step 8 – Blend in the Colors
To tie everything together, you need to blend the colors of both the car and background layers. So first, add a Gradient Map layer on the very top of all your previous layers. Go to the layers panel and make sure this new layer is at the top. Now select Layer > New Adjustment Layer > Gradient Map. If you have presets loaded, use the violet/orange one.
Finally, decrease the opacity to 15% and make a copy of the GM layer. Adjust the GM copy to the ‘Overlay‘ blend mode. Then go back to the layers panel and move the duplicate GM layer under the first GM layer. Your edit should now look cohesive, realistic, and visually thematic. Learn more: Create Stunning Car Photos Using PicsArt.
Conclusion
All in all, it’s pretty easy to know how to Photoshop a car into a picture if you already know how to make a clipping path and play around with filters. Don’t be let down if you don’t get your desired results immediately, and you’ll need to practice a few times before getting the hang of it.