
How to Edit Words Out of a Picture? − The Ultimate Guide!
- March 7, 2025
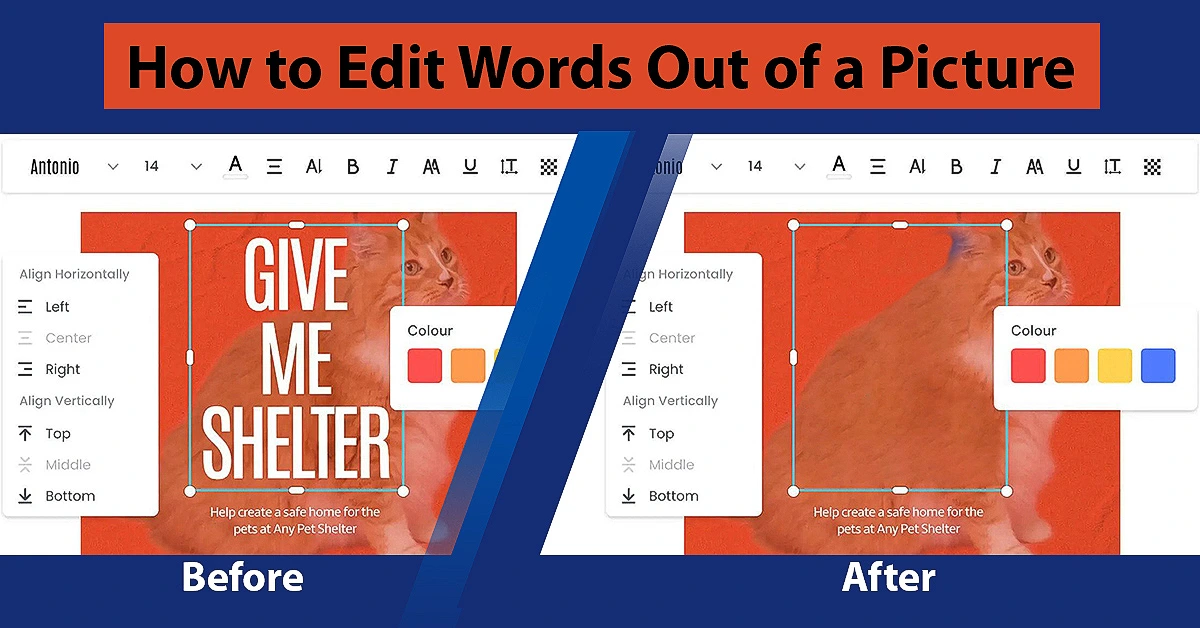
Have you captured a perfect picture only to find out later that there is some distracting text in the background? Well, fear not! We’ll discuss how to edit words out of a picture in this simple guide!
Whether it’s a watermark, some graffiti, or even a street sign, it is indeed frustrating to have an otherwise great picture ruined by unwanted text. You can remove text from an image easily with an online photo editor.
Or if you’re not worried about the technicalities, you can jump straight into an advanced photo editor like Adobe Photoshop. That being said, this article explains both ways to remove text from an image. Let’s get started!
How to Remove Text from an Image in Adobe Photoshop – Step-by-step Guide
Adobe Photoshop is a fully featured image-editing software that offers a wide range of tools and techniques. Although it has a steeper learning curve than online photo editors, the final results are definitely more fruitful with Photoshop! Follow these steps in Adobe Photoshop to remove text from a picture −
Load the Image in Adobe Photoshop
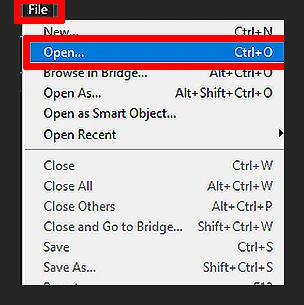
First, you’ll have to open the image in Photoshop. From the toolbar above, click on File>Open. A dialogue box will pop up, allowing you to browse and select the image you want to edit.
Use the Marquee Tool/Lasso Tool to Select the Unwanted Text
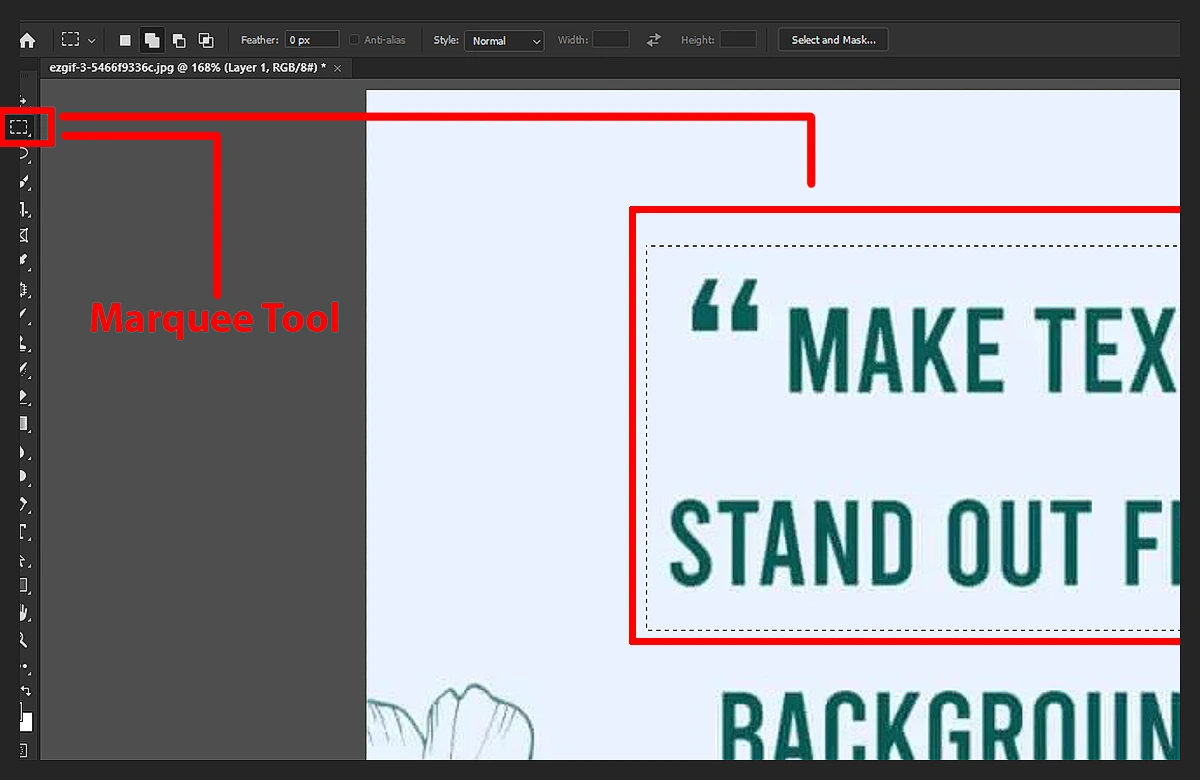
Once the image is loaded in Photoshop, select the Marquee Tool located in the toolbar on the left of your screen. With the Marquee Tool selected, drag a box around the unwanted text.
Or, you can use the Lasso Tool for more precise results. After selecting the Lasso Tool, you’ll have to draw a path intricately around the text that you want to remove.
Note that it is easier to make a selection with the Marquee Tool, but the Lasso Tool provides you with better control when selecting an area.
Apply the ‘Content-Aware Fill’ in the Selected Area
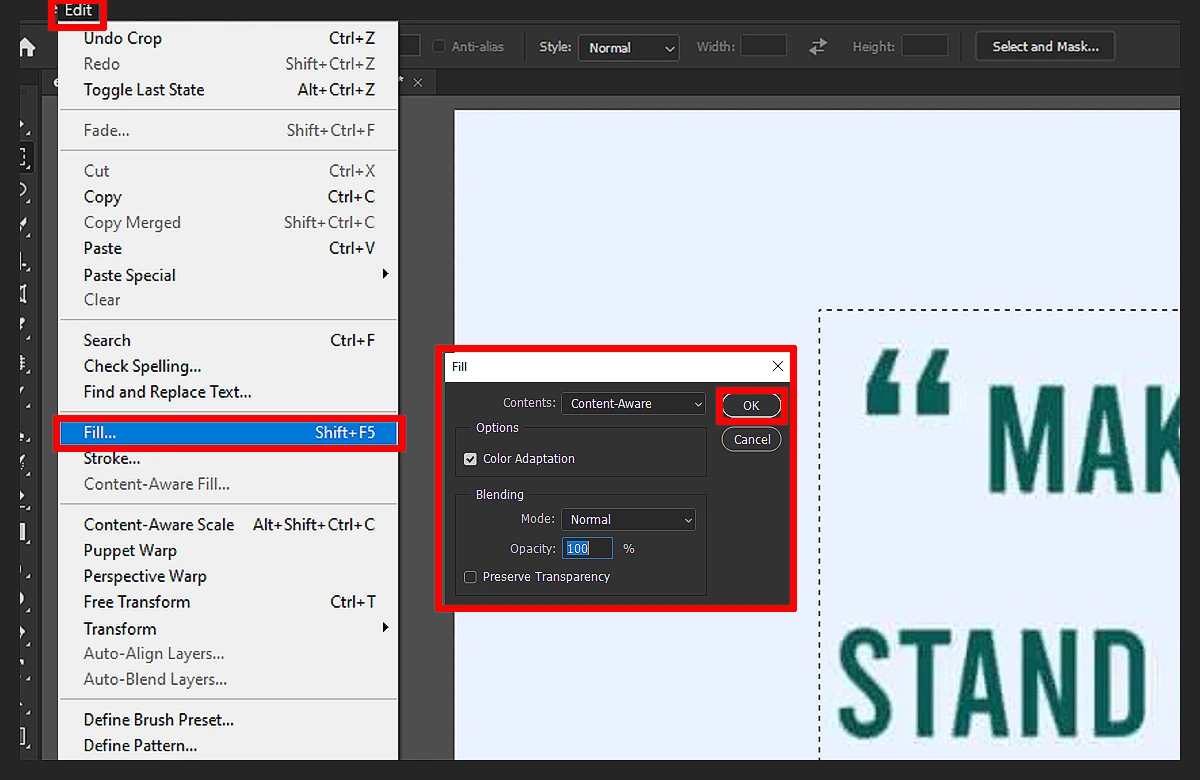
When you’re done selecting the unwanted text, click on Edit> Fill from the toolbar above. A dialogue box will show up, where you’ll have to click on Content-Aware under the ‘USE’ sub-menu. Next, click OK.
Now sit back and relax as Photoshop analyses the pixels surrounding the selected area and fills it with content that matches the background. Easy, isn’t it?
Refine the Image (Optional)
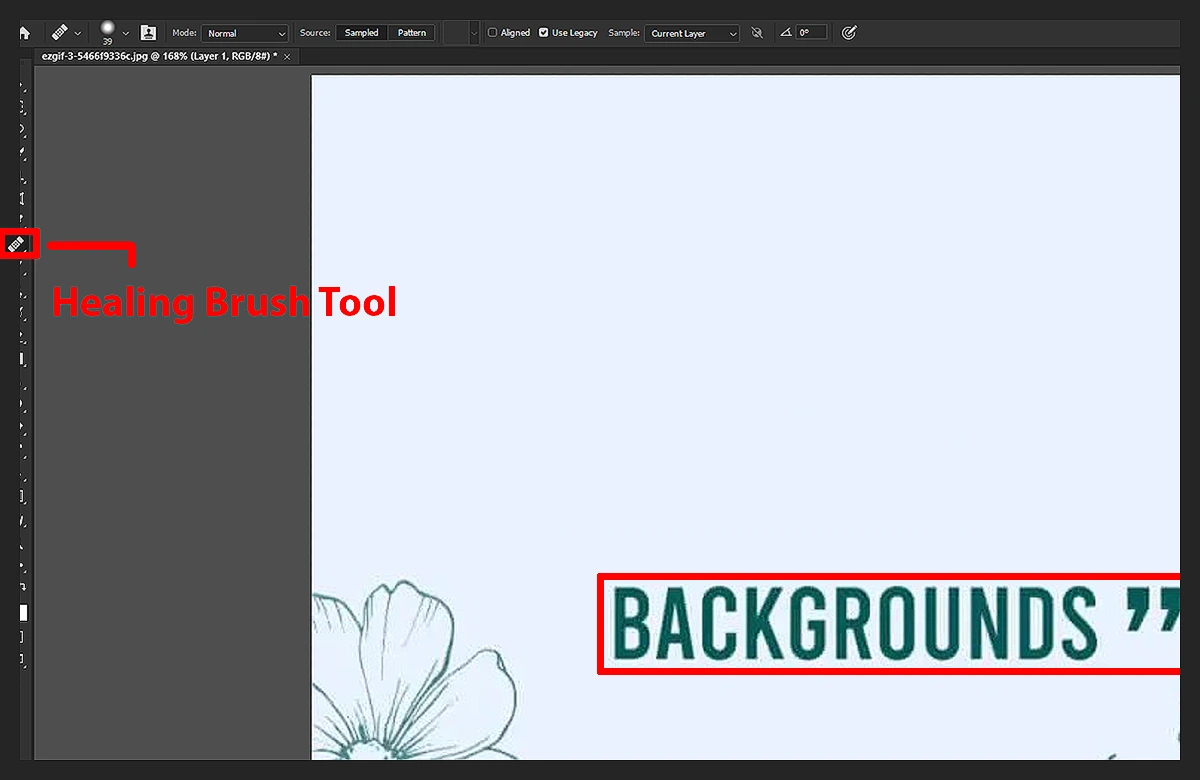
After the ‘Content-Aware Fill’ is completed, the image may require touch-ups in the area where the text was removed. Use the Clone Stamp Tool or Healing Brush Tool to work on areas that may distract consumers. As a rule of thumb, we want the image to appear as natural as possible.
Save the Photo
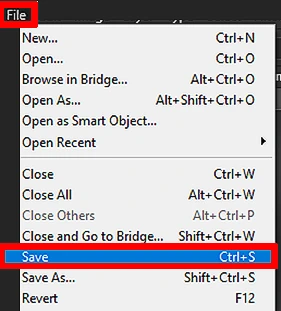
Once you’re done with removing the text and other edits, you can save the image. For this, click on File>Save As. In the dialogue box that appears, you can choose a storage location and a name for your image.
By following the steps above, you can remove text from pictures and make it appear as if it was never there! On the other hand, you can use the same steps to remove unwanted objects from an image.

How to Remove and Add Text in an Image Online?
Although removing or adding text may seem challenging, you can do it easily online. You can choose from plenty of online image editors, such as Pixlr, Fotor, Canva, and PicsArt. For this article, we’ll be working with PicsArt. Here’s how you can remove and add text from a picture using PicsArt online—
1. Upload the Image
First, go to the PicsArt website and click on ‘Get started for free.’ Next, you’ll have to upload the image you want to edit by using the ‘Upload Image’ option.
2. Use the Eraser Tool to Remove the Text
Click on the ‘Tools’ tab at the bottom of the screen. From there, select the ‘Eraser’ tool and adjust the brush size appropriately. With the Eraser tool selected, carefully remove the text. If you accidentally remove too much, you can use the ‘Undo’ option.
3. Add Text
To add text to your image, click on the ‘Text’ tab at the bottom of the screen. Next, select the type of text you want, e.g., header, sub-header, or body text.
Choose a suitable font, colour, and size for the text. Lastly, type in the text you want to include. Once the text is added, you can adjust the position and size of the text with the ‘Move’ and ‘Resize’ tools, respectively.
4. Save the Image
After you’re done working on the image, click on the ‘Save’ option at the top of the screen. You can save the image directly to your computer or share it straight to social media from PicsArt. Learn more: How to Photoshop a Car Into a Picture in 8 Easy Steps.
Final Verdict
When you learn how to edit words out of a picture, you’ll also learn how to use removal tools so you can remove other unwanted objects from an image.
Whether you choose to remove text from an image online or use Adobe Photoshop, try to make the removed area appear seamless with Healing/Cloning tools. Best of luck!