Merge Photos with Graphics
- February 11, 2026
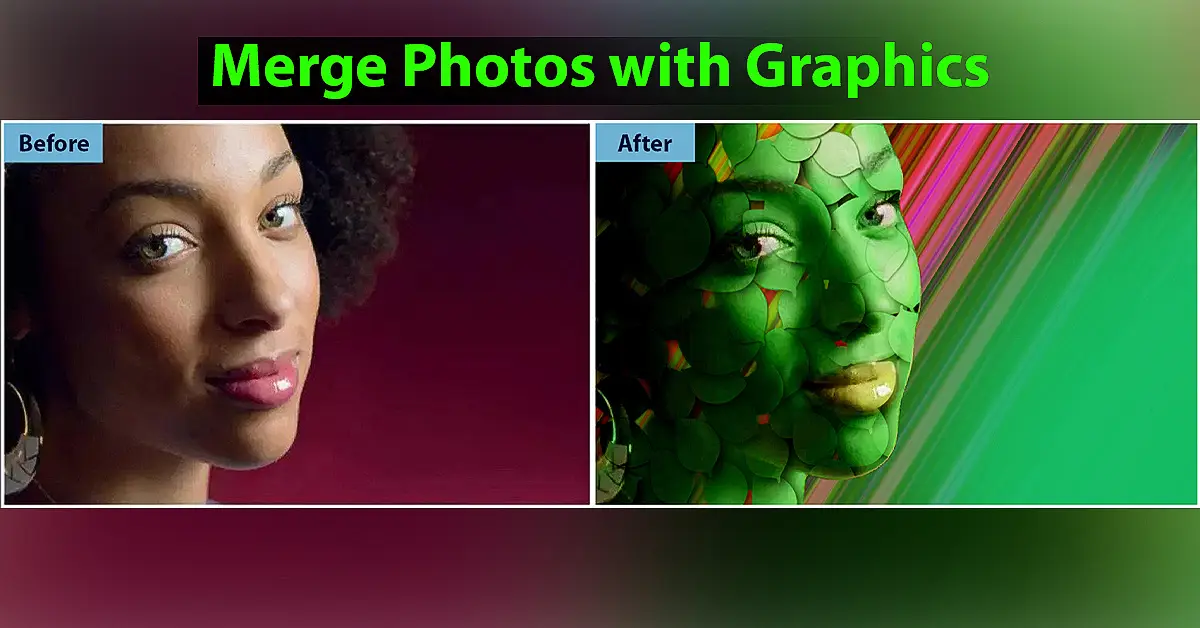
This surreal merge of photos with graphics effects may look intricate and complicated. Still, merely by using the graphics and backgrounds that come with Elements, it’s something that anybody can do, and on any portrait they like. We’re using a simple graphic called Brass Leaves, which you’ll find within the hundreds of graphics, frames and effects that come with Photoshop Elements in this tutorial. However, if you prefer, you could always use one of the other graphics.By duplicating and reshaping the leaves in different ways, you can build up an entire bush. Once that’s been done, all you have to do is duplicate the cut-out face. We’ve provided and applied the clipping path to each Layer before applying a Drop Shadow. Layer Style and changing the colours—Drop in a suitably green leafy background to round things off, also taken from the Elements graphics library.
Merge photos with graphics and create fantastic effects using blending modes.
Along the way, we’ll repeatedly use one of Photoshop’s most valuable and underused shortcuts – the humble Alt key. Let loose on the Layers panel; it enables you to make speedy copies of layers, styles, masks and adjustments. It also enables you to ‘clip’ a layer to the shape of the Layer beneath. Here’s how we can merge photos with graphics.
1. Cut out the portrait

Open the starting image. The first step is to cut out the portrait from its background. Grab the Quick Selection tool and paint to select the face and neck. If the tool goes wrong and picks up any areas you don’t want, hold Alt.
And paint to subtract areas from the selection. When you’re happy, go to Select > Refine Edge to improve the edges of the selection. Set Radius 2.1, Contrast 25 , Shift Edge +17. Set Output to New Layer and click OK.
2. Add the brass leaves

Go to Window>Graphics to access the Graphics panel. Here you’ll find all manner of different graphics and templates. You can search through the hundreds of items using the menu at the top. Set to filter ‘By Word’ and type ‘Brass Leaves’ in the search bar. Once you’ve found it, drag the leaves graphic into the image. A graphic is a Smart Object, which means it can be resized up or down without losing quality.
3. Build up the leaves

Grab the Move tool and check Show Bounding Box in the Tool Options. Click the bounding box to transform the shape of the leaves. Drag the corners to resize and position the leaves over the face. Next, hit Cmd/Ctrl+J to copy the Layer. Transform again, but in a different way so that it doesn’t look too similar to the first copy (you can right-click while transforming for more options, like Distort). Continue making more copies until the face is mostly covered.
4. Copy and clip to the face

Rename the background copy layer (the one with the cut-out face) ‘face’, then drag it above the lowermost leaves layer. Hold down Alt and click the line between the two layers to clip the face to the leaves. Now hold down Alt and drag the face layer above the next leaves layer to make a copy, and Alt+click the line again. Repeat to copy the cut-out face above every leaf layer, each clipped to the underlying leaves.
5. Mask the leaves

Hold down Cmd/Ctrl and click the image thumbnail on the uppermost face layer to load a selection of its shape. Highlight the leaves layer below, click the Add layer mask icon to convert the selection to a mask. Next, hold Alt and drag the mask thumbnail to each of the other leaf layers to copy it, so that every leaf layer has a mask attached that is the shape of the face.
6. Add the drop shadows

Highlight any leaf layer and go to Layer>Layer Style>Style Settings. We can add depth to the effect with drop shadows. Check Drop Shadow and set Angle 40, Size 18, Distance 6, Opacity 90, and click OK. When you add any Layer Style effect, such as a drop shadow, a little FX icon will appear on the highlighted layer in the Layers panel. Hold down Alt and drag the FX icon to another leaves layer to copy it, then copy it to every other leaves layer in the same way. Well, we are not done yet.
7. Color the effect

Next, we can add colour to the effect by turning each leaf layer a shade of green. First, highlight the top face layer, and click the Create adjustment layer icon in the Layers panel. Set Hue +61, then hold Alt and click the line between the Hue/Saturation layer and the face layer below to clip the Layer to the face. Hold down Alt and drag the Hue/Saturation layer above the next face layer to make a copy, then clip it again. Double-click the layer thumbnail to change the Hue setting slightly for some subtle variation to the colours.
8. Drop in the background

We’ll drop in another graphic as a background for the effect. Go to the Graphics panel and search for ‘leaves 02’, and bring it in. Hit Cmd/Ctrl+T, right-click and pick Flip Horizontal. Add a Brightness/Contrast layer set to 10, 100. Finally, darken the background corners. Add a Solid Colour adjustment layer filled with black. Grab the Brush tool, set the colour to black and 30 opacity, then paint on the Layer’s mask to hide the black and reveal the green underneath.
Now, you have your photos merged with graphics. Well, don’t just read; practice too. I know you may have better ideas to demonstrate such an effect. Please write your comments below; I would appreciate new ideas from the readers.
Conclusion:
Blending photos with graphics in tools like Adobe Photoshop Elements is a powerful way to create eye-catching, surreal visuals with minimal effort. By using simple techniques like layer duplication, clipping masks, and blending modes, anyone can achieve professional-looking photo manipulation effects. This tutorial highlights how built-in graphics and smart objects can transform ordinary portraits into creative artwork. Mastering shortcuts like the Alt key also boosts workflow speed and efficiency. Whether you’re a beginner or exploring advanced photo editing, these techniques help enhance creativity and visual storytelling. Start practicing today to elevate your digital art and photo editing skills.