Clipping Path Reverse Guide – How to Reverse And Inverse Your Selection And Clipping Path?
- January 1, 2025

Clipping path is one of the best tools for changing backdrop colors, removing objects from backgrounds, and creating composite product pictures. Once you understand how to use clipping paths, you may rapidly and safely edit your photographs. Just to be clear, a clipping path is what you use to make a clipping mask. Now, what is a clipping path reverse, then? Often, while creating the clipping path, they accidentally mask the background rather than the subject. So, clipping path reverse is just that! If you are also facing this issue, worry not! This concept, also known as an inverted clipping path, can be confusing. Through this blog, you will learn practical solutions for these challenges using both Adobe Photoshop and Adobe Illustrator. Let’s transition to the fundamentals of what a reverse clipping path is and how to handle it.
What Is a Reverse Clipping Path?
The purpose of a clipping path is to create a mask that keeps everything inside the path and omits everything outside it. This helps us give a specific part of our image a certain shape and provide a new or different background for the image.

The reverse of that in Photoshop is that everything inside the path is omitted, while everything outside remains. So basically, a cutout is made instead. This is a common mistake made by many novice illustrators or editors. However, it does not always have to be a mistake. This can be a unique way to isolate the subject from the background.
Reverse a Clipping Path in Photoshop
A clipping path is created with a selection tool that outlines the subject or a specific shape on a vector/raster image. The outline tells Photoshop what to keep and what to discard. Now, suppose you create the path with the Pen Tool and enter the final command.
Instead of the subject becoming the clipping mask, you have negative space in the middle and the background around the clipping path.
The Solution to an Inverted Clipping Path
To understand the solution, we must first learn when this occurs. The following steps will show you why you achieved a reverse clipping path in photoshop.
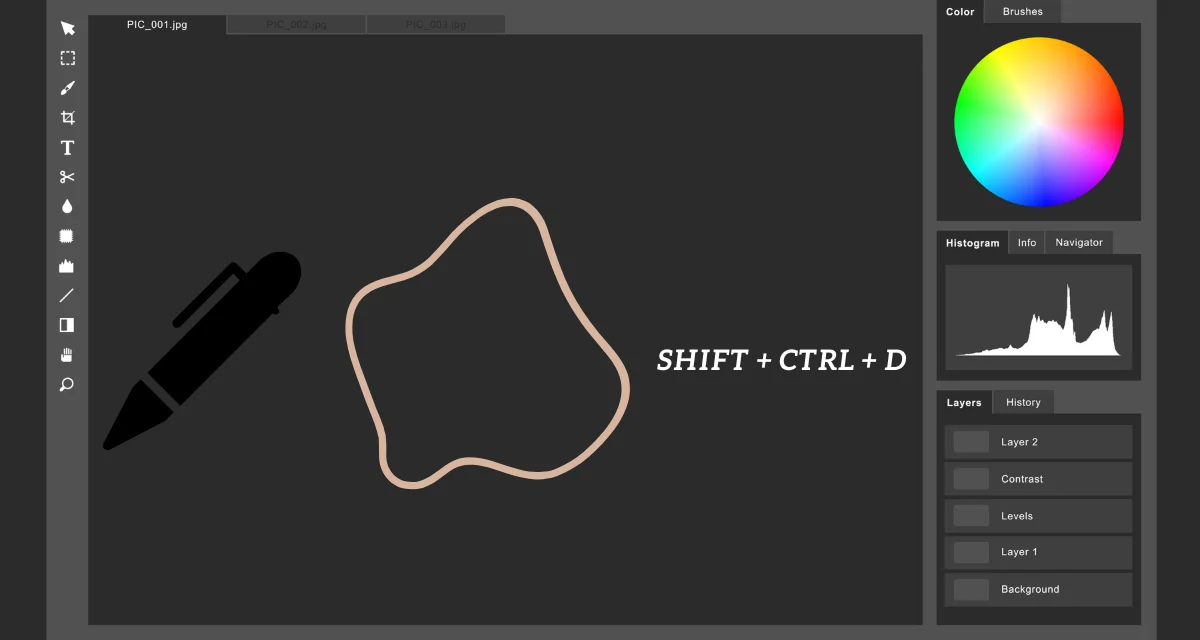
- Select the pen tool from the tools menu
- Outline the shape you want to be masked
- Press Shift+Ctrl+D
You have an inverted clipping where the object itself is discarded!
What to actually do:
- Go to the dropdown menu> click Select> choose Inverse
- You can also use the keyboard shortcut Shift+Ctrl+I
- Press Q from the keyboard to reveal your clipped image
There are other ways to reverse a clipping mask in Photoshop. One way is to select the “Toggle Mask” button in the “Layers” bar. When it comes to vector masks, the Selection Command includes an Invert option. So, after creating the path, all you need to do is choose Invert between the image and the mask.
Now you can add a new layer below this clipped image to change the background or attach this clipping to a different vector. Select the layer with the clipped image and keep it as a top layer to achieve the look you are going for. This is how you create the clipping mask you want in Photoshop.
Inverse Clipping Mask in Illustrator
Adobe Illustrator has opened new doors for graphic designers and made creating vector masks a breeze. The possibilities are endless! Clipping masks and transparency masks in Illustrator have countless uses, from creating an illustration for a graphic t-shirt to creating a vector mask for a background in an infographic; the world is the designer’s oyster.

The inverted clipping mask lets you create a design that highlights the negative space rather than the image itself. This gives the designer free rein to create interesting shapes and patterns within an image and to utilize negative space.
The steps are too simple to be true! Use the Selection tool to make the clipping mask of your choice, then go to Object > Clipping Mask > Invert. This gives you the effect of the inside of the mask becoming invisible, while the outside remains as is.
Adding a layer beneath this will create the exotic look of your image, with a window-like feature. This is often used in infographics and short videos to make the letters a clipping mask and to add the video’s content or other images beneath the mask.
Inverting a Selection
You can achieve the complete opposite effect from what was mentioned above by inverting the mask in Illustrator. For this effect, the area to be inverted must be selected first. Follow the steps written below, or simply use the keyboard shortcut described below.
By doing this, the selection will be inverted, making everything that wasn’t previously selected part of the selection.
- Select > Inverse
- Windows keyboard shortcut- Ctrl+Shift+I
- Mac Keyboard shortcut- Command+Shift+I
Conclusion
This blog gave all the nitty-gritty details of how to reverse and inverse your selection and clipping path in two of the most used applications for editors and designers. You have now become a master of all things related to clipping path reverse! Both clipping path and clipping masks are the most important and versatile tools in photoshop and illustrator. Whether you did it by mistake or it was a thought-out decision to give your vectors and images a unique look, you have learned an integral tool that will take you a long way!