How to Merge Two Photos in Photoshop 7 − The Ultimate Guide
- February 18, 2023
There are many reasons why you may want to merge photos.
For instance, a landscape photographer can capture multiple shots and merge them later to produce amazing images without distracting elements in the background.
Or, a photographer experimenting with double-exposure photography may have to blend two pictures to obtain their desired composition.
Adobe Photoshop is a full-fledged photo editing software with tons of amazing features. One such feature is its ability to merge two photos into one.
By the end of this article, you’ll learn how to merge two photos in Photoshop 7 and more!
With that being said, we’ll now discuss how to blend two pictures together in Photoshop 7 with a simple step-by-step guide.
Let’s get started!
Things to Consider Before Merging Two Photos
Before you jump into merging photos, there are a few things you should consider to ensure that your final image looks as good as possible −
Composition
The first thing to consider is the composition of the two photos. Are the photos similar enough in terms of lighting, color, and perspective to merge together seamlessly?
If the photos are too dissimilar, it may be challenging to create a natural-looking final image. When photos have similar compositions, it’s usually easier to merge them.
As an extra measure, ensure that photos were shot with the same focal length – if the difference is too large, you won’t be able to merge the photos.
Image Quality
You should also consider the image quality of the two photos. Is the photo resolution high enough to merge together without losing too much detail?
If the images are too small, the final merged image may look blurry or pixelated.
Make sure that the two photos have a similar resolution to ensure the best possible result.
Purpose of Merging Photos
Define your purpose for merging the photos.
Are you trying to tell a story or convey an emotion? Do you want the final image to look natural or surreal?
Knowing the purpose behind merging the photos can help guide your decision-making as you work to create your final image.
How to Merge Two Photos in Photoshop 7 – Step-By-Step Guide
While it is possible to create stunning visuals by merging photos, it is also important to be patient when learning the ropes. With a little bit of practice, you’ll have the skills to create beautiful merged photos!
That being said, here’s a step-by-step guide on how to merge two photos in Photoshop 7 −
1) Open Photoshop 7 and Create a New Document
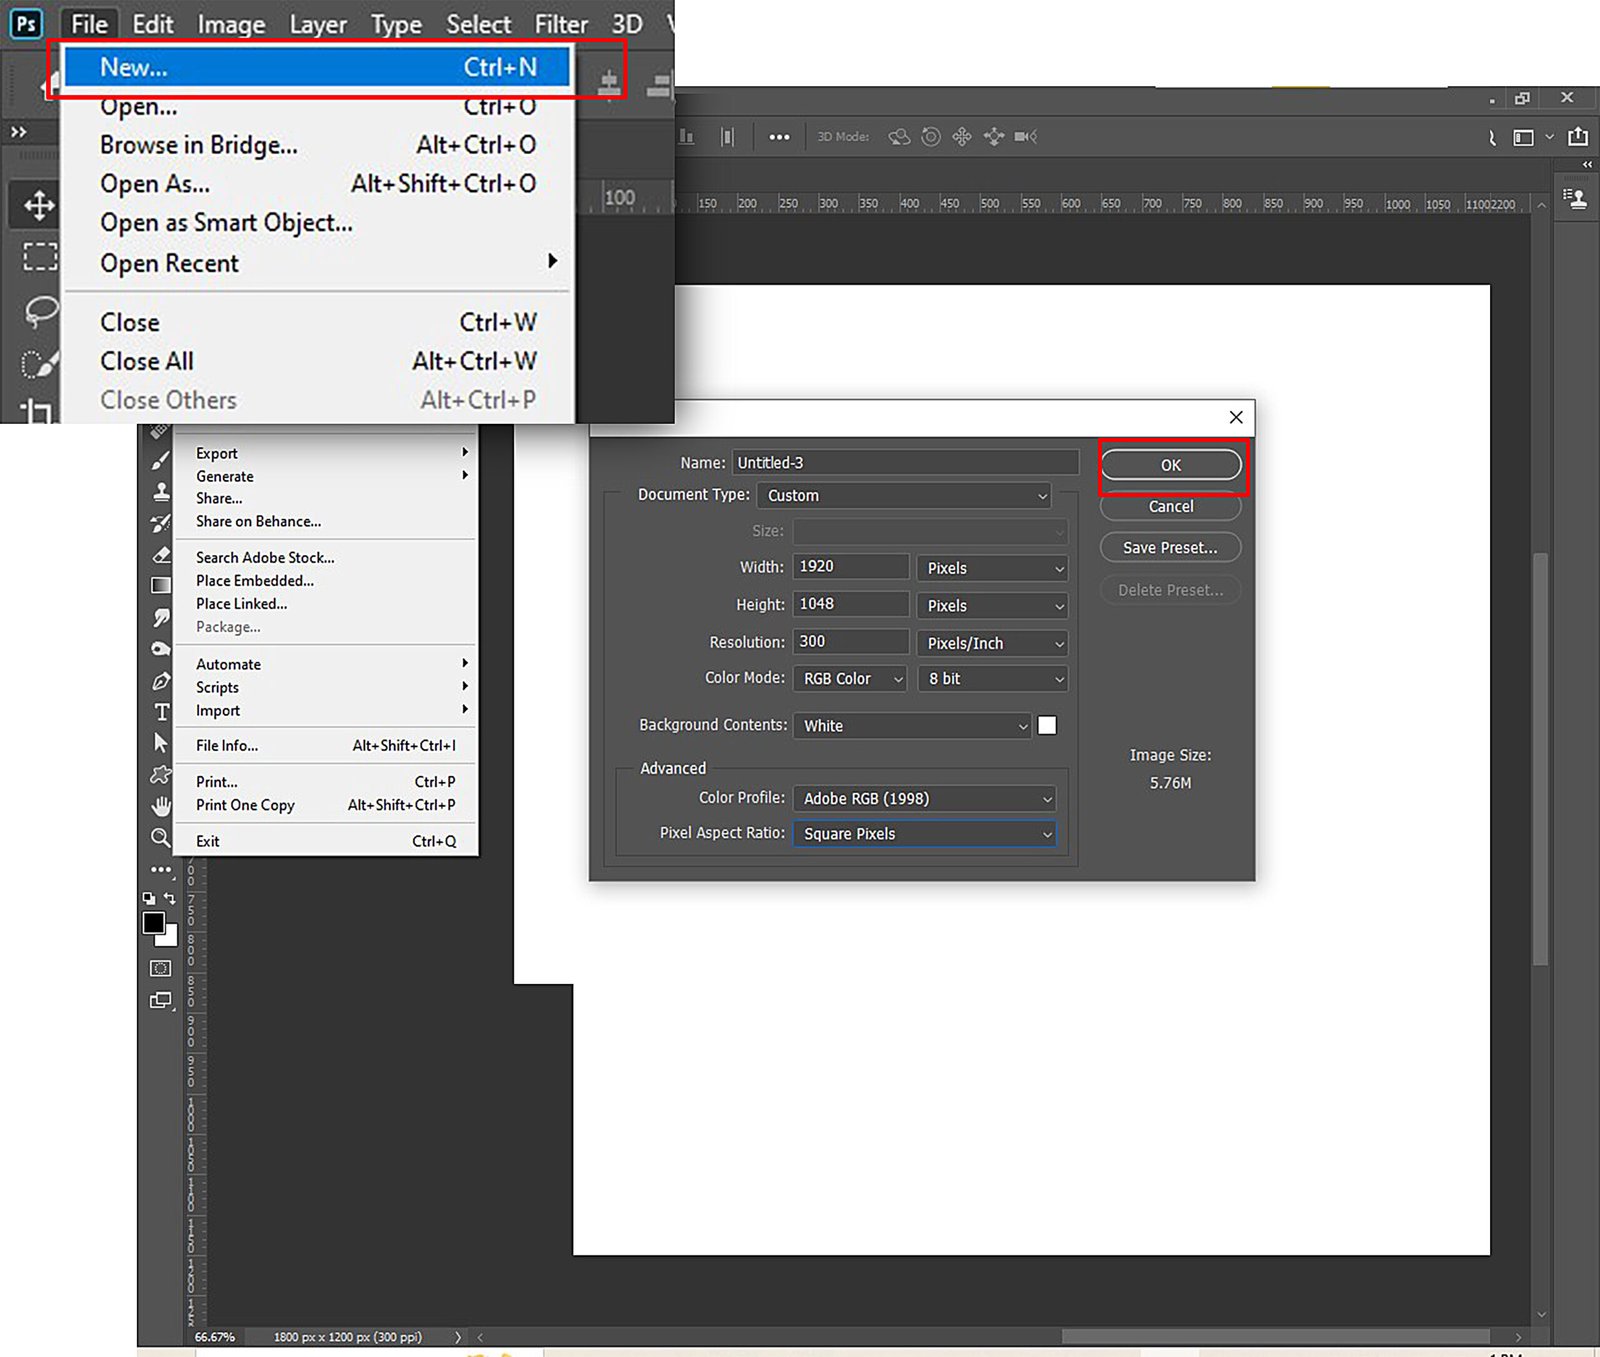
First, you’ll have to open Photoshop 7 and create a new document by clicking on File > New.
Enter the appropriate dimensions for your new image document and click OK.
2) Load the Photos You Want to Merge
Next, open the two photos you want to merge by clicking on File > Open
If the main subject in the photos has different sizes in the pictures, load the smaller one first. This prevents distortion as downscaling doesn’t affect the image quality.
Once the photos are loaded, create another empty document.
3) Select the Move Tool
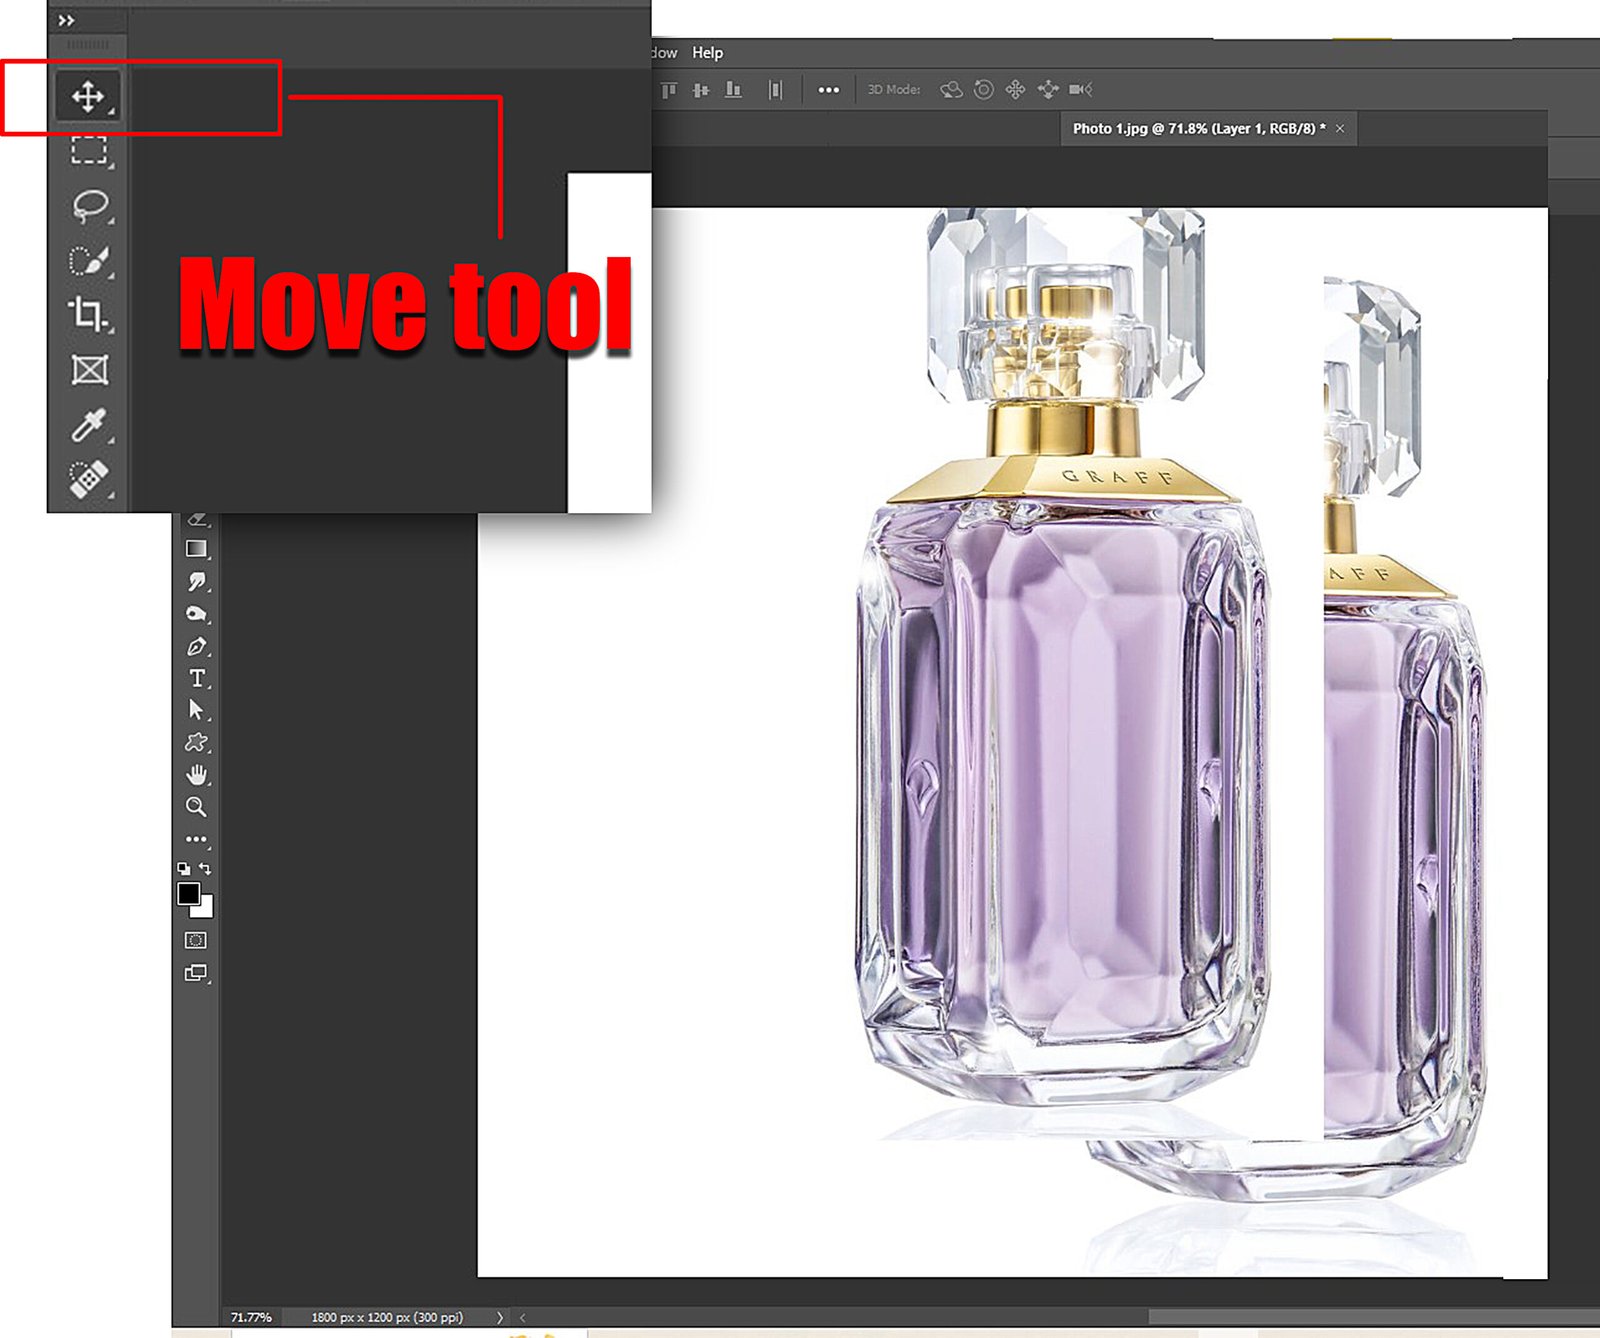
From the toolbar on the screen’s left, select the Move tool. It allows you to move and adjust the position of each photo in your new document.
4) Drag and Drop the First Photo into the New Document
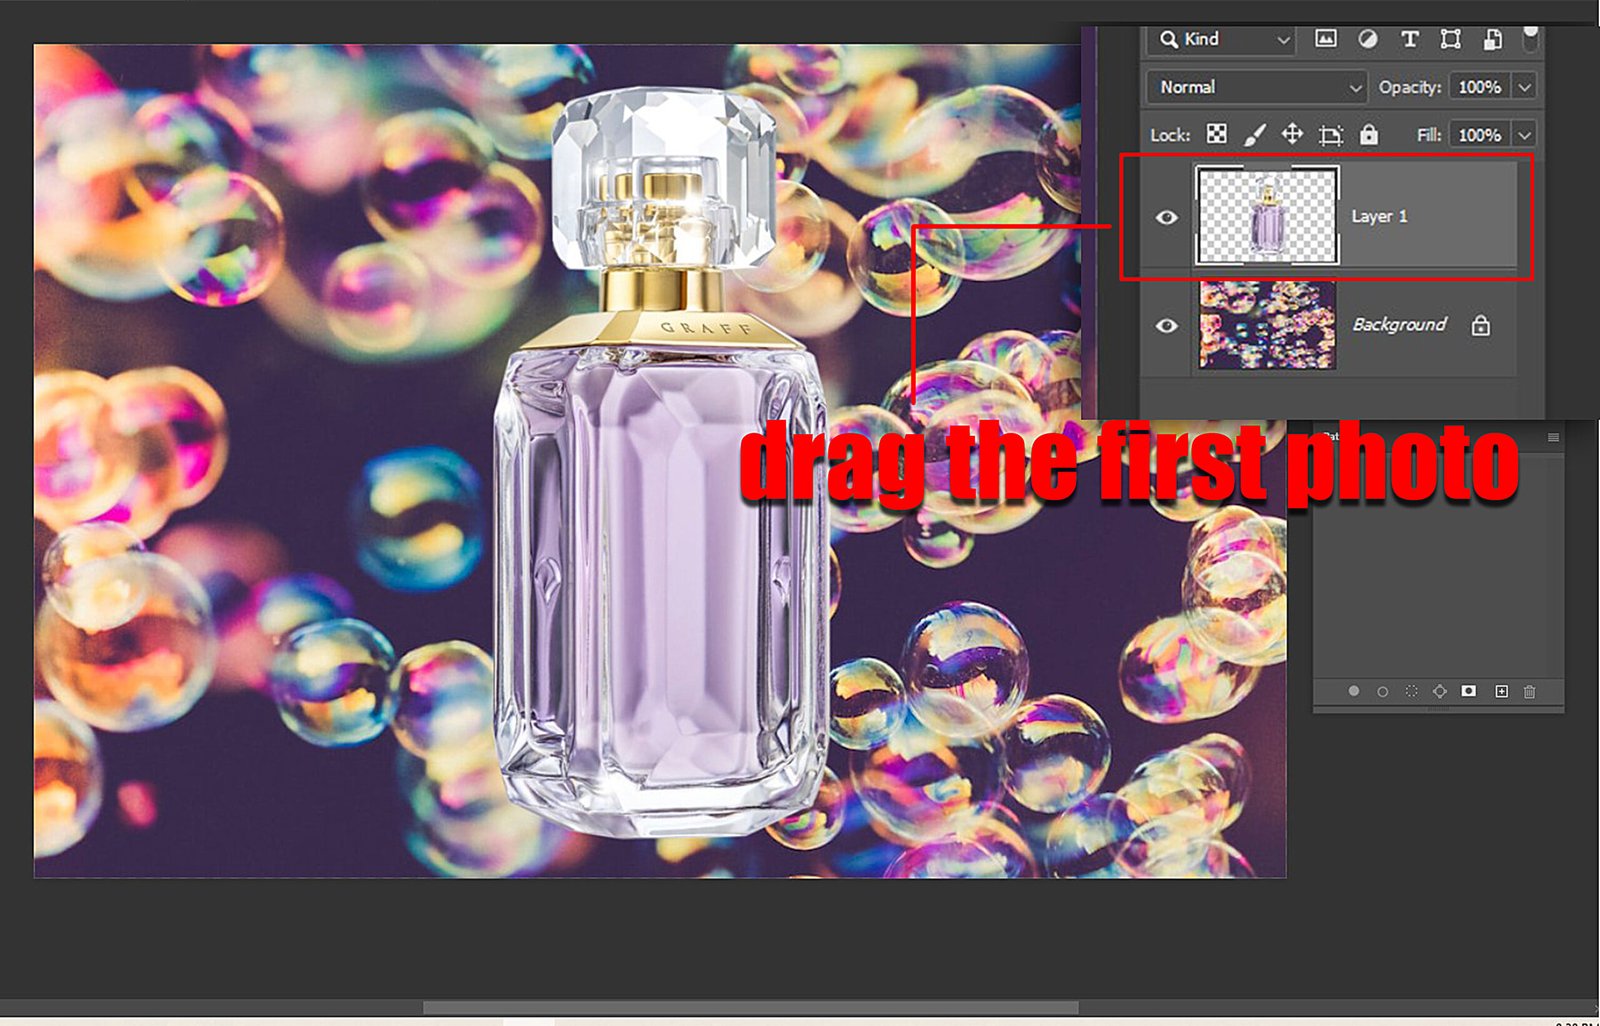
With the Move tool selected, click and drag the first photo into the new document you’ve created.
You can adjust the position of the photo by clicking and dragging it within the new document.
5) Add the Second Photo to the New Document
Repeat the process for the second photo. Click and drag the second photo into the new document using the Move tool.
Align the photo as desired with the transform handle on the corners and edges.
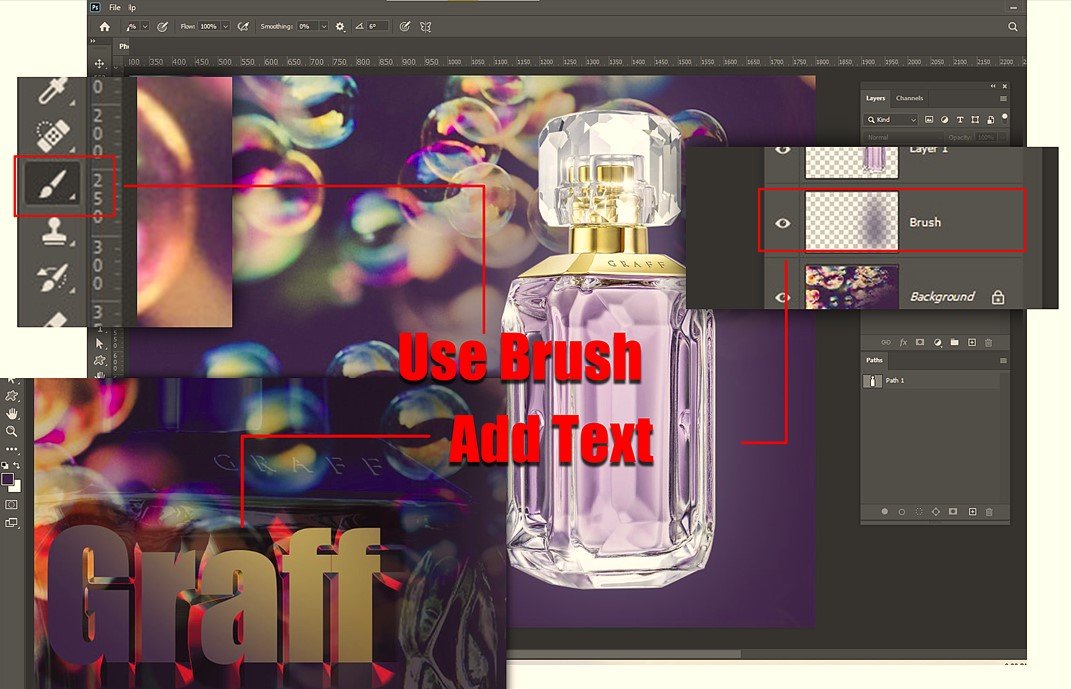
6) Blend the Photos Together

Although there are other ways to go around this, using layer masks to blend photos together is relatively simple.
To do this, click on the top layer in the Layers panel on the right side of the screen. Click on the Add Layer Mask button at the bottom of the Layers panel.
With the layer mask selected, use a Soft Brush to paint over the areas where you want to blend the two photos together.
You can adjust the opacity of the brush to control the strength of the blending effect.
7) Save Your Merged Photo
Once you’re happy with the result, save your merged photo by clicking on File > Save As.
Choose a file format and location for your new image, and click ‘Save.’
Learn more: How To Use Deep Etching In Adobe Photoshop?
FAQs on How to Merge Two Photos in Photoshop 7
Be sure to check the following answers to know more about the topic.
How do you link layers in Photoshop 7?
To link layers in Photoshop 7, choose ‘Layers’ or ‘Groups’ from the Layers panel. At the bottom of the panel, click on the link icon.
How do I merge all layers in Photoshop?
You can use the keyboard shortcut ‘Ctrl’ + ‘Shift’ + ‘E’ (Windows)/ ‘Cmd’ + ‘Shift ‘E’ (MacOS) to merge all the visible layers. On the other hand, you can select ‘Flatten Image’ if you want to merge all layers, including hidden layers.
How do I merge layers in Photoshop without losing layers?
For this, hold the key ‘Alt’ (Windows)/ ‘Option’ (MacOS) while clicking on ‘Merge Visible’ in the Layer menu. By doing this, you can merge all visible layers into a new layer and leave the original layers intact.
Can Blend combine and merge images?
Blend modes are an advanced way of merging photos in Adobe Photoshop. With Blend Modes, you can layer two images together and adjust the transparency of either image to make their subjects appear as portions of the same picture.
Final Verdict
With Adobe Photoshop, you can merge multiple images to create stunning photos. Make sure to practice enough so you can bring out the best of your best creativity!
That being said, we hope to have helped you with this article on how to merge two photos in Photoshop 7.