Creating and Modifying Directional Shadows in Photoshop: A Step-By-Step Guide
- February 17, 2023
Shadows are essential to give images a sense of realism and belonging, making them look like they exist in a 3D space. It’s important to understand the value of creating and modifying directional shadows in Photoshop.
Depending on the light source, you place the shadow at the right angle and direction. The appropriate placement of the shadow is crucial.
You can add a drop shadow, and the image will still look fake if you mess up the direction.
In this guide, we’ll dive into the art of creating and modifying directional shadows in Photoshop with 8 steps and cover the fundamentals of the process.
The Steps to Create and Modify a Directional Shadow
To create a directional shadow, you must first learn how to create a drop shadow. We can worry about the direction of the shadow later.
Follow the 8 steps below to learn how to create a shadow.
Step 1: First Things First
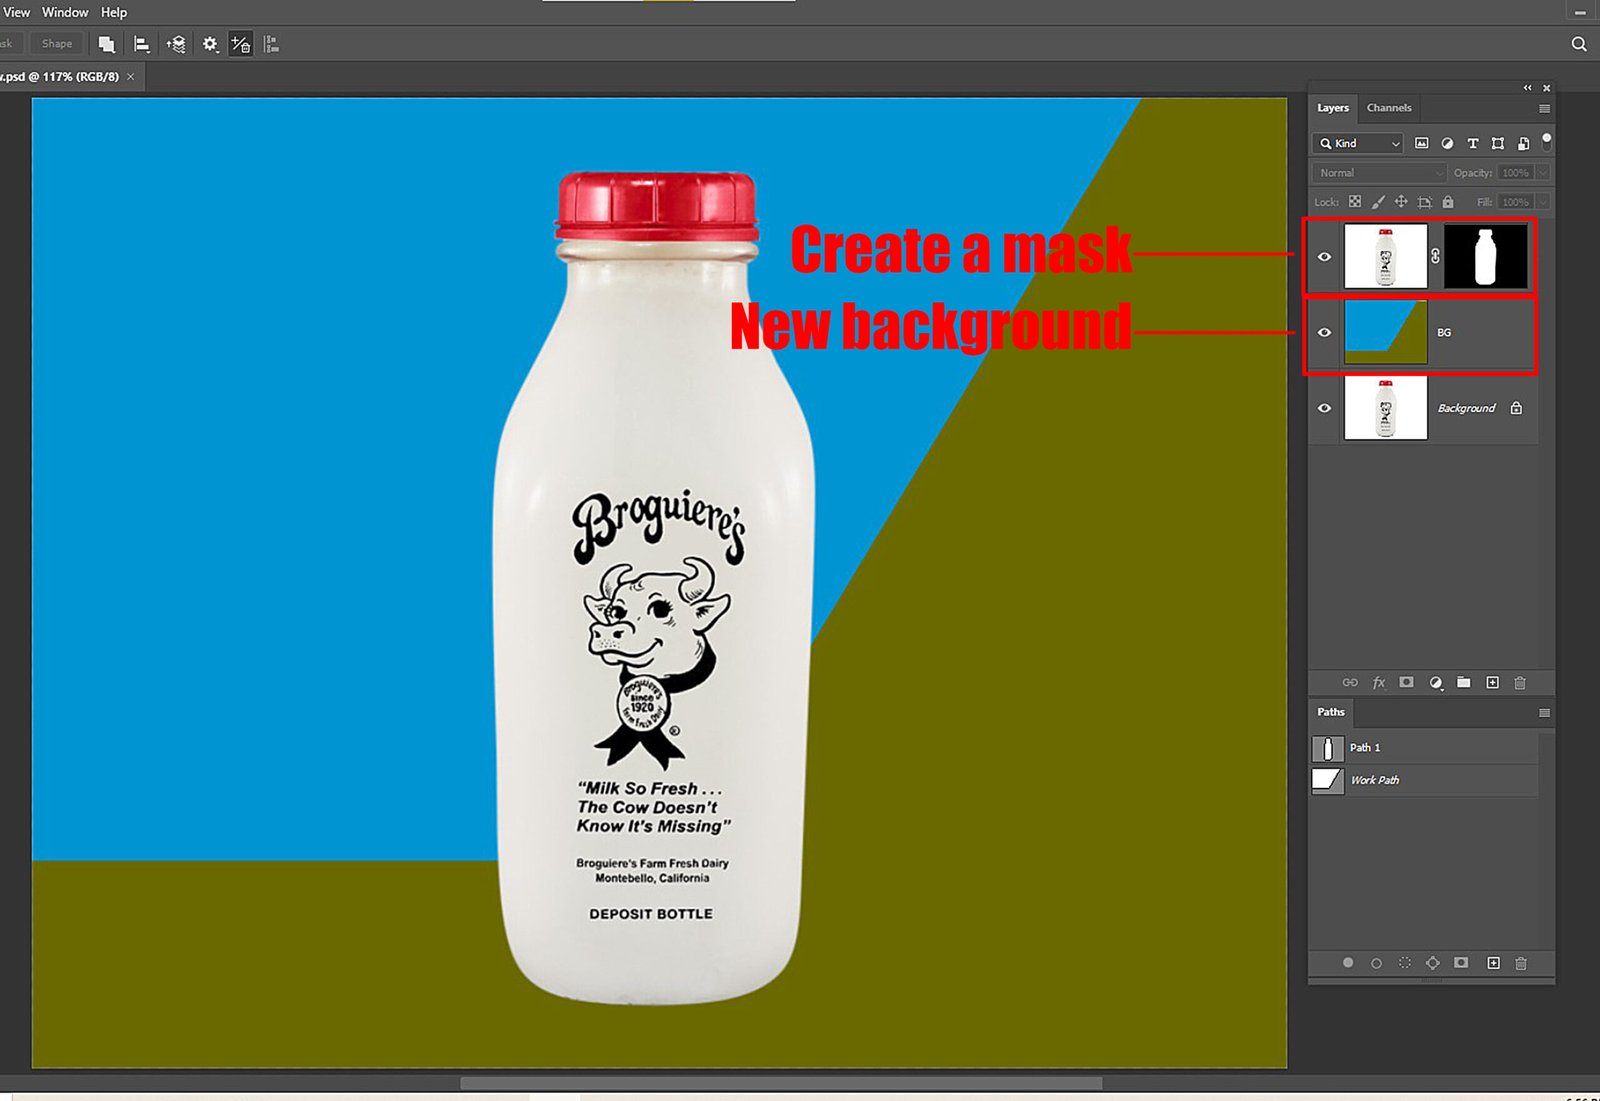
Let’s say you have selected an object and want to give it a shadow. So, the first thing you do is create a mask of the object and remove it.
Then drag the cutout and place it on a new background. And finally, add the shadow.
Usually, these are the prerequisites to creating a shadow. So, make sure you have done all that beforehand.
However, if your scenario is different, you don’t have to pay any heed to this section. You can continue to the next one.
Step 2: Add the Text or Image
It’s time to add the text or image and give it a shadow.
You can add text using the Text Tool. If you want to work on an image or a cutout of an object, add it.
Step 3: Create a New Layer
The first step is to create a new layer of text or images. To do this, go to the Layers panel; you can find it on the right side of the software window.
Click the Create A New Layer button, choose your preferred settings for your image, and a new layer will appear. Rename it if you want.
Or, you can use the shortcut button − Ctrl+Shift+N (Windows) or Command+Shift+N (Mac).
Step 4: Duplicate the Layer


Now that you created the layer, it’s time to duplicate it.
Select the layer you want to duplicate. Then Right-click the selected layer and choose the Duplicate Layer option.
Or you can press Ctrl + J (Windows) or Command + J (Mac).
A new layer will appear in the Layers panel. You can rename the layer if you like.
Step 5: Select the Object
After duplicating the layer, you select the object to which you want a shadow. Remember that you must make the changes on the duplicated layer from now on.
If you’re working with a mask of an object or a text, clicking on it will do the job.
However, you can use any Selection Tool to select the subject/object if you’re working on an image.
We prefer the Quick Selection Tool and Magic Wand; you can use either or a different one and select the object.
Step 6: Add the Shadow

Now’s the time to add the shadow. Go to the Layer Style dialog box and choose the Drop Shadow option.
Once you have added the shadow, you can play with its settings (opacity, distance, size, etc.) using the slider until you get your desired look.
You can also change the color of the shadow if you want.
Step 7: Maintain the Direction

Remember to place the shadow in the right direction and angle to give the object realism. You just figure out the light source and direct the shadow based on it.
Another trick is to figure out how the other things are shadowed in the same picture and place your object’s shadow accordingly.
After figuring out the direction, keep moving the shadow and tweaking the settings from the dialogue box until you believe it’s perfect.
And once you reach perfection, save the file. Go to File, click Save As, and choose any format, and you’re done.
Step 8: Modifying the Shadow

This step is conditional.
You’re already done with creating the directional shadow. One important lesson is remembering to make a separate layer for the shadow.
This is necessary and works as a contingency if you ever need to modify your directional shadow.
Anyhow, suppose your client isn’t satisfied with the graphic, and there’s always a possibility that they won’t be. In that case, you can modify the shadow from its respective layer.

For example, you can use the Brush tool to paint the shadow, adjust the opacity and size of the shadow, or change its position.
Learn More: What Is Shadow Clipping and How to Fix It?
FAQs about Creating and Modifying Directional Shadows in Photoshop
We will answer some of the most frequently asked questions. Hope these help.
How to create a layer mask in photoshop?
Select any layer and click the Add Layer Mask button at the bottom of the Layers panel. Then, use a selection tool, for example, the Quick Selection tool or Magic Wand, to select the object and click on Select And Mask.
I have multiple layers. Can I separately control the settings of each layer?
Yes, you can. Go to the Drop Shadow dialog box, and look for the Use Global Light option. Simply uncheck the option if you want to make changes to a particular shadow. Any tweaks you make will impact all the shadows when this option is checked.
How can I choose the perfect color for the shadow?
You can use a tool called Color Picker to pick the background color where you will place the shadow. And then, use the Brush tool to paint the shadow. Using the Hue/Saturation or the Color Balance options, you can adjust the color of the shadow.
How to use the selection tool in Photoshop?
Open an image in photoshop. Choose any Selection Tool, preferably Magic Wand or Quick Selection tool, and carefully select the object. Use the Rectangular Marquee tool when the object is rectangular-shaped and the Elliptical Marquee tool when the thing is a circle or oval. You can use the Lasso tool to freely select any area.
Conclusion
Hopefully, now you understand the method of creating and modifying directional shadows in Photoshop using 8 steps.
Be mindful of the direction and angle of the shadow. Look around the image and try to figure out where the light source is. The trick is to examine the shadows of other objects if there is one.
Also, based on the light’s intensity and the object’s size, remember to set the opacity, softness, color, and size of the shadow accordingly.