How to Edit a Car Photo? − A Beginner Friendly Guide
- February 26, 2023
Unedited car photos often lack emotions and colors. By learning how to edit a car photo, you can transform any car photo from a dull image to a work of art.
Whether you want to increase sales or simply love having good pictures of your cars, editing a car photo is sure to create a massive difference in the final image.
That being said, today, we’ll discuss how to edit car pictures. With our simple guide, you’ll be on your way to editing car photos into professional-grade images!
You can use any image editing software of your choice. As they all have their own pros and cons, feel free to use editing software that you’re comfortable with. Let’s get started!
How to Edit a Car Photo with Editing Software − Step-By-Step Guide
If you want to transform car photos from ordinary to extraordinary, the pictures must be edited first. Here’s a step-by-step guide for editing car photos −
Choose an Image Editing Software

The first step for editing car photos is to choose an appropriate editing software. There are quite a few options in the market, such as Adobe Lightroom, Adobe Photoshop, GIMP, and many others.
While they all have their own strengths and weaknesses, choosing the right software for you will depend on your personal preferences, skills, and budget.
It is recommended to use editing software that you’re familiar with, so it will be easier for you to navigate through its interface
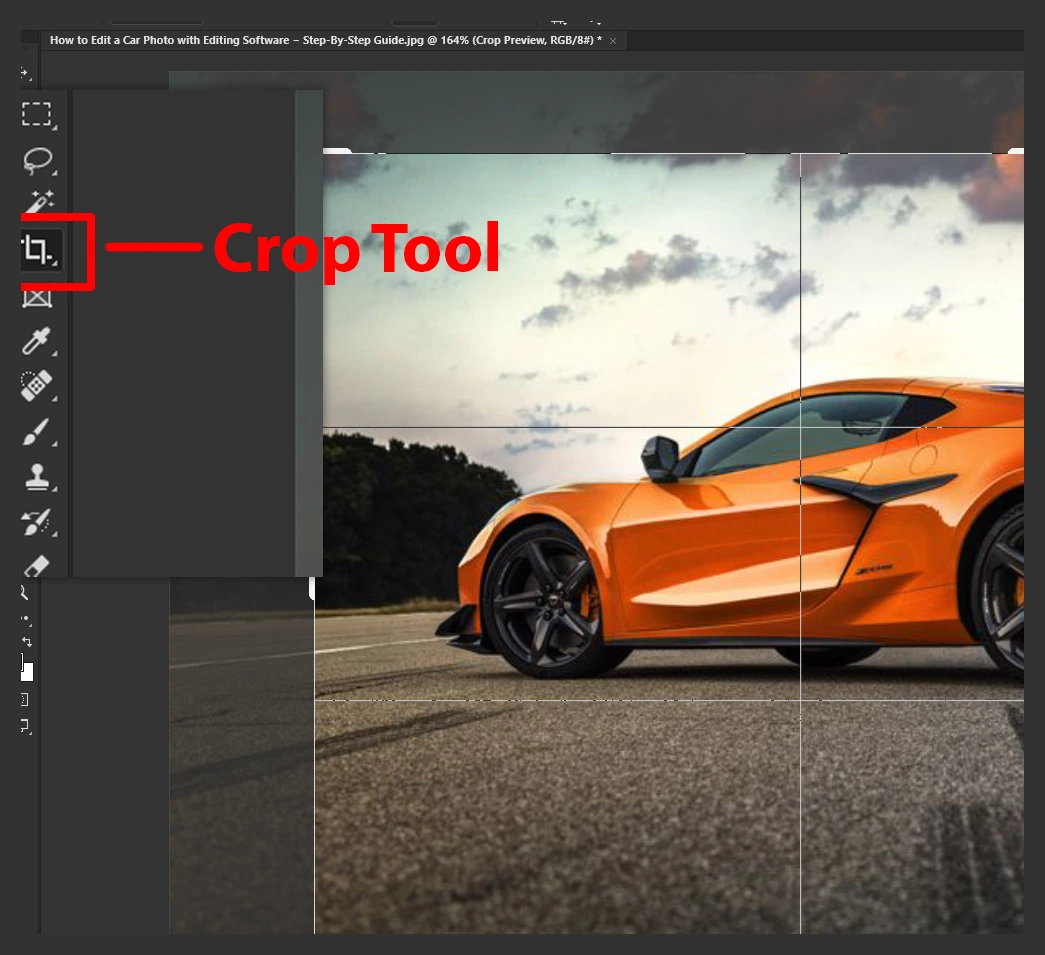
Straighten and Crop the Image

Once you’ve loaded the car photo into an editing software of your choice, the first thing to do is to straighten and crop the photo. Cropping the image will remove distracting elements from the image and give it a cleaner, professional look.
On the other hand, straightening it will make the car appear more centered and balanced.
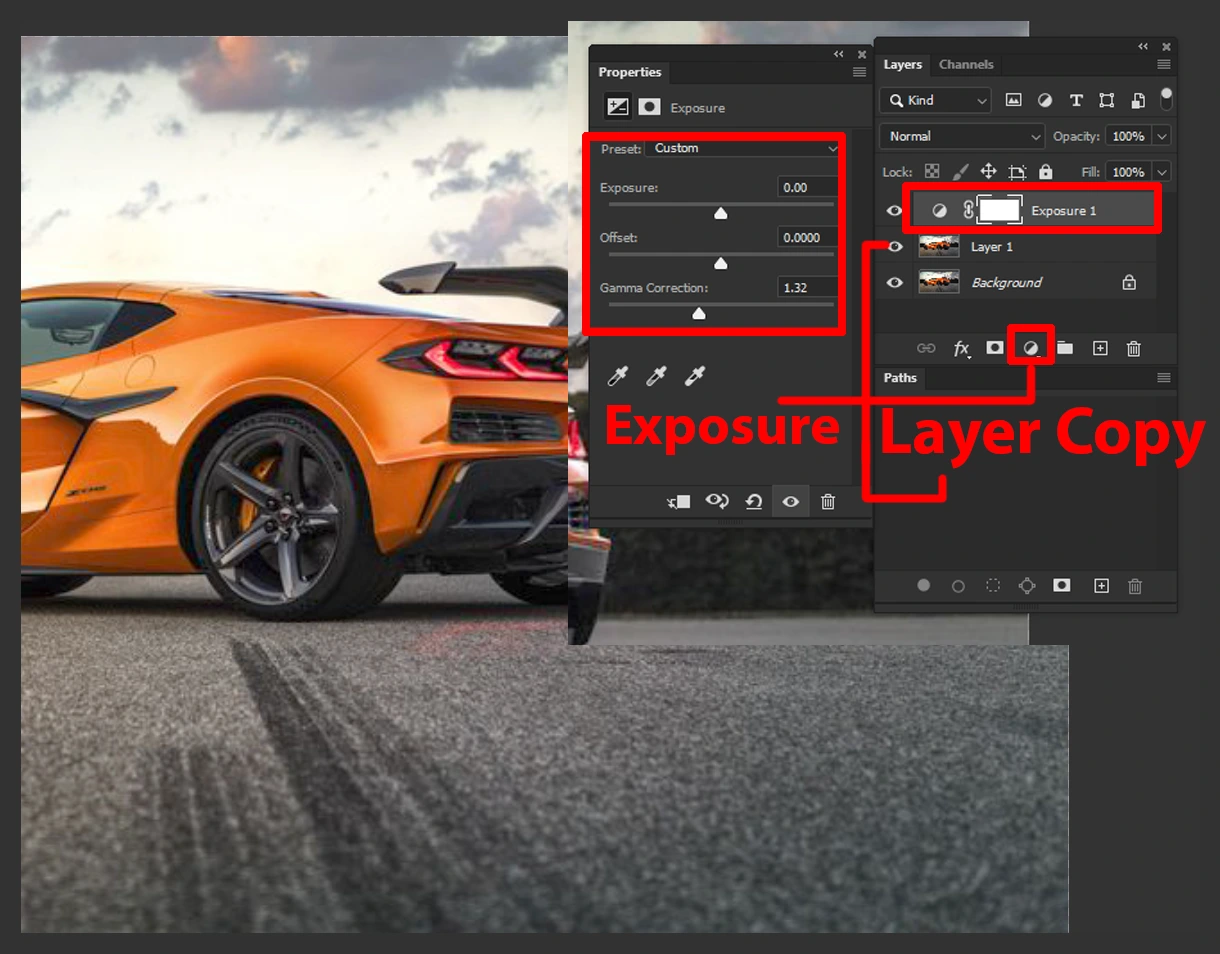
Adjust the Exposure of the Image

The exposure of a picture determines the amount of light entering the camera sensor. By adjusting the exposure of a photo, you can brighten or darken the image to bring out more details.
When dealing with car photos, ensure that the car is properly lit. In other words, the picture shouldn’t be too bright or dark, which may lead to overexposure and harsh shadows.
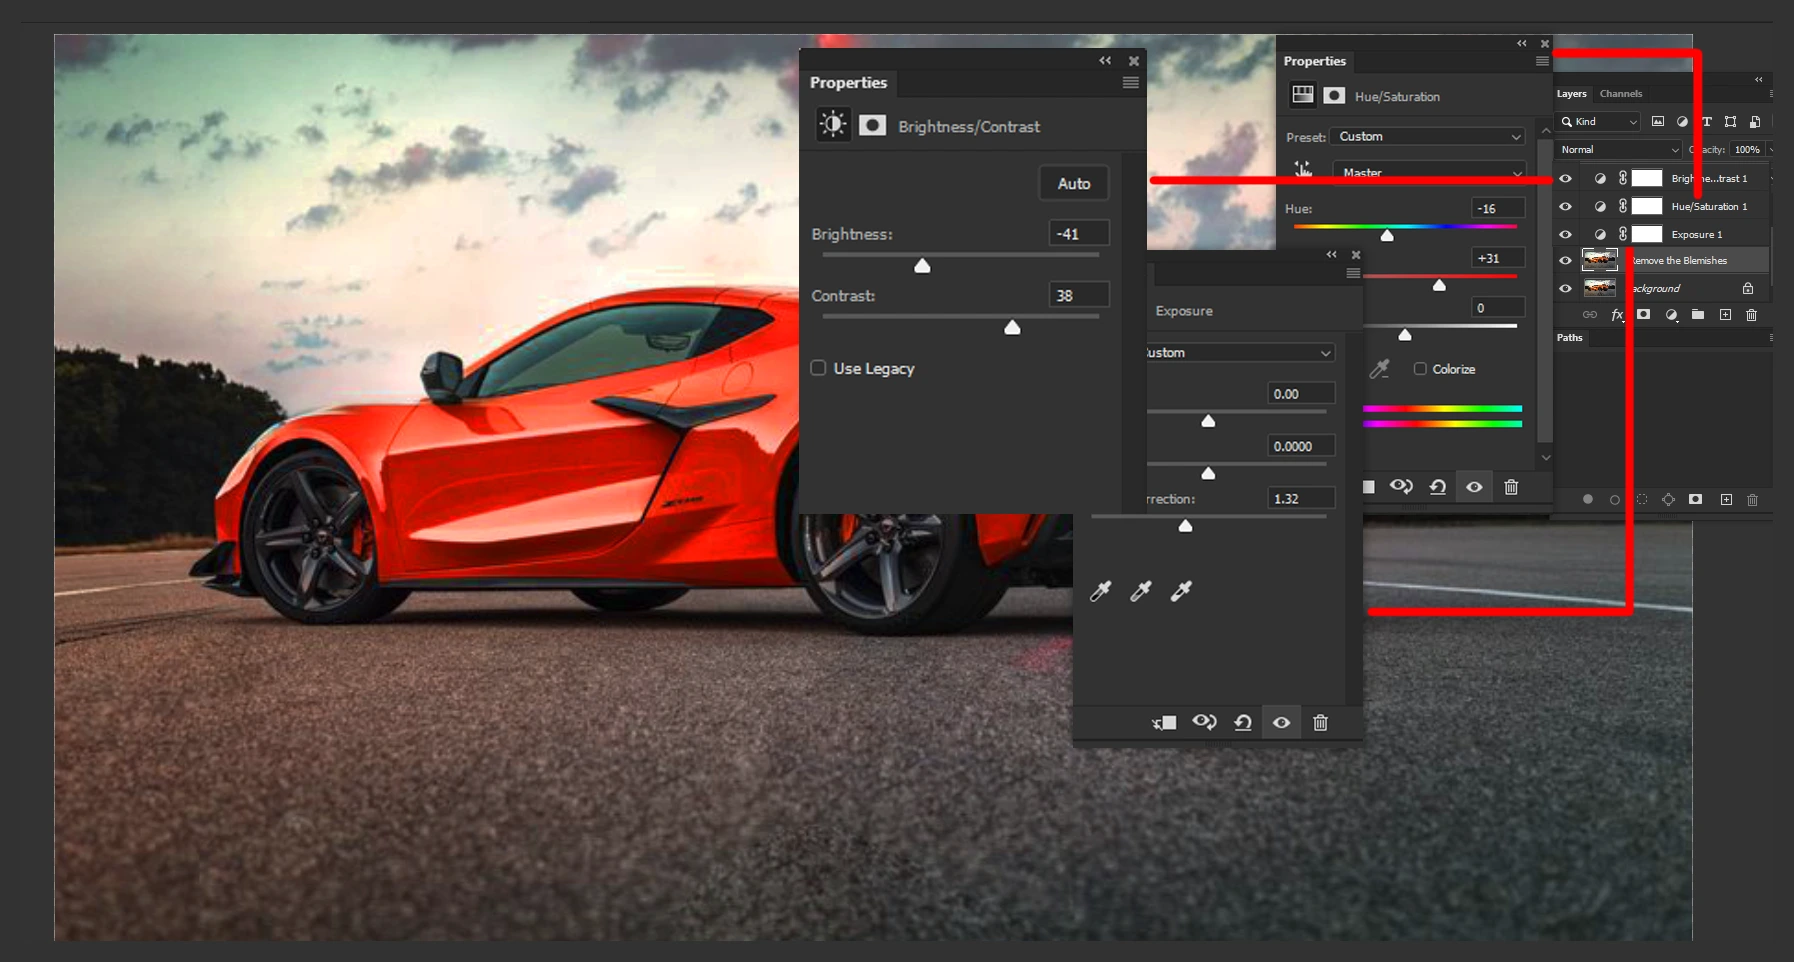
Experiment With the Colors

You can adjust the colors in your car photos by adjusting their contrast, saturation, and hue. Whether you’re looking for a warm sunny look or a bold visual, you can achieve it by playing around with enhancing the colors of the car photo.
However, make sure not to overdo it, as the resulting image may look artificial. It is important to maintain a natural appearance while also making the car’s colors more vibrant.
Remove the Blemishes

Like all photographs, car photos may sometimes have imperfections or blemishes, such as dents, scratches, or dirt. With the Cloning/Healing tool from your editing software, you can remove imperfections and blemishes to make the vehicle look flawless.
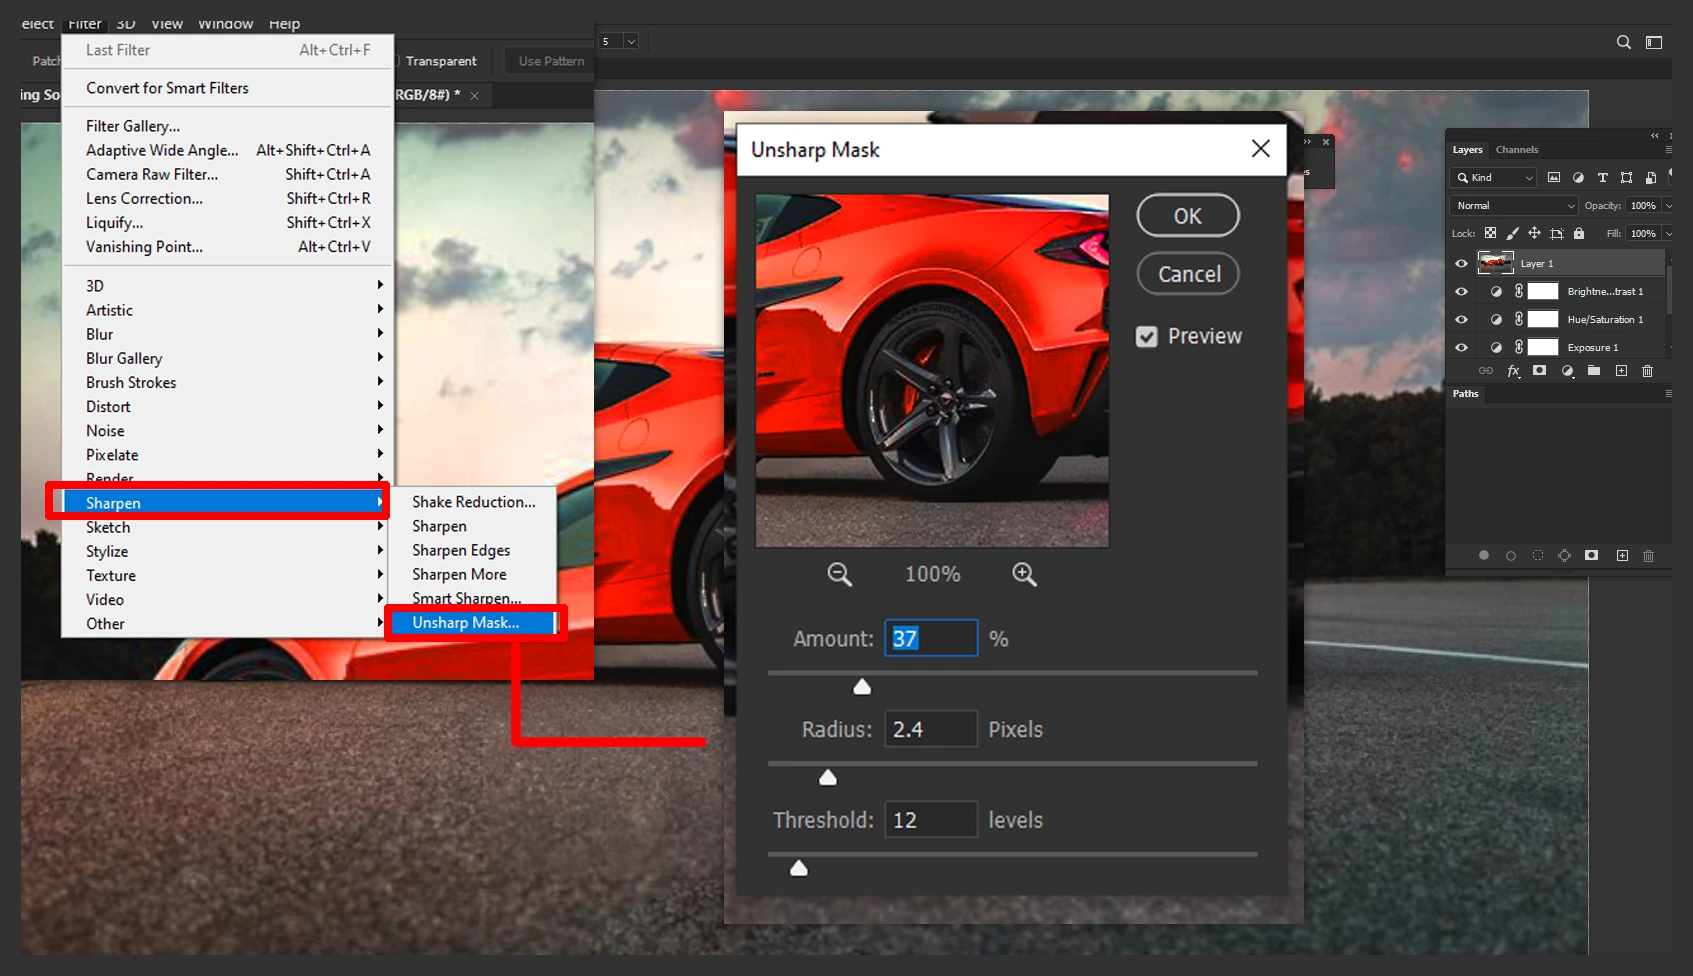
Sharpen the Image

The last step is to adjust the sharpness of the car photo. It is crucial as the details of a car picture play a huge role in car photography. Sharpening the image will help bring out intricate details in the photo, making the car appear more defined.
But over-sharpening the image may create a noisy and artificial-looking photo. By following these steps, you can edit your car photos into digital masterpieces!
How to Edit Car Pics on iPhone
iPhones have brilliant cameras with which you can capture amazing pictures. But if you want to take things beyond simple photographs, you should start thinking about editing the pictures.
You can download an image editing application of your choice from the Apple App Store. Or, you can use the pre-installed Photos application if you like things simple.
If you’re looking for free applications, you may try PicsArt, Snapseed, VSCO, and many more.
On the other hand, if you’re looking for advanced tools and features, you can purchase premium image editing applications, such as Adobe Lightroom and Pixelmator Photo.
You can refer to the step-by-step guide above and follow the steps on any application of your choice. That being said, here are some tips to keep in mind −
- Make sure that the vehicle is the main subject of focus in the image.
- Avoid using filters that cloak the car too much.
- Be careful when adjusting the color tone to ensure a natural look.
- Use the vignette tool to enhance attention on the vehicle.
- Maintain a balance of exposure to prevent washed-out looks or harsh shadows.
Learn more: How To Create Stunning Car Photos Using PicsArt.
Frequently Asked Questions on How to Edit a Car Photo
The following 3 queries are often asked by beginners attempting to edit their very first car photo.
How can I make my car pictures look good?
To get good pictures, the shot has to be captured from appropriate angles. In general, automotive photographs are shot at eye level, from the side, and at a 45-degree angle from each corner of the vehicle.
How do you make a professional car picture?
While there aren’t any defined rules for this, here are some tips to produce professional-grade car pictures-
- Ensure proper lighting to have well-lit pictures.
- Keep the background and foreground equally sharp.
- Capture images with the lowest possible ISO.
- Take into account the field depth .
- Clean the car before shooting pictures of it.
What is car photography called?
Photographers in the automobile industry are usually known as automotive photographers. They specialize in capturing intricate details of every vehicle at hand to produce stunning visuals.
Final Verdict
Knowing how to edit a car photo is crucial for automotive photographers and auto enthusiasts alike. With the right tools and techniques, you can edit and transform regular car photos into visuals that are sure to attract consumers.
We hope to have helped you with our article. Best of luck!
