
How to Make Simple 3D Text Effect in Photoshop that Will Wow Your Audience?
- February 16, 2025
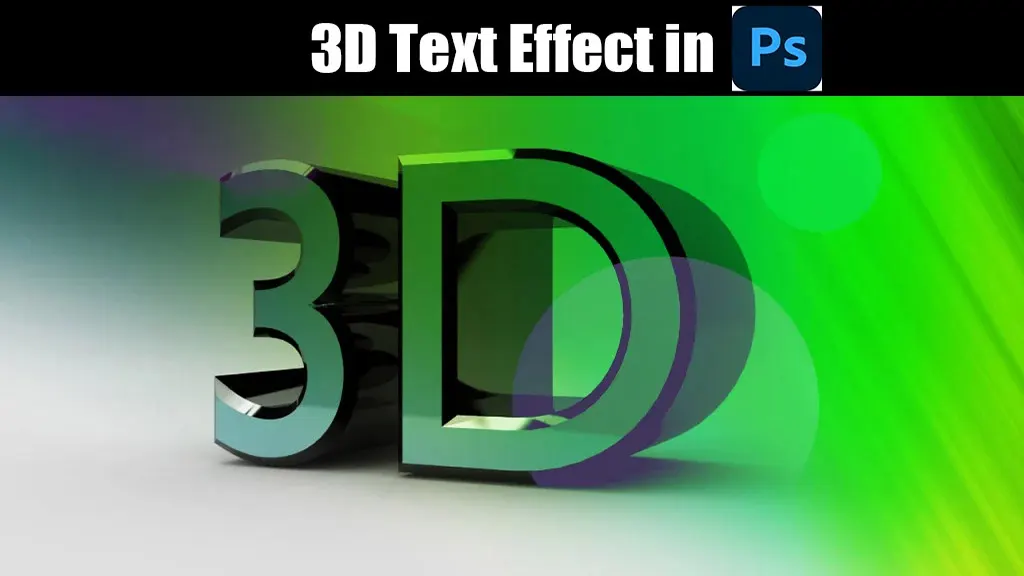
Don’t you find it intriguing when a text resembles an object rather than being a part of it? You can also construct similar elements if you learn how to make a simple 3D text effect in Photoshop.
These 3D texts used to be highly time-consuming and challenging to create. However, thanks to the development of Photoshop’s 3D tools, they are now relatively easy to design.
All it takes to create 3D text effects is Photoshop’s 3D tools, along with other adjustments such as shadows, contours, and bevels. In the article, we first provide a brief overview of 3D text effects. Following that, we will discuss two methods for creating the most stunning 3D text. Let’s jump right in!
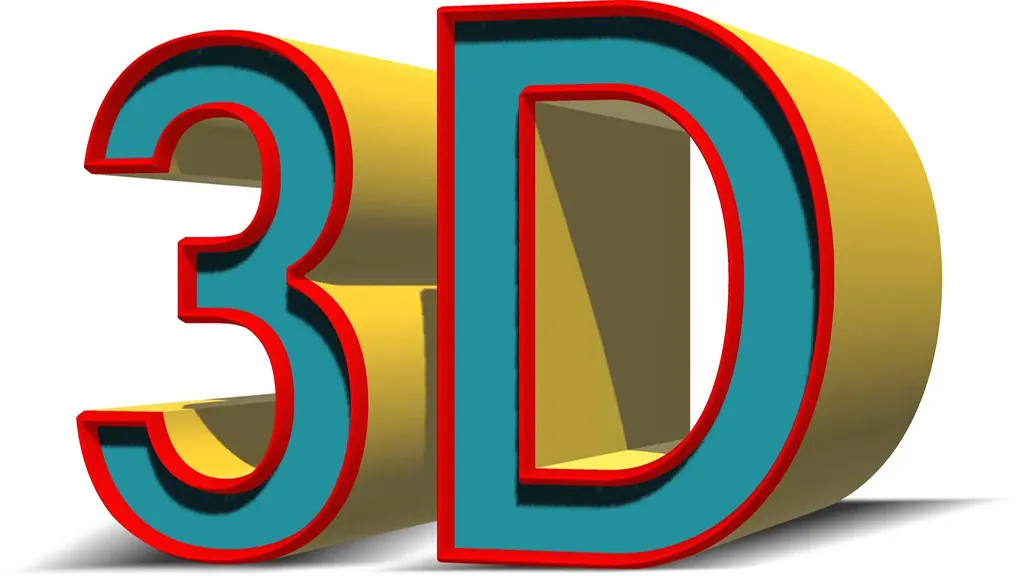
What Is a Simple 3D Text Effect?
3D text effects refer to a design technique that transforms flat text into a three-dimensional object. To accomplish this, Photoshop relies on depth, shadows, and lighting effects.
The 3D and Properties panels in the program can help you produce such texts. They provide options for customizing the text’s extrusion, bevel, and lighting.
A 3D text effect looks more dynamic and eye-catching than regular 2D types. It is therefore popular among motion graphics artists, VFX artists, and graphic designers.
Different Ways to Create 3D Text Effects
With Photoshop, you can create three-dimensional text effects in several ways. However, we found that two of them were the most effective and easiest to use.
Method 1 – Applying the 3D tool
In case you didn’t know about this gem, the 3D tool in Photoshop is one of the awesome features that lets you move, scale, or rotate 3D objects and change their views.
And if you have OpenGL support on your system, you’re in for a treat. For instance, you will be able to manipulate 3D models using a 3D Axis. So, let’s examine how this tool can assist you in creating 3D text effects.
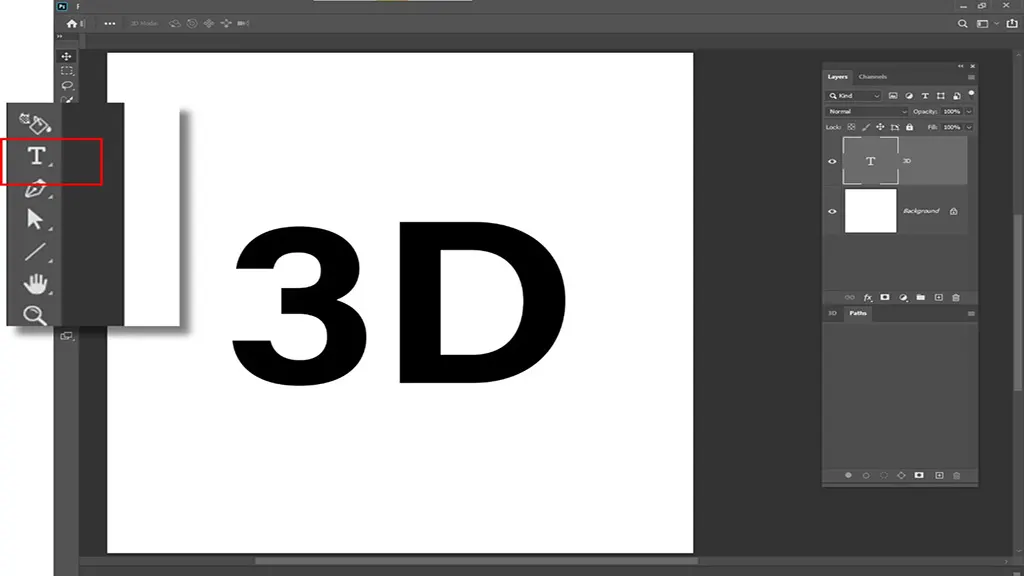
STEP 1 – Add Text to a New Document
First things first, you will need to start a new document. When the canvas is ready, you can type anything you like on it. As you enter text, you must adjust its colour and font. We recommend bolding the text at this time so that it stands out later.
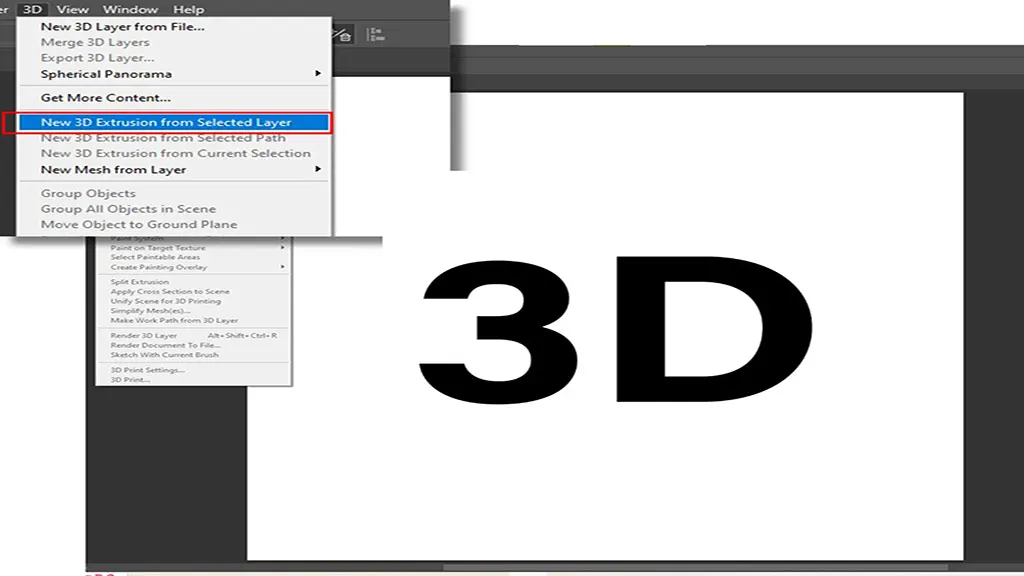
STEP 2 – Develop the 3D model
Click on 3D from the top menu bar. A pop-up window will appear displaying New 3D Extrusion from the Selected Layer. You must select it. Afterwards, the text should turn into a 3D model.
STEP 3 – Rotate the Angle
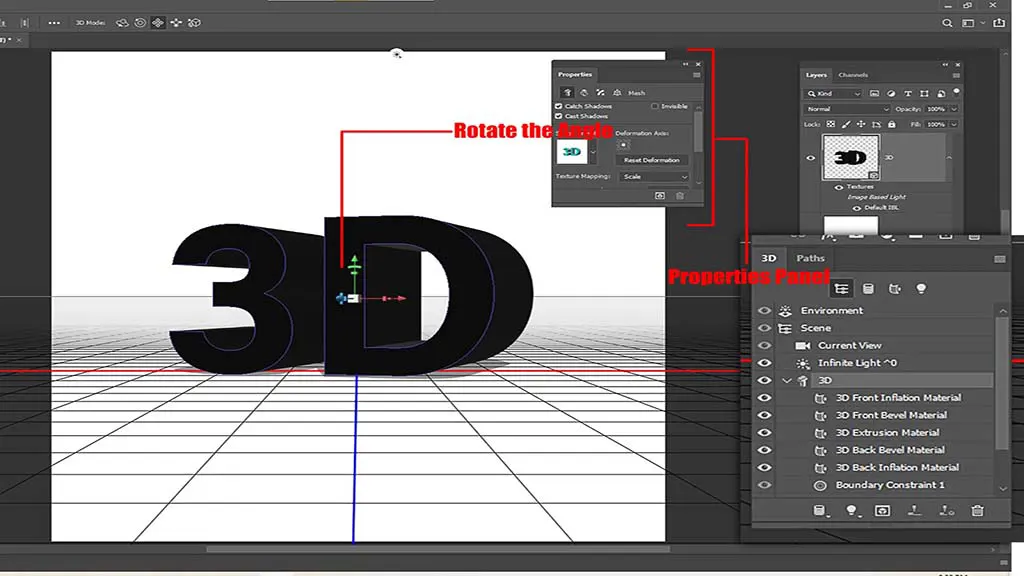
This is the perfect time to adjust the image’s angle. Locate Coordinates in the Properties Panel. You will come across quite a few values. The only thing you need to change is the X value to 90 degrees. It results in an immediate angle shift. If you are unable to observe it, simply rotate the camera.
STEP 4 – Adjust the Text’s Alignment
Back in the top toolbar, choose Orbit the 3D Camera. Select Canvas next. As soon as you click Canvas, drag the text to the front, and move it around. Soon, a blue vertical line will be visible, along with a red horizontal line. It means you aligned the text correctly.
STEP 5 – Fit the Shadow to the Image
You’re right; the alignment is great now, but what about those bizarre shadows? They are neither properly positioned nor sized. Fortunately, you have an axis in the centre to fix them. All you need to do is drag it to rearrange the shadow.
Some folks find even the mere presence of this shadow bothersome. If you are one of them, uncheck the Cast Shadowbox under the Properties window. It will erase the shadow in an instant. And that’s it; you have done all the basics to generate a simple 3D effect. You are free to render it right away by proceeding to STEP 9 if you want.
However, we would like to remind you that the effect is still in its infancy. You can add tons of effects to give it a distinctive look. Those interested in these tweaks are encouraged to continue reading.
STEP 6 – Set the Contour and Bevel
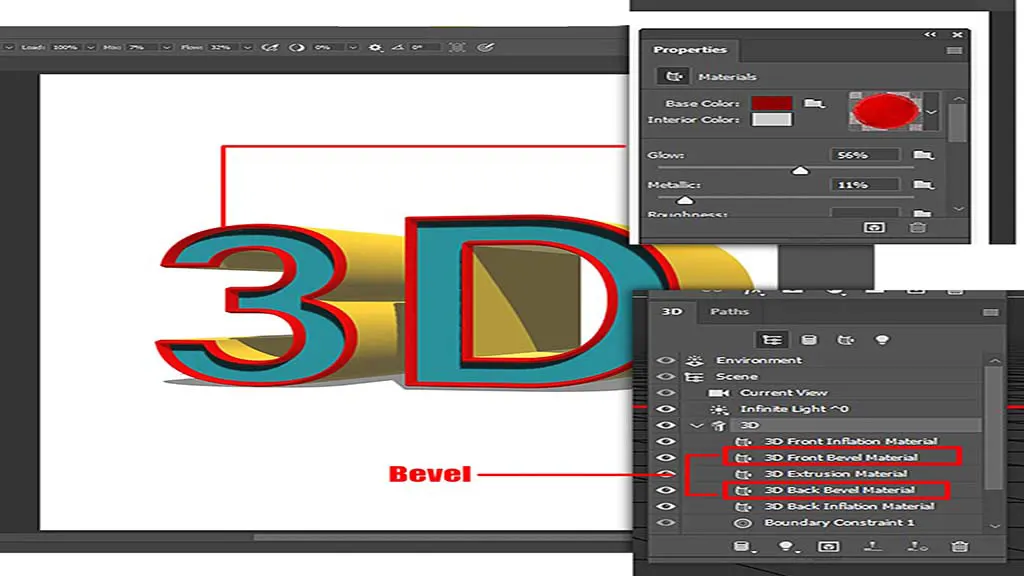
Return to the Properties panel and open Cap. It offers multiple functions, such as defining contours and bevels. There is just one drawback to Cap: It ruins shadows or makes them look artificial.
STEP 7 – Light Up the Surroundings
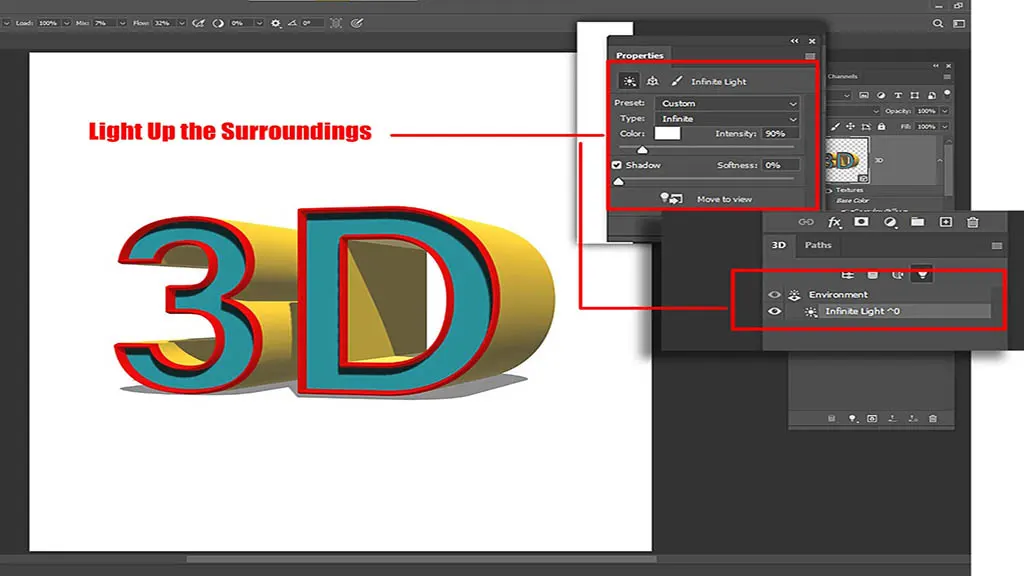
Don’t have enough light in your text? Open the 3D panel and select Lights from the Filter By menu. Now tap the light icon in the upper right corner to set your light source. It will display a circle that you can use to adjust the angle. Depending on your preferences, you may not be happy with the default shade, colour, or intensity of light. In that case, edit them in the Properties panel.
Some images may need more than one light source to catch the eye. You can add another one from the 3D panel by choosing New Infinite Light (which usually appears at the bottom-right).
STEP 8 – Colourise the Text or Change the Materials
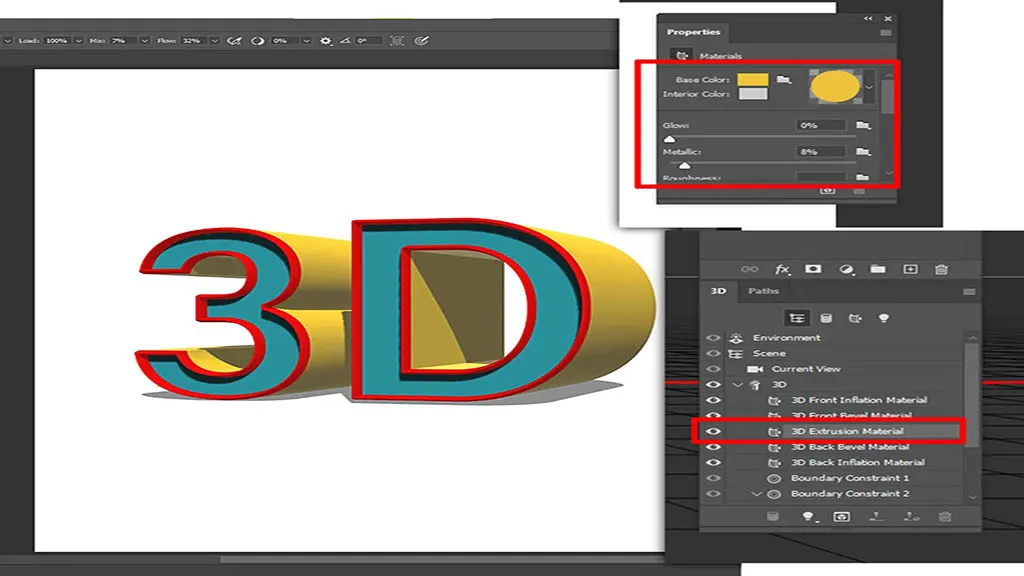
The colour you chose in the first step may have changed due to all the adjustments you made. To modify the colour again, click the Materials tab under the 3D panel and check all the boxes. Now you are ready to recolour or alter the text’s material.
STEP 9 – Bring the Effect to Life
You have finally finished making a spectacular 3D text. Now it’s time to render it. You can begin the procedure by clicking on Render.
Similar to video renders, a 3D text effect may take a while to render or even cause Photoshop to freeze. The system will automatically restore itself in a few minutes, so there is no need to worry. To further inspect how your effect looks, you can insert a background image from the Layers panel.
Method 2 – Creating 3D Effects Without 3D Tools
While the 3D tool offers many micro-adjustment options, many beginners may encounter difficulties using it. For them, we prepared instructions showing how to make a simple 3D text effect in Photoshop without using any complex tools.
STEP 1 – Write Your Message
Open Photoshop and create a new document. After that, choose the Text tool and fill the canvas with your words. Once again, it is a good idea to bold your text as this emphasises the effect.
STEP 2 – Duplicate the Layer
Create a duplicate layer of the 3D text. Next, click and drag the 3D copy or duplicate layer to the left.
STEP 3 – Put a Colour on the Text
Now you need to give the layer a new colour. However, you cannot simply pick any colour you want. Why is that? This is because the colour will later become the shadow. Hence, you must choose something dark and not too colourful.
As soon as you tweak the colour, the text turns into a three-dimensional image. Nevertheless, if you look closely, the layers do not seem to connect well. It’s okay, don’t fret. We will later apply the Lasso Tool to fill in all the gaps hidden between these layers.
STEP 4 – Rasterise the Image
Before working with the Lasso Tool, we need to rasterise the layer. To do so, make sure it’s selected in the layer panel and then right-click it. It will open a new window where you have to choose the Rasterise Type.
STEP 5 – Use the Lasso Tool
Your job now is to unleash the big guns, namely, the Polygonal Lasso Tool. Select it, then fix the areas where the text overlaps. You can place the first anchor by clicking once. Click once more to apply the shadow colour to the desired area. Please note that it is affecting the text at the bottom.
STEP 6 – Coordinate Foreground Colours
Let’s add the foreground colour to the layer this time. Make sure you match the foreground and shadow colours. To apply the foreground tone, hold down the Option and Delete keys simultaneously. The gaps should start closing immediately. Continue this process until no gaps remain. Using Command and D keystrokes together, you can deselect a spot that has already been checked.
STEP 7 – Draw With the Pen Tool
Straight lines are easy to fill. The problem arises when you attempt to handle curved edges. There is no better place to use the Pen Tool than here. You may use it to select curves effortlessly. Open the right-click menu and opt for Make Selection. And similarly to the previous step, hit Delete and Option at the same time, and voila, you’ve got the three-dimensional text.
It is possible to manipulate the image in a variety of ways, such as −
- Blending with a layer mask
If the image is blended using a layer mask, you can control the transparency and apply effects selectively.
- Combine the layers
It refers to merging multiple layers of an image into a single layer. This lets you set how layers interact with each other.
- Incorporating different styles
Another way to manipulate the text is by applying filters and layer styles. For example, you may add shadows, highlights, textures, and other special effects. Learn more about: How to Make 3D Text Effect in Photoshop.
Tips to Create 3D Photoshop Text Effects More Effectively.
Although producing 3D effects is not rocket science, there are ways to make your end product more distinctive rather than blatantly generic.
Here are some tips for that—
- Try to choose a font with built-in 3D features. Some are bevelled and have a drop shadow suitable for this application.
- As we mentioned before, use layer styles in your text. They improve the depth, texture, and other aspects of the image.
- Use gradients and shadows to create more realistic 3D text. Adding reflections will also boost realism.
- Lighten your text to generate different effects. Play around with various light sources and angles to maximise lighting.
- Text with 3D elements, including shapes and symbols, will attract viewers’ attention more easily.
Different Uses of 3D Text Effects
Many different applications can benefit from 3D text effects. Here are a few of them.
Video Editing
There’s nothing worse than boring plain text in videos. It’s sometimes barely visible unless you’re right next to the screen. A 3D effect solves this issue by adding a touch of pizazz to a video project. You can use them to create captivating titles, credits, and other visuals for your productions.
Text Art
Another prominent use for 3D text is stunning text artwork. The effects can be used to create beautiful typography and intricate designs. You may also design picture frames featuring quotes from literary greats and offer them for sale online. It makes for a fun side gig.
Web Design
With countless websites available on the internet, you need something special to set yours apart from the rest. 3D texts are probably what you’re looking for. They let you customise headers, menus, and other elements on your websites so that visitors are more likely to explore them.
Animations
Animating your 3D text effects will bring them to life. You can move the text left and right, ascend and descend, and recede the text from view using the right animation. In addition, there are some other opportunities, such as designing logos or even creating kinetic typography.
Architecture Signage
3D text effects can enhance the look of architectural signage. They complement the space by bringing a dynamic and bold aesthetic to it. These effects also play a role in creating a sense of motion, as they appear to move and shift as the viewer navigates the scene.
Backgrounds
Last but definitely not least, you can use 3D text effects as a background for websites, videos, and other digital projects. A text-based animated background is always superior to a solid-colored one, isn’t it?
Final Words
As you can see from these tutorials, making 3D text effects in Photoshop is surprisingly straightforward. The 3D tool is equipped with everything you need to render 3D texts from flat letters. This simplifies the process even further.
However, if you are unfamiliar with 3D tools and wondering how to make a simple 3D text effect in Photoshop, simply follow the second method, where we recommend using basic functions like Text and Lasso tools.