
How to Edit Photos of Older Adults Like a Pro in 6 Simple Steps?
- March 23, 2025
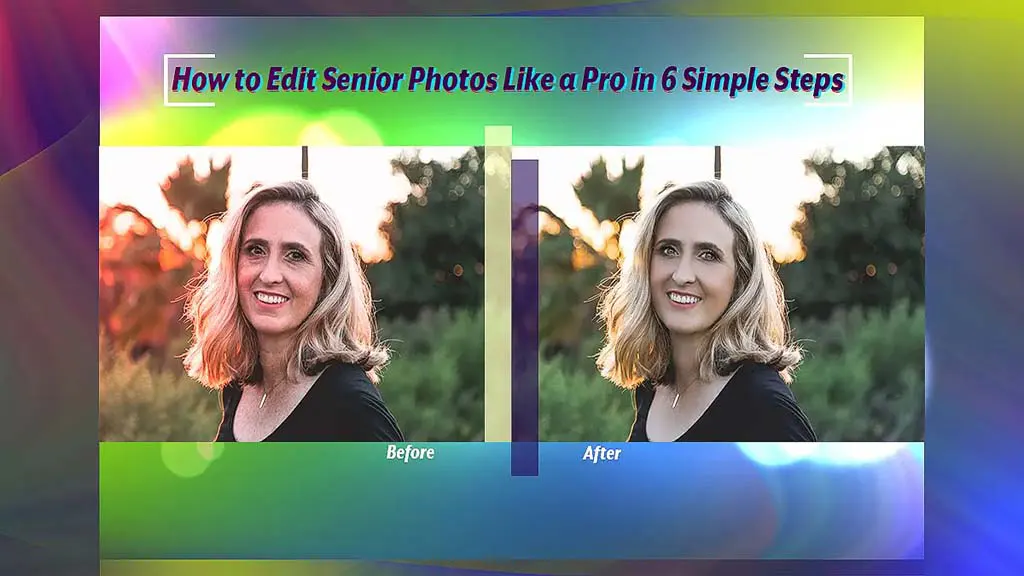
Whether you’re a professional photographer or just someone taking pictures of an older family member, editing photos of older adults is an important part of the process. With the right tips and tricks, you can easily create stunning images that will last a lifetime.
From choosing the right software to optimising colour and contrast, we got you covered, which will help you take your photos to the next level. So, without further ado, let’s dive in and learn how to edit senior photos like a pro!
Challenges of Editing Photos of Older Adults
Editing photos of older adults can be a unique challenge. Older people often have more wrinkles and blemishes that need to be edited out; their skin tones are typically less vibrant, and their hair is often greyer than it used to be.
Additionally, the lighting may not be ideal, which can lead to an overall dullness in the photo. It’s important to keep in mind that these challenges can be overcome with the right techniques and tools.
With patience and attention to detail, you can create beautiful and flattering older adult photos. But the concept of editing is to make the picture perfect, make its subject look better, and not completely change its authenticity. Therefore, portraits of older adults should preserve the subject’s natural appearance and authenticity.
How to Edit Photos of Older Adults in Adobe Photoshop?
With this popular Photoshop tool, you can edit older adult photos like no other. However, you need to go through some trial and error to create stunning photos of your loved ones. Here is a simple step-by-step guide to editing senior photos in Adobe Photoshop.
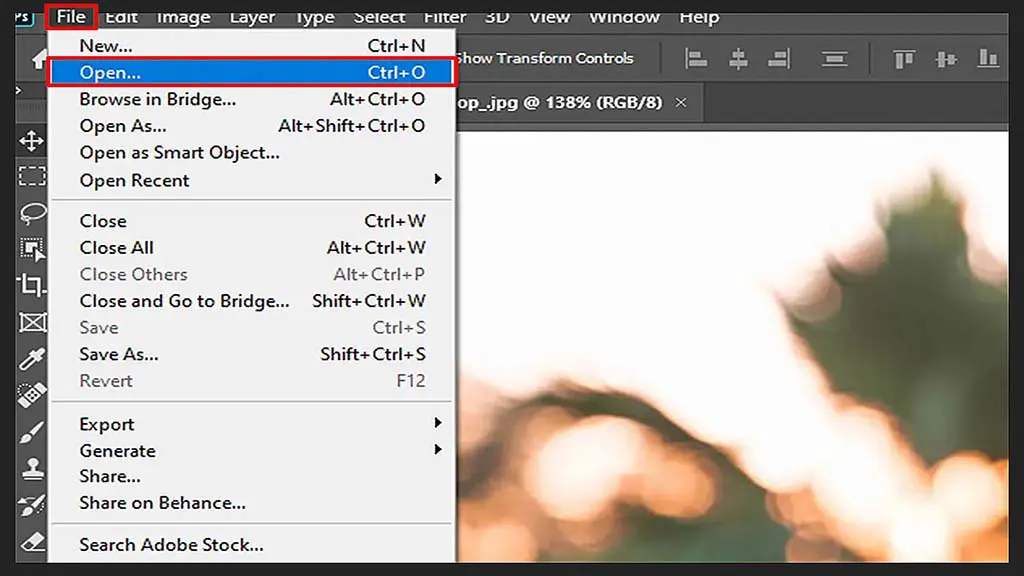
Step 1: Open Adobe Photoshop
Start by opening the photo in Adobe Photoshop. You can do this by selecting File > Open or by simply dragging the photo into the program window.
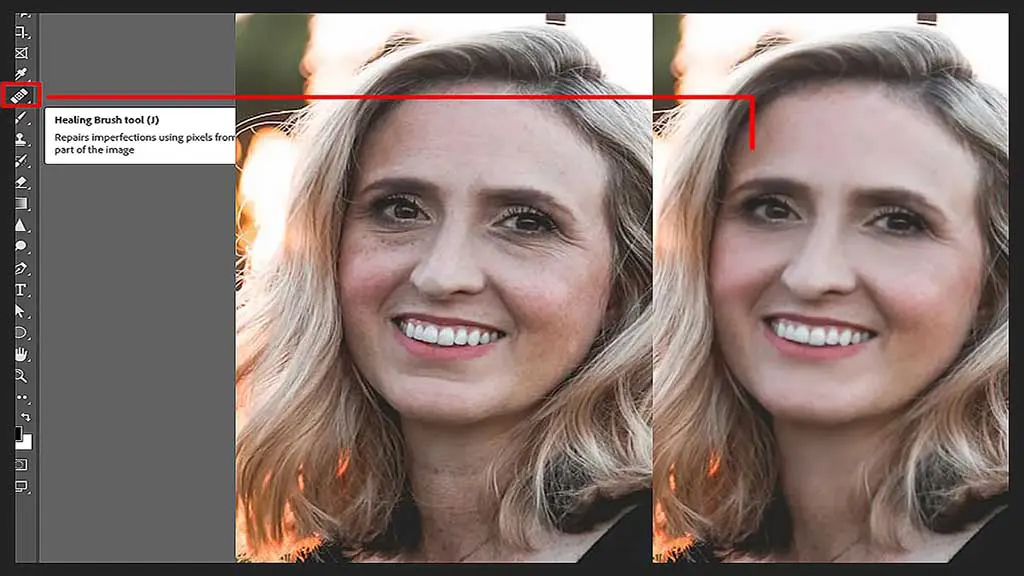
Step 2: Use the Healing Brush Tool for Blemishes
Smooth out wrinkles and blemishes with the help of the Healing Brush tool. Pick the tool from the toolbar on the left, then select the brush size and hardness to suit your needs. Next, start brushing away any wrinkles or blemishes you may see in the photo.
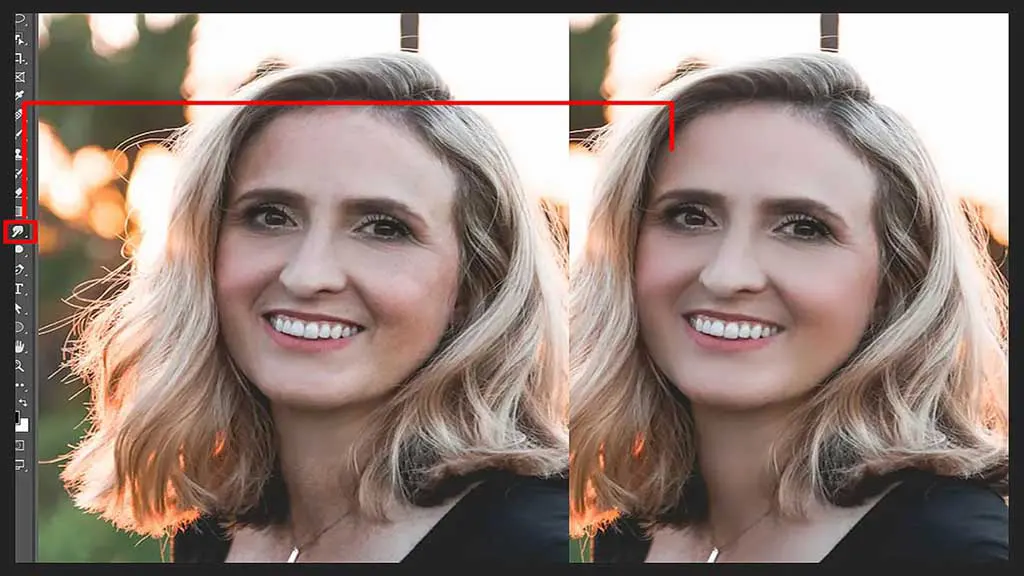
Step 3: Smoothen the Skin
Next, soften skin tones and give the subject a more even complexion using the Smudge tool. For that, select the Smudge tool from the toolbar, adjust the brush size and hardness as needed, and begin softly smudging the areas of the skin you want to soften. However, make sure you don’t overdo skin smoothing on photos of older adults, as it may look unnatural.
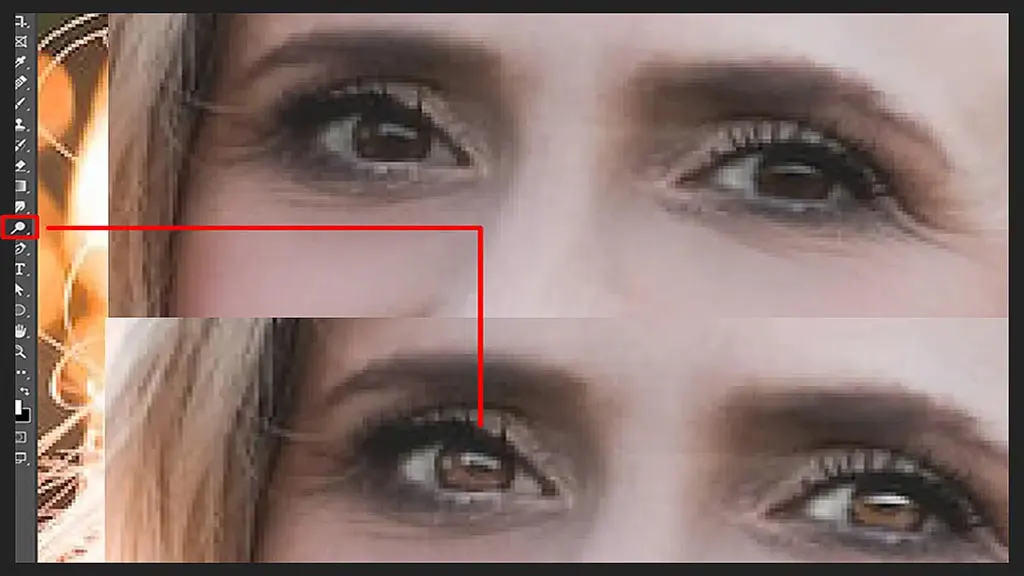
Step 4: Select the Dodge Tool
To make the subject’s eyes look brighter and more vibrant, you can use the Dodge tool. Click the Dodge tool on the toolbar, adjust the brush size and hardness, then begin brushing around the eyes to brighten them.
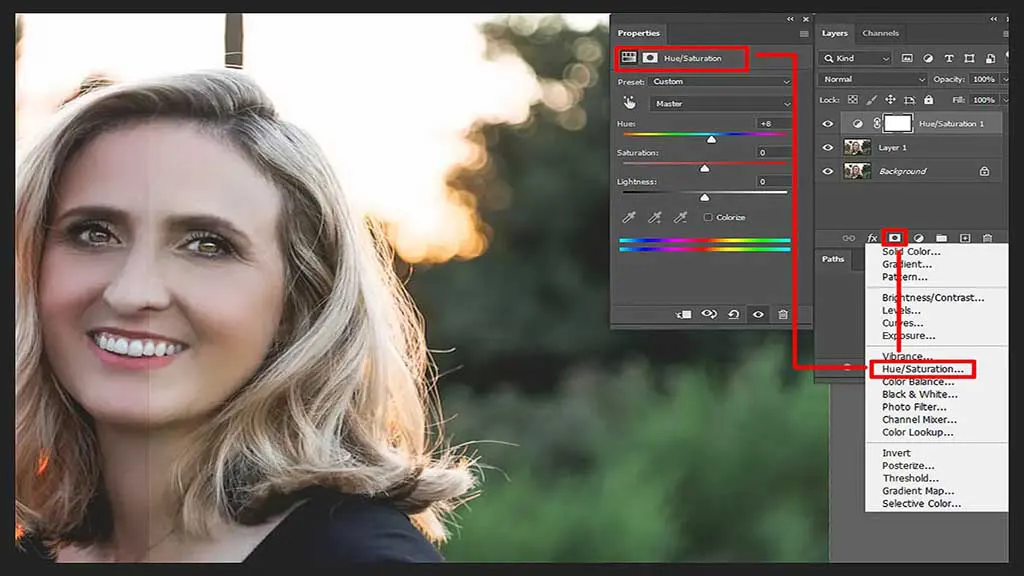
Step 5: Add Some Colour
To add a bit of colour to the photo, use the Hue/Saturation tool. Select this tool from the toolbar, then adjust the settings to your preference. Once you are done, click ‘OK‘ to save your changes.
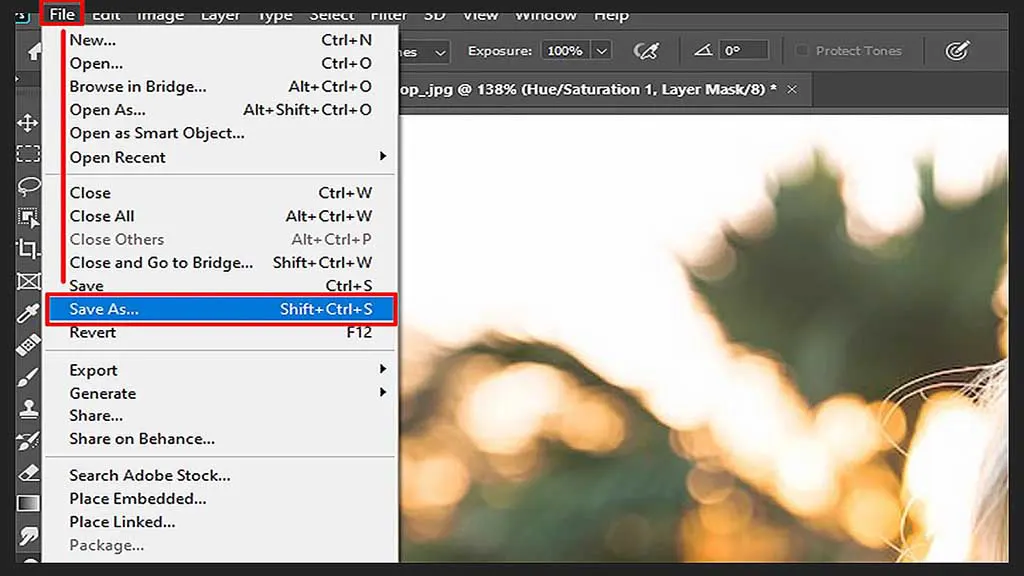
Step 6: Save Your Results
Finally, when you are happy with the results, save your edited photo. You can do this by clicking on File > Save As. Give your photo a name and choose a format in which you would like to save it. By following these simple steps, you can easily edit senior photos in Adobe Photoshop and create stunning results!
Easy Way to Edit Senior Photos With GIMP
Editing photos of older adults in Adobe Photoshop can be a challenging task, especially if you’re not familiar with the software. Luckily, by following this step-by-step guide, you will be able to edit photos of older adults with confidence.
Download GIMP
First, you need to download the free photo editing software GIMP on your computer. Once it is installed, open the software and load the photo you want to edit.
Add Some Colour
Then, use the brightness/contrast tool to make the subject brighter and more vibrant. You can also use the hue/saturation tool to add colour to the photo if needed.
Smooth Out Wrinkles
Next, use the clone stamp tool to help smooth out wrinkles and blemishes. Select the stamp and the source area you want to copy, and then brush it over the wrinkles and blemishes.
Experiment with different brush sizes, hardness, and opacity levels to find the best settings for your photo. This tool can be used to quickly and effectively edit older adult photos. Read more: Get Picture Perfect Hair: What are the Benefits of Hair Masking in Photoshop?
Final Thought
Editing portraits of older adults can be an enjoyable and rewarding experience. It is important to remember to take your time, be creative, and make adjustments with care. Keeping contrast and brightness levels in check and skin smoothing limited will help ensure that your photos look as good as possible. Following these steps will help you achieve amazing results when editing photos of older people.