Get Picture Perfect Hair: What are the Benefits of Hair Masking in Photoshop
- February 4, 2025

Though Photoshop offers several tools for image masking, hair masking is not as easy as it seems. It is undoubtedly a complicated task, as cutting the unnecessary hair strands from the original background is way too difficult. But why do you need hair masking, and what are the benefits of hair masks?
Basically, proper hair masking can create images with a properly cropped background and hair edges that are perfect for creating advertisements and magazine covers. Moreover, it also increases the transparency of any image after editing. In this article, we have discussed all the benefits of hair masks along with different types of masking techniques in Photoshop. So, let us just get into this!

Benefits of Hair Masks in Photoshop: Methods of Hair Masking
There are a bunch of methods for hair masking with Photoshop, which are efficient in their own ways. These methods have certain options for regulating pixel opacity without affecting the quality of the original picture.
You can use them at your convenience to create a clearly edited photograph. Generally, Photoshop provides you with five techniques of hair masking. These are briefly stated below.
Pixel Masks
For complex imagery with hair strands or fur, pixel masks work great, as you can determine the opacity value of any raster image. The greyscale values represent the light intensity value of each pixel of an image. This Photoshop hair mask provides you with 100 grayscale values of any two-dimensional or raster image, which is associated with the percentages of pixel opacity.
Advantages
- Easy to control the transparency of a certain layer
- It is possible to refine the mask if needed further.
- Allows the regulation of pixel opacity
- It can be modified using different filters and adjustments.
Disadvantages
- Degrades the image quality if used for rescaling
- Due to the raster format, there can be unwanted artefacts and blurriness.
- Doesn’t provide perfectly smooth edges and curves
Quick Masks
You can create a certain selection on any picture by using quick masks, as they are effective for removing overlays more precisely. After you apply a quick mask, an overlay of semi-transparent colour is generated on the image. You need to edit the overlay and remove unnecessary parts of the picture. These removed parts are included in your desired selection.
Advantages
- Can create any complex mask by varying the opacity
- It is possible to change the colour of the mask mode.
- Can remove hair with a clear visual representation
- The target of the mask overlay can be changed.
Disadvantages
- Difficult to crop the small edges from an image
- The overlay might create difficulty in determining the masked area and the selected area.
- Not so flexible for defining various shapes
Vector Masks
If you want interface elements with clean and smooth edges, vector masks are undoubtedly a viable option. It can define various shapes in your picture with excellent flexibility.
Editors often use a hybrid mask for hair masking, consisting of pixel and vector masks. It enables you to extract certain objects from any complex area of a picture.
Advantages
- Ideal for defining interface elements
- Can crop small edges precisely
- Fill layers created by this mask are more flexible compared to the raster level.
- Can resize any part of the image without modifying the original data
Disadvantages
- Can’t regulate pixel opacity
- An image needs to be rasterised before applying this mask.
- There is no overlay on the mask preview.
Clipping Paths
For specifying certain shapes of different objects, clipping paths can do wonders as they can create crisp and clear edges. Though clipping paths can be used for cutting specified objects like vector masks, these are a bit different. Vector masks are applied on a certain layer or a group of layers on an image, while clipping paths work on the entire document, cutting a certain area.
Advantages
- Can crop specific, shaped objects
- Ideal for smooth finishing on the edges
- Can be applied to multiple layers
- It is possible to change the density of the mask.
Disadvantages
- Without a saved path in the mask, a document can’t be clipped to the path.
- Removing hair can be difficult without the mask overlay.
- Can’t regulate the pixel opacity
Clipping Masks
When you need to use the same mask on multiple layers on a certain image, using clipping masks can be advantageous, as you can acquire the pixel opacity from the bottom layer.
Masking a layer group doesn’t always give effective results, and that is where clipping masks can help you out. Moreover, you can clip a huge number of layers into a single layer by creating a clipping mask.
Advantages
- Ideal for using adjustments on a single layer
- Doesn’t affect the underlying layer while working on a certain layer
- Grouping multiple layers and adjusting them is easier with this mask.
- Allows linking several layers
Disadvantages
- Can’t crop perfect edges from an image
- It is difficult to control the visibility of the layers with this mask.
- It is a must to have two layers while applying this mask.
How to Do Hair Masking in Photoshop
Hair masking is undoubtedly one of the most challenging and difficult tasks for photo editors, as you need to remove every single strand of hair perfectly. But if you have proper knowledge of advantageous Photoshop tools, it is not that hard.
Here we have presented a step-by-step procedure for hair masking with Photoshop so that you can learn and apply those effects to your projects.


Step 1 – Selecting the Subject
First, select a subject that you want to crop out of the original image. After that, select the portrait layer of the subject and unlock it to remove the original background. Now, click the Quick Action from the Properties panel and remove the background.
Step 2 – Fine-Tuning the Mask
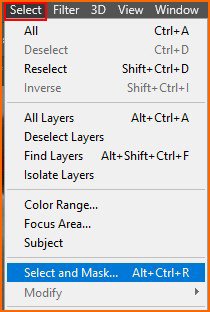
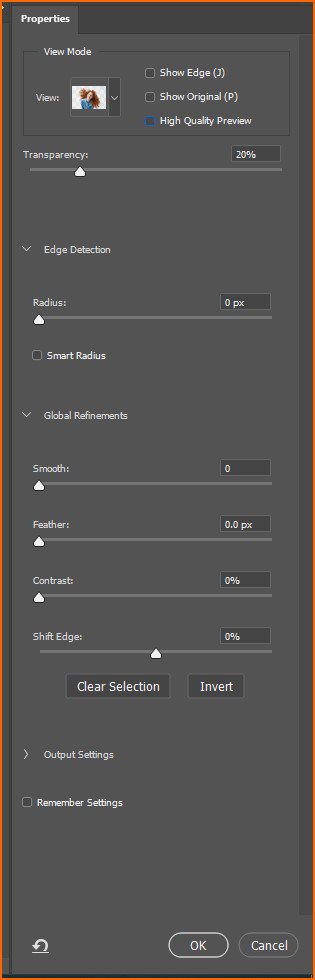
Select the thumbnail of the layer mask and click Select > Mask. Now, select View Mode > On Black to refine the cropped edges from the outer shape.
To remove the uneven parts and bumps from the edges, select the Refine Edge Brush and drag it on certain points. Now, select the Shift Edge Slider and drag it on the mask outlines to fix the imperfections.

Step 3—Using A Preferable Brush
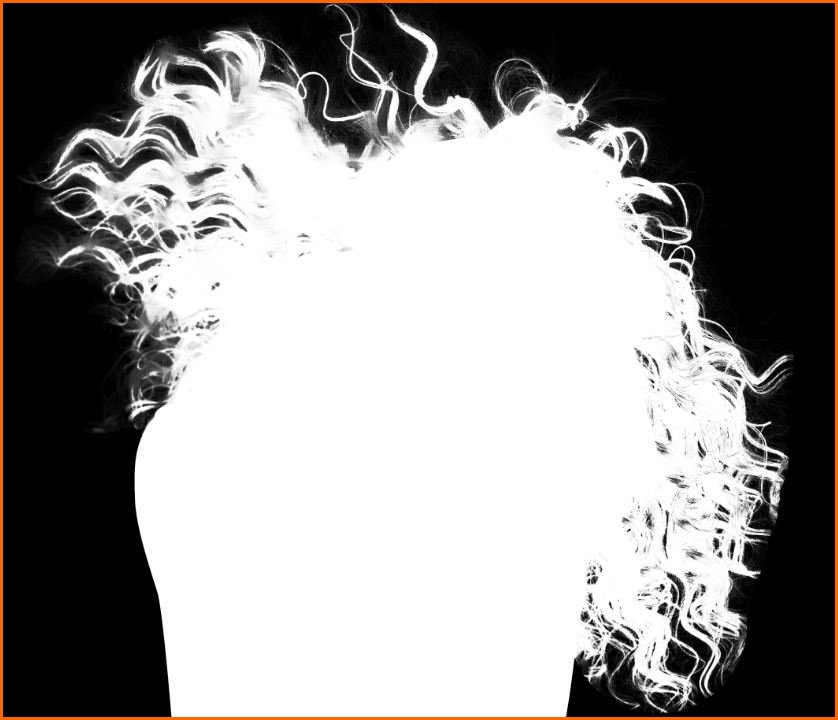
For a smooth finish on the cropped image, often, editors use custom brushes depending on the hair colour and type. Select any photo containing hair that is contrasted with your hair image. Now, crop the hair part and change the colour by selecting Adjustment > Levels. Make the background white and the hair black. Finally, select Edit and define it as a Brush Preset to create your custom brush. You can now use it for additional effects and finishing on the hair.
3 Practical Photo Editing Benefits of Hair Masks in Photoshop
For cutting certain parts from images or changing backgrounds, people often think of using erasers. But if you want to remove specific elements like hair strands, erasers might disappoint you very badly.
Hair masks can be a game-changer in such a situation and create clean images with crisp outlines and edges. Hair masking in Photoshop can provide you with the following benefits.
Removing Background from Images More Effectively
In model photography, hair masks are used widely as perfectly cropped hair strands set a higher standard for an image. By using it, you can cut your desired portions of a picture and change the background more effectively by taking care of complexities and smaller details.
Creating Smoother Boundaries and Edges
As there are different types of hair masks, you can use them as per your requirement for certain images. By using a vector mask and a clipping path, you can create smoother boundaries and exquisite edges of the hair. You can even extract the most difficult hair shapes from a picture with these masks.
Maintaining the Transparency of Images
If you use hair masks for cropping out the shape of hair strands, it can create transparency in the image by increasing visibility and adjusting the opacity. Hair masks don’t affect the clarity of pictures; instead, they help to refine an image to transform it into a clearer version.
Final Words
The modelling and magazine industries are mostly dependent on hair masking services, as hair masks can increase the natural look of hair even after massive editing. Though hair masking can be quite a tricky job, it can perfectly edit images with minimum damage to the image quality.
Hopefully, this article has cleared up your idea about the benefits of hair masks in Photoshop. If you are not a professional editing expert, make sure to get professional clipping path service providers, as it is not a good idea to use hair masks without proper experience and training.