How to Swap Faces in Photoshop: Step by step guide 2025
- October 30, 2024
In a group photo of family, friends and colleagues, often we might have seen someone who is not in the right facial expression. One may be not smiling, looking at the wrong direction, eyes may be closed or blinking, or having with a weird face. ‘Swap faces’ is a marvelous photo editing technique that can solve these issues by blending in a better version without snapping another photo again, so everyone looks great!
Table of contents
What is ‘Swap Face’ technique?
Technically ‘Face swapping’ is a replacement of a new face onto another face in a precise way. This image editing skill is so effective and serves versatile purposes in different industries.
For an ecommerce business, advertisers may need to replace faces of models or actors’ images used in a product in order to promote the brand.
From the very personal life to the purely entertaining, for fashion brands ‘Swap faces’ are commonly needed to transform images to life in beautiful ways.
This photoshop skill is so easy and interesting. Any novice or beginner can learn easily how to manipulate images for creative endeavor and entertainment by reading this latest step by step guide to swap face.
In this article we have discussed the best and professional ways to swap face editing techniques and its necessities.
Best way to swap face in photoshop
‘Creativity is intelligence having fun.’
— Albert Einstein
‘Swapping faces’ is all about replacing one face with another in a photo. To get the best results, it’s important to focus on a few key elements before starting the process.
There are several techniques of ‘Swap Face’ in photoshop, that includes the quick and easy method of swapping faces using a masking layer and quick selection tool [W]. On the other hand, the more professional method is through ‘Object Selection Tool’ which involves detailed adjustments like color correction, lighting matching, and precise blending for an aesthetic result.
Here is the step-by-step guide to be master on ‘Swap face’ in photoshop:
Step 1. Image Selection
Storm your brain first, select a new image that closely matches the target or original photo where you want to place with a new face. Make sure the photos have similar features like in terms of size, color, lighting, face direction and age.
Pay attention to matching the light color, less shadow, soft lighting, and size of the faces in both images. This image selection step is important in making the swap look natural.

Step 2. Opening Images in Photoshop
Open both images in photoshop from the menu,
File→Open or by clicking Ctrl + O in Windows and Command + O on Mac.
Do it for both images.
TIPS: Work with a face that’s larger than the face you’re trying to swap out. It’s easier to fit a large face over a small one. This practice will save your resolution problem when resizing.
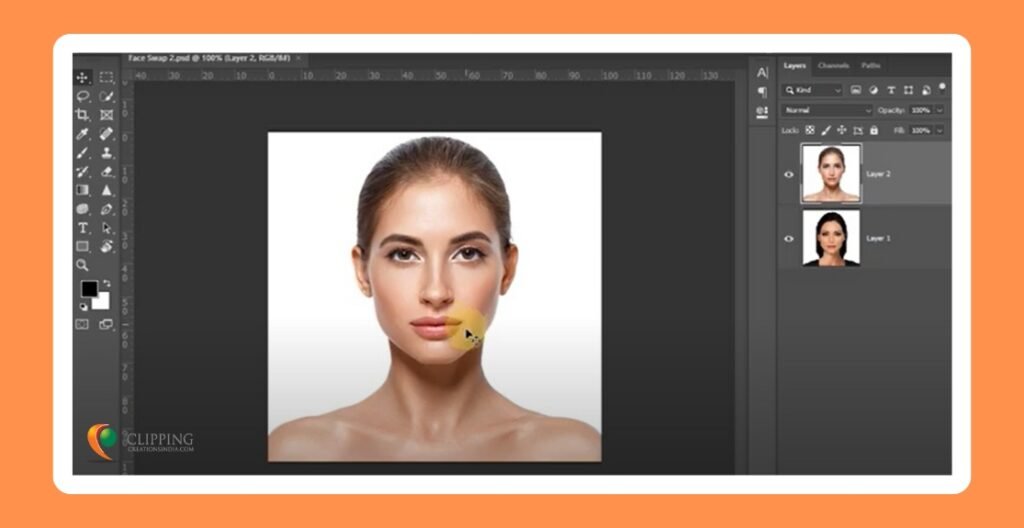
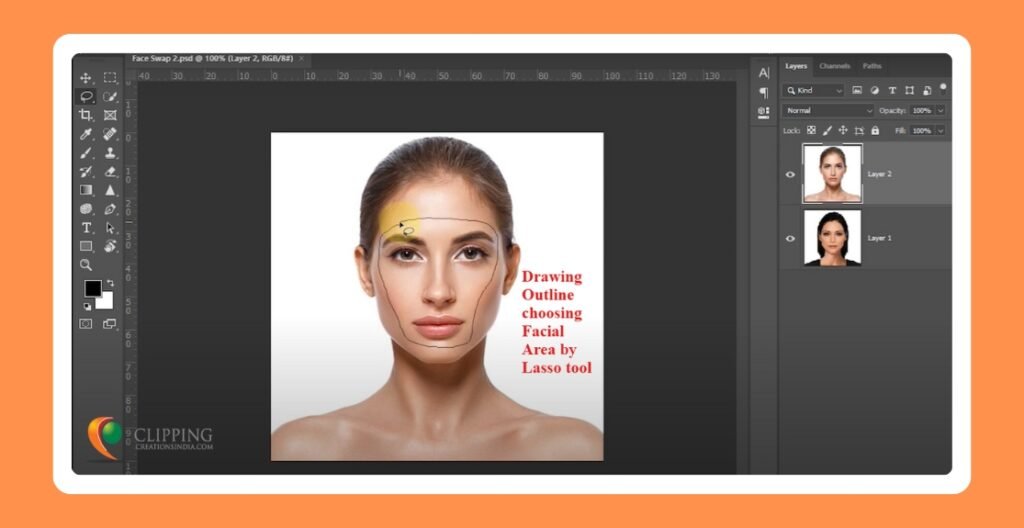
Step 3: Drawing Outline
We will start working with the new image. Make sure that the layer of image is correctly selected. Use the Lasso Tool in order to select carefully with your mouse, drawing an outline around the facial elements like brow, eyes, nose, lips you want to capture.
Avoid selecting any of the model’s hair.
Step 4: Copy and paste
Now you see a border of dashed marque lines around your selection.
Then, copy the outlined portion by pressing ctrl+c {com+c} or go to edit>copy from the dropdown menu and paste it by typing ctrl+v {com+v} or choosing edit>paste, on the original image.
Or you can simply drag the selected part and drop on the new image.
This copied part may be larger than the original face.
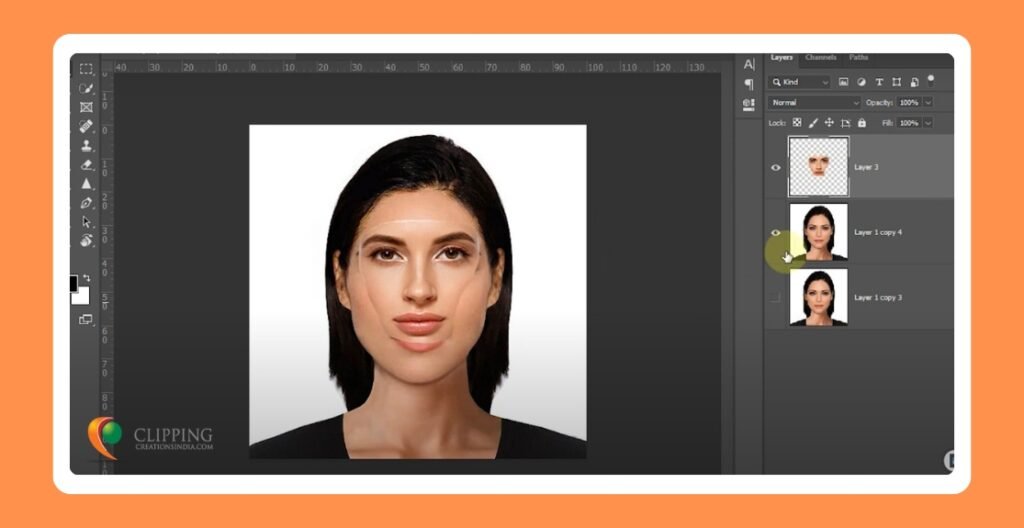
Step 5: Resize and adjust
Then by using the Move tool or cursor, you can resize and align the elements you pasted to the original features. In the layers panel, rename and save the new Face layer. Next, reduce the opacity by 50 percent so that the original image can be seen underneath the face you are working with. Match the brows, eyes, nose and other features exactly.
Reset the opacity of your Face layer to 100%.
Tips: You need to duplicate your background layer for safety, and you can also retain your original image to improve by small additional strokes or alterations.
To duplicate the background layer, select the layer containing the original image.
Go to the Layers panel menu and click Duplicate Layer from the dropdown of the Layers panel options.
Or, you can type keyboard shortcut CTRL+J (COMMAND+J on Mac) to duplicate the layer without needing to access the Layers menu.
Step 6: Little overlap of the face with the body layer
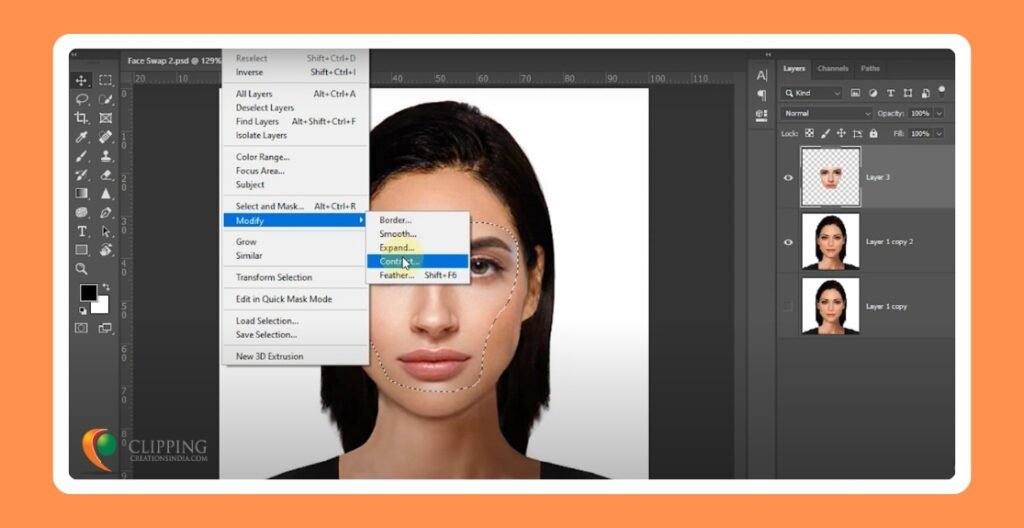
Now, you need to create a little overlap of the new face, when you paste the new face, with a view to blending the cut-out image with the original part smoothly. This step is divided into two parts.
01. First, you need to select the new face and click Select > Modify > Contract. Enter the pixel value 10px in the and click OK.
Turn off the eye icon next to the new face layer.
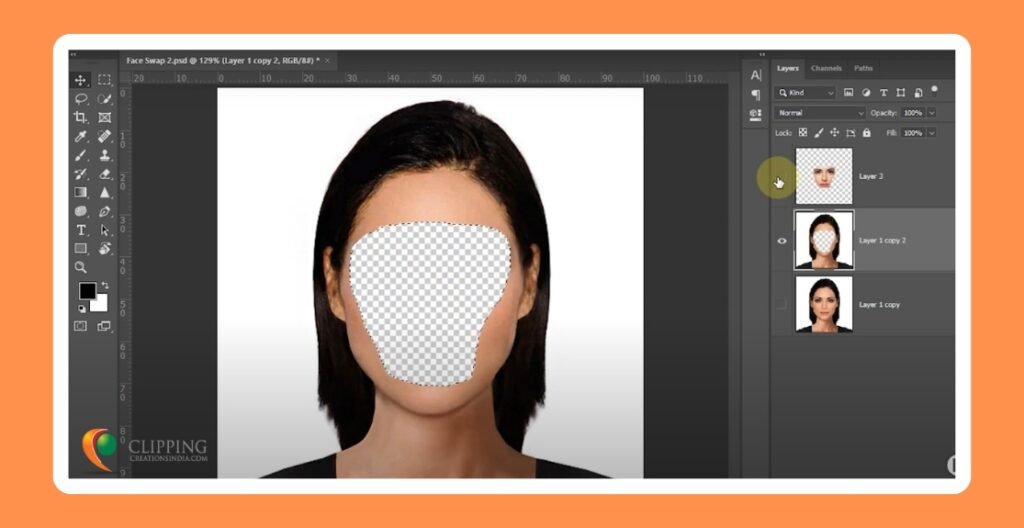
02. At the second stage, select the body layer where the face will be replaced. To do so, Control + Click (or Command + Click on Mac) on the thumbnail of the layer containing the new face. Next, click on the body layer which contains the original image of the old face. A selection in the shape of the new face’s cutout outline should be visible.
7. Delete the face from the Body layer
Keeping selected with the body layer, press Backspace {Delete on MAC}. This will remove the area beneath the face or original Face part. Deselect by typing ctrl+D {Command+D}.
8. Blend the images together
Turn on the eye icon to make it visible again. Now you will see the face and body together. Blending images is easy.
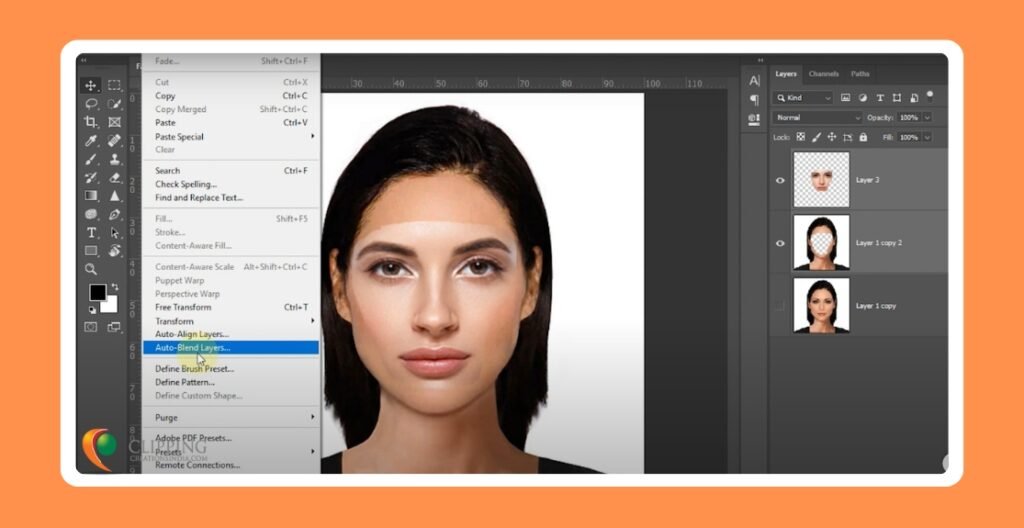
In your Layers panel, select the new Face and Body or original layers at the same time by holding down the SHIFT key.
Then, go to Edit>Auto-Blend Layers, in the pop-up menu there appears Panorama select it as blending option and keep the box for Seamless Tones and Colors and Content Aware Fill Transparent areas checked. Click Ok.
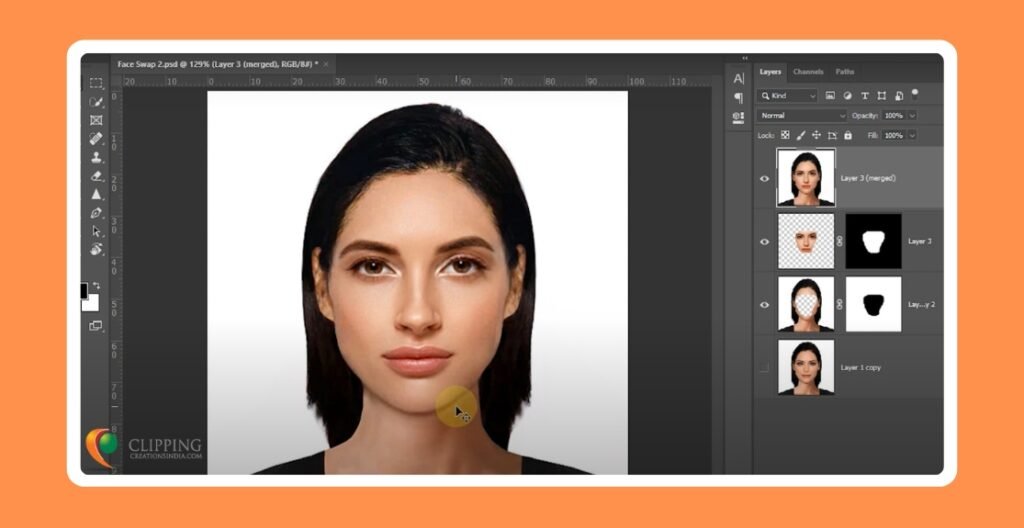
You will now see a new combined layer where the two faces are seamlessly merged together.
9. Final touch-ups:
Lighting and skin tones can look different in photos, so a person’s appearance might vary from one picture to another. It’s always a good idea to zoom in when doing your final touch-ups to catch these subtle differences. For a more realistic face swap, getting a close-up view helps you fine-tune details. Lastly, don’t forget to save your work. File > Save.
01. The Auto-Blend Layers feature doesn’t always work perfectly, but you can easily fix any subtle flaws it leaves behind. Use the Eraser tool to clean up visible edges, or the Blur tool to soften harsh lines. Adjust colors, tweak brightness, saturation, and opacity, or make any other edits needed to get the look just right.
02. Liquify filter has a Face-Aware feature in photoshop that lets you adjust facial features like eyes, nose, and mouth, which can help in blending swapped faces more naturally.
03. Content Aware Fill can blend parts of a face with the background for simpler swaps, but it offers less control than manual masking.
Tools like Adobe’s Neural Filters is an AI based tool for quick face swaps. They can provide instant results but often lack the precision of manual Photoshop techniques.
Necessity of swap faces in different purpose
Here we are going to shed some light on the necessities of face swapping in various personal and commercial contexts. Widely used in image editing, particularly in e-commerce and fashion industries, face swapping offers a versatile and broad range of applications. Let’s dive into some of the most common purposes it serves:
1. Correcting Group Photos: Swapping faces from different shots of the same scene ensures everyone looks their best, creating a perfect final image.
2. Old Photos Restoration: For restoring damaged historical photos or enhancing old family pictures swap face technique utilized by replacing damaged or faded faces. Thus, this skill helps to preserve memories and improves the quality of valuable images.
3. Creative Projects and Art: Artists and designers often swap faces for artistic expression or compositions.
4. Advertising and Marketing: In advertising and marketing, ‘face swap’ skill is necessary in putting a model’s face on a product and enhancing visual appeal and relatability.
5. Film and Entertainment: In movie posters, promotional images, face swaps in photoshop is necessary to align actor appearances especially when a stunt double’s face is required to match the main actor. It saves time and the cost of reshooting.
6. Social media and Memes: Face swaps are popular in social media posts and meme culture for humorous or satirical content. Provides entertainment and engages audiences through playful manipulation of familiar faces.
7. Celebrity Edits for Magazines: Magazines often love using a good face swap of celebrity characters for a catchy headline or editorial. It grabs the attention of readers, inspiring them to get in the full content.
Swap Face Technique-Try yourself:
Now you know how to swap faces in Photoshop—pretty easy, right? By following this step-by-step guide, you have learned to ‘swap faces’ onto any image without needing professional skills. Face swapping is useful in many industries and can be a great way for freelancers and small agencies to earn money. Many international businesses need this kind of ecommerce image editing service on a large scale. Clippingcreationsindia is a well-known agency for outsourcing image editing services and has been serving clients USA worldwide for over a decade.
Please Contact us if you need any help regarding the Image Editing Service.