How to Photograph Reflective Products In 2025
- January 31, 2024
Reflective products are tricky! Ever thought about how to photograph reflective products?
If not, let us show you the right approach and equipment. Take beautiful images to showcase the product’s details. Because your products deserve it! Our guide today will simply walk you through the step-by-step process of photographing reflective products.
Let’s take you through each step. Who are you? A beginner who is struggling with reflective products or a professional photographer. We will open up the knots of photographing reflective products.
By the end, you will find yourself successfully shooting reflective products. Showcase the details and make them more beautiful. Let’s have a look at how to photograph reflective products and capture beautiful images instantly.
Why Reflective Products Are Tricky to Shoot?
Shiny or reflective stuff can be tricky. Here are some common ways to deal with them:
- Too Much Glare: Sometimes, there’s too much shiny light. It is even hard to see the product, such as the Diamond, or a glowing bulb. In this case, you have to adjust the lights’ angles or use a special filter to reduce the glare.
- Background Reflections: The reflective product shows reflections from the background. You have things messy. Choose a plain background and try using black cards to block unwanted reflections.
- Fingerprints and Smudges: Fingerprints or smudges on the product can show up in the photo. You can clean the product thoroughly before taking pictures to avoid these distractions.
- Hard-to-See Details: Reflective surfaces might hide the product’s details. Experiment with lighting and angles to reveal the important features.
- Unwanted Shadows: Shadows can appear where you don’t want them, making the photo less clear. Adjust the lighting setup to minimize shadows or use additional lights if needed.
- Uneven Lighting: Some parts of the product may look brighter or darker than others. Arrange lights evenly around the product to get consistent lighting.
- Get the Right Focus: The camera might struggle to focus on the reflective surface. Use manual focus or focus on a non-reflective part of the product before adjusting.
- Camera Reflections: The camera or photographer might accidentally show up on the reflective surface. Be mindful of the camera’s position, or use a remote control to avoid being in the shot.
Remember, it might take a bit of experimenting to get it just right. Don’t be afraid to try different things until you find what works best for your reflective products.
How to Photograph Reflective Products?
Don’t rush into shooting. First, make a few things on the list. Check the list below.
You Will Need,
- Camera: Use a good-quality digital camera with manual settings for better control.
- Tripod: Stabilize your camera to avoid shaky shots.
- Light Source: Ensure even and diffused lighting to minimize reflections.
- Background: Choose a neutral background to highlight the product.
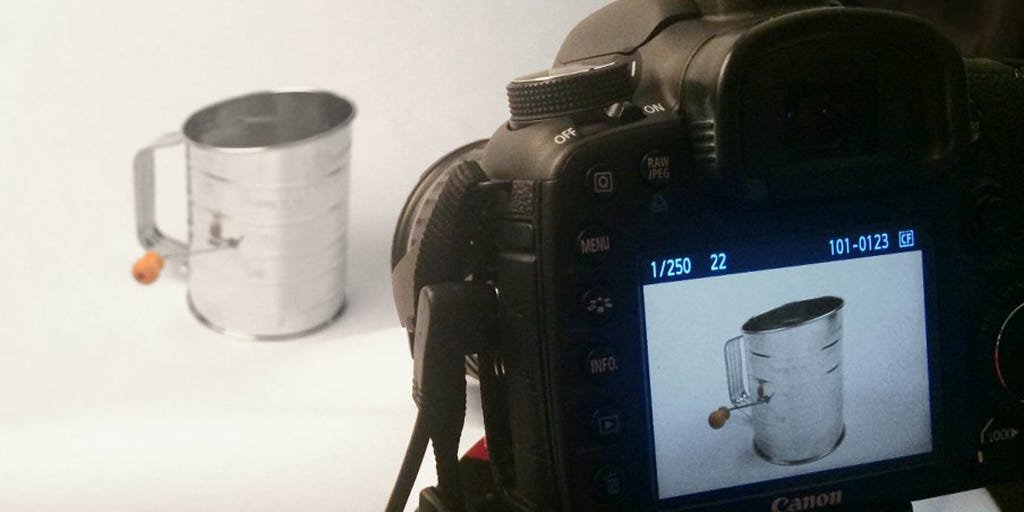
Step 1: Set Up Your Workspace
Set up your shooting area in a room with minimal natural light to control reflections. Place the reflective product on a flat surface, ensuring it is clean and free of smudges or fingerprints. Use diffused light sources, such as softboxes or umbrellas, to minimize harsh reflections. Position them at an angle to illuminate the product evenly.
Step 2: Camera Settings
Now, get to your camera. Have your camera in manual mode for better control over exposure. Choose a narrow aperture (higher f-number) to increase the depth of field and capture more details. Use a tripod to allow for longer shutter speeds without introducing motion blur. Keep ISO low to reduce noise in the images.
Step 3: Dealing with Reflections
Analyze the reflective surfaces of the product and surrounding elements. Experiment with different lighting angles to minimize unwanted reflections. Attach a polarizing filter to your lens to reduce glare and reflections. Place black cards or flags strategically to block reflections and control light direction.
Step 4: Post-Processing
Use photo editing software to fine-tune your images. Adjust brightness, contrast, and exposure to enhance the overall image. Eliminate any unwanted reflections or distracting elements in the background. Apply subtle sharpening to improve the product’s details.
Step 5: Test and Repeat
Periodically review your images on a computer to identify areas for improvement. Based on your review, make necessary adjustments to your setup, lighting, or camera settings. Continue refining your approach through trial and error until you achieve the desired results.
Overview
Photographing reflective products requires patience and attention to detail. By following these simple steps and making incremental adjustments, you can capture professional-looking images that highlight the unique features of your products. Remember to review and iterate to continuously improve your photography skills in this specific context.
Let us know in the comments about your experience with reflective products. After reading our article, we believe you won’t face any obstacles. For professional support, contact us today.