How To Get Rid Of A Double Chin In Photoshop: Goodbye to Double Chin!
- October 4, 2023
Welcome to our comprehensive guide on how to get rid of a double chin in Photoshop. Is it really important to remove the double chin?
We totally appreciate and nurture the natural presence of your body. But sometimes a double chin may not be what you have been looking for in a beautiful photo.
In fact, many of us have faced unexpected photos that make us wish we could magically get rid of that extra chin.
Thankfully, with the powerful tools and techniques available in Adobe Photoshop, you can effortlessly transform your images and achieve a more flattering look.
In our step-by-step tutorial today, we’ll walk you through the process of removing a double chin and enhancing your portrait like a pro. So, let’s dive in!
How To Get Rid Of A Double Chin In Photoshop
Removing a double chin in Photoshop can be accomplished through various techniques and tools. Here’s a step-by-step guide to help you achieve a natural and flattering result:
Step 1: Open Your Image in Photoshop
Launch Adobe Photoshop and open the image you want to edit by going to File > Open.
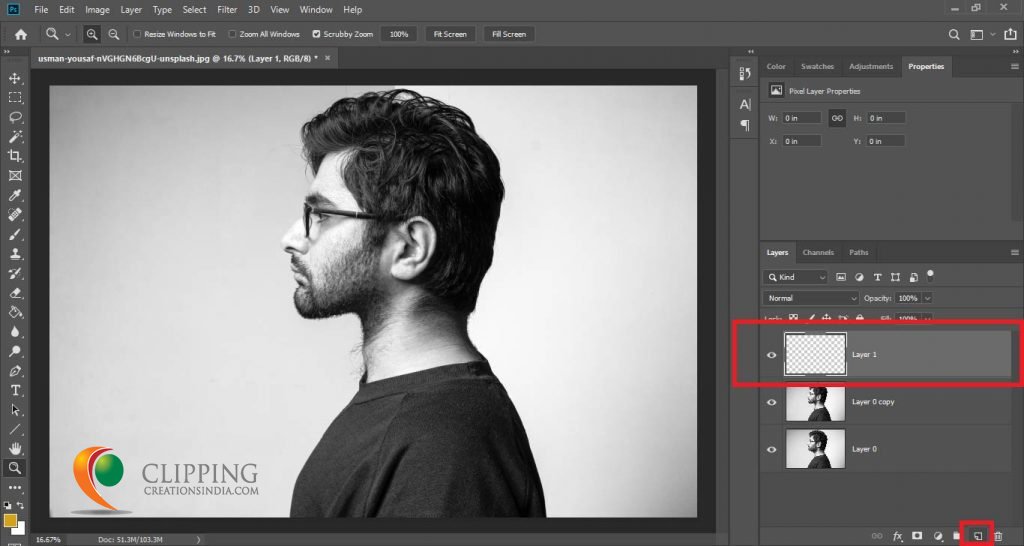
Step 2: Duplicate the Layer
Before making any edits, create a duplicate layer to work non-destructively. To do this, right-click on the Background layer in the Layers panel and select “Duplicate Layer.”
Step 3: Select the Lasso Tool
Select the Lasso Tool (Shortcut: L) from the toolbar. Draw a rough selection around the double chin area. It doesn’t have to be precise at this stage.
Step 4: Refine the Selection
With the selection still active, go to Select > Modify > Feather. Enter a small value (around 1-3 pixels) to soften the edges of the selection for a more seamless result.
Step 5: Create a Layer Mask
With the selection still active and the duplicated layer selected, click on the “Add Layer Mask” button at the bottom of the Layers panel. This will create a layer mask that hides the selected area.
Step 6: Use the Brush Tool
Select the Brush Tool (Shortcut: B) and set the foreground color to white. Adjust the brush size and hardness according to your image size and the level of detail required. Use a soft-edged brush for blending.
Step 7: Reveal the Chin
Paint over the double chin area with the white brush to reveal the duplicated layer underneath, where the double chin is removed.
Take your time and be precise while painting to achieve a natural look.
Step 8: Adjust Opacity
If the edit looks too drastic, reduce the opacity of the duplicated layer to make the effect more subtle. Lower the opacity until the edit blends seamlessly with the rest of the face.
Step 9: Use the Clone Stamp Tool (Optional)
For more advanced edits, you can use the Clone Stamp Tool (Shortcut: S). This tool allows you to copy pixels from one area to another. Carefully sample nearby areas and paint over the double chin to create a smooth and natural transition.
Step 10: Use the Healing Brush Tool (Optional)
The Healing Brush Tool (Shortcut: J) is another helpful tool to fix imperfections. Alt-click to sample a clean area near the double chin, and then carefully paint over the unwanted chin area to replace it with the sampled pixels.
Step 11: Liquify Filter (Advanced Option)
For more advanced edits, you can use the Liquify Filter to reshape the jawline. Go to Filter > Liquify. Use the Forward Warp Tool (Shortcut: W) to subtly push or pull the jawline until it looks natural and well-defined. Be cautious not to overdo it, as it can result in an unnatural appearance.
Step 12: Final Adjustments
Make any final adjustments to the overall image, such as contrast, brightness, and color balance, to ensure a cohesive and polished look.
Step 13: Save and Export
Once you are satisfied with the results, save your edited image in the desired format (e.g., JPEG) and resolution.
Remember, practice makes perfect! Don’t be discouraged if your first attempts are not flawless. Keep experimenting and refining your technique, and soon you’ll master the art of removing double chins in Photoshop. Happy editing!
Photoshop Vs. Other Tools to Remove Double Chin
While Photoshop is a powerful and popular tool for photo editing, there are several other software options and apps that you can use to remove a double chin from your photos. Here are some alternatives:
1. GIMP:
GIMP (GNU Image Manipulation Program) is a free and open-source alternative to Photoshop. It offers a wide range of editing tools, including the ability to remove a double chin.
2. Pixlr:
Pixlr is a web-based photo editor that provides various tools similar to Photoshop. It’s user-friendly and accessible online, making it a convenient option for quick edits.
3. Paint.NET:
It is another free photo editing software that has many features similar to Photoshop. It’s relatively easy to use and can handle basic to moderately advanced editing tasks.
4. Affinity Photo:
Another professional-level photo editing software, Affinity comes with advanced tools for retouching and manipulating images, including the ability to remove double chins.
5. Snapseed:
Even if Snapseed is a mobile photo editing app available for both Android and iOS devices. It offers various tools, including spot healing and the ability to retouch and enhance portraits, making it a great option for on-the-go editing.
6. Lightroom:
Adobe Lightroom is primarily known for its capabilities in organizing and processing raw photos, but it also offers basic retouching tools to remove a double chin.
7. FaceTune:
It is a mobile app specifically designed for portrait retouching. It offers easy-to-use tools to smooth skin, reshape facial features, and remove imperfections, including double chins.
8. PhotoScape:
PhotoScape is a free photo editing software that includes a “liquify” feature to reshape facial features and remove double chins.
When using any photo editing software or app, remember that the key to achieving natural-looking results lies in moderation.
Avoid over-editing and strive to retain the subject’s original appearance as much as possible. Double chin removal should be done subtly and thoughtfully to ensure a realistic and authentic outcome.
The Not to Do(s) of Removing Double Chin in Photoshop
When learning how to get rid of a double chin in Photoshop, it’s essential to exercise caution and avoid common mistakes that could result in an unnatural or unflattering outcome. Here are some common mistakes to avoid:
1. Over-editing:
One of the most common mistakes is over-editing the double chin area, leading to an unrealistic and plastic appearance. Make subtle adjustments to retain a natural look.
2. Excessive Blurring:
Blurring the double chin area excessively can create an obvious and unnatural softness. Use a soft brush and low opacity to blend the edit seamlessly.
3. Misalignment of Features:
Be mindful of maintaining the correct alignment of facial features when removing the double chin. An improperly aligned jawline can make the image look distorted.
4. Ignoring Lighting and Shadows:
Pay attention to the lighting and shadows in the original photo. Failure to account for these elements can make the edit stand out and look inconsistent with the rest of the image.
5. Using Large Brush Sizes:
Avoid using large brush sizes, especially near the edges of the edited area. This can lead to visible hard edges and an unnatural appearance.
6. Disproportionate Jawline:
Be careful not to reshape the jawline too drastically. Maintaining a proportionate jawline is crucial for a realistic edit.
7. Ignoring Skin Texture:
Neglecting to preserve the skin texture in the edited area can make it look flat and artificial. Use the Clone Stamp or Healing Brush Tool to maintain skin details.
8. Not Blending with Surrounding Skin:
Blend the edited area with the surrounding skin to achieve a seamless transition. Use a soft brush and varying opacities to create a natural look.
9. Disregarding Facial Expression:
Ensure that the facial expression remains consistent after the edit. Avoid changes that make the subject look unnatural or expressionless.
10. Ignoring Overall Composition:
Consider the overall composition of the portrait and how the edited area fits into the entire image. An isolated edit without regard for the whole picture can be distracting.
11. Neglecting to Save Originals:
Always work on a duplicate layer and keep the original photo intact. Saving backups allows you to go back and make adjustments if needed.
12. Rushing the Editing Process:
Take your time and be patient with the editing process. Rushing can lead to careless mistakes and subpar results.
The goal of removing a double chin in Photoshop is to enhance the image while preserving a natural and authentic look.
Regularly zoom out and take breaks during the editing process to assess the overall appearance and ensure a successful edit.
Practice and experience will help you avoid these common mistakes and achieve polished and professional results.
Frequently Asked Questions
Here are some commonly asked questions on How to Get Rid of a Double Chin in Photoshop:
Is it possible to remove a double chin in Photoshop without making it look unnatural?
Yes, it’s entirely possible to remove a double chin in Photoshop while maintaining a natural look. Using precise selection tools, layer masks, and subtle adjustments, you can achieve a seamless result.
What is the best tool in Photoshop to remove a double chin?
The best tool for removing a double chin in Photoshop is the Lasso Tool for making selections and the Brush Tool for blending the edited area with the rest of the face.
How can I avoid over-editing and retain a natural appearance?
Work with low-opacity settings and make incremental changes to avoid over-editing. Regularly zoom out to assess the overall effect and ensure the edit remains subtle.
Can I use the Liquify Filter to remove a double chin?
Yes, the Liquify Filter can be used to reshape the jawline and remove a double chin. However, exercise caution to avoid distorting the face, which could make the edit look unnatural.
Can I use Photoshop to remove a double chin from a group photo?
Yes, Photoshop can be used to remove a double chin from a group photo. Carefully apply the same editing techniques to the specific individual’s face.
Are there any automatic tools in Photoshop for removing double chins?
While Photoshop offers some automatic tools like Content-Aware Fill, it’s best to manually remove a double chin to ensure a natural result, as automatic tools may not always be accurate.
How can I practice and improve my double chin removal skills in Photoshop?
Practice different portraits, watch tutorials, and experiment with various techniques. Pay attention to lighting, angles, and shadows, as they play a crucial role in the edit’s realism.
Remember that photo editing is a skill that improves with practice, so be patient and persistent in honing your double chin removal techniques in Photoshop.
Final Words:
Congratulations! You’ve now mastered, how to get rid of a double chin in Photoshop. So now, enhance your portraits like a pro.
With the valuable techniques and tools we’ve covered in this comprehensive guide, you can confidently tackle any double chin in your future images.
Remember to keep practicing, as editing is a skill that improves with time and experience. So, go ahead and let your creativity soar as you create stunning, confident portraits free from the pesky double chin effect. Happy editing!
And if you feel too troubled with Photoshop, don’t hesitate to reach out and get your free trials today!