How To Edit Product Photos: Go Pro for Amazon Product Marketing
- October 13, 2023
Whether you’re a budding e-commerce entrepreneur, a small business owner, or simply someone with a penchant for photography, knowing how to edit product photos can be a game-changer.
It’s the secret sauce to transform ordinary snapshots into stunning visual assets that grab your audience’s attention and entice them to click that “Buy Now” button.
But here’s the best part: You don’t need to be a professional photographer or a Photoshop wizard to master the art of product photo editing.
In our guide today, we’ll describe how to edit product photos in Lightroom and for the specific platform Amazon, all without the need for an extensive photography studio or a hefty budget.
Let’s not wait any longer and dive into the world of product photo editing.
Getting Started with Photo Editing
Before getting into the intricate details of product photo editing, let’s start with the basics.
Select the Right Tool
The first step in your photo editing journey is choosing the right software. There are numerous options available, from free online editors like Pixlr and Canva to professional tools like Adobe Photoshop or Lightroom. For the sake of simplicity, we’ll focus on Adobe Lightroom, a widely used software that’s beginner-friendly and packed with powerful features.
Import Your Photos
After installing Lightroom, launch the software and import the product photo you wish to edit. To do this, click on the “Import” button and select your image from your computer or storage device. Once imported, you’ll see your photo in the Library module, ready for editing.
How To Edit Product Photos In Lightroom
Lightroom is a powerful yet user-friendly tool that streamlines the editing process. In this part, we’ll walk you through the process in engaging detail, from importing your photos to making those essential adjustments that will make your products shine.
Step 1: Organize Your Photos
Effective organization is the cornerstone of efficient photo editing. In the Library module, you can create folders, add keywords, and sort your images for easy access and management. This organizational step ensures you can quickly find the photos you want to edit.
Step 2: Basic Adjustments
Now that your photos are imported and organized, it’s time to bring out their best qualities. Head over to the Develop module by clicking on “Develop” at the top right corner of the screen. Here, you’ll find a set of tools to fine-tune your images.
Exposure: This slider lets you adjust the overall brightness or darkness of your photo. Aim for balanced lighting that showcases your product without overexposing or underexposing it.
Contrast: Use the contrast slider to increase or decrease the differentiation between light and dark areas in your image. A touch of contrast can add depth and vibrancy to your product.
Highlights: Reduce this slider to bring back detail in overexposed areas of your photo, ensuring no precious product information is lost.
Shadows: Increasing the shadows slider brightens darker areas of the image, revealing hidden details in your product.
Whites and Blacks: Fine-tune these sliders to set the brightest and darkest points in your photo. This helps maintain clarity and ensures your product looks crisp and balanced.
Step 3: Color Adjustments
Moving on to color adjustments, you have several tools at your disposal:
Temperature: Adjust the overall warmth or coolness of your photo by moving the temperature slider. Push it right for a warmer, cozier look or left for a cooler, crisper appearance.
Tint: Tint allows you to balance the green and magenta tones in your photo. Use it subtly to achieve the desired color balance.
Vibrance and Saturation: Vibrance boosts less saturated colors without affecting skin tones, making your product colors pop. Saturation, on the other hand, increases or decreases the intensity of all colors in your photo. Use these sliders wisely to make your product shine.
Step 4: Detail and Sharpness
Details matter when it comes to product photos.
Clarity: The clarity slider enhances mid-tone contrast, making your image appear sharper. Use it with care to avoid an overly gritty or unnatural look.
Sharpening: This slider increases the overall sharpness of your photo. Adjust the “Amount,” “Radius,” and “Detail” sliders for precise sharpening. Beware of oversharpening, as it can introduce unwanted noise.
Step 5: Cropping and Straightening
Sometimes, your product photo may benefit from cropping or straightening. Click on the “Crop Overlay” tool (shortcut key: R) to crop your image, and use the straightening tool to correct any tilted horizons or angles.
Step 6: Noise Reduction
If your photo exhibits grain or noise, particularly in low-light conditions, Lightroom’s “Noise Reduction” sliders under the “Detail” panel can come to the rescue. Increasing the “Luminance” slider smoothes out the noise while preserving image details.
Step 7: Export Your Edited Photo
Once your edits are complete and your product photo looks sharp, it’s time to save and export your work. Click the “File” menu, select “Export,” and pick your desired file format (JPEG is commonly used for web images). Adjust image dimensions and quality settings to your liking, then hit “Export” to save your edited photo to your chosen location.
With these steps, you’ll master the art of editing product photos in Lightroom, ensuring your products shine brightly and draw the attention they deserve.
Lightroom’s intuitive interface and powerful tools make the process both accessible and effective, allowing you to transform your product images into captivating visual assets. Happy editing!
Advanced Edits for Professional Results
Now that you’ve mastered the basics, let’s explore some advanced editing techniques to take your product photos to the next level.
Give a Consistent Look
Maintaining a consistent style across your product photos is essential for branding and visual coherence. Lightroom allows you to save your editing adjustments as presets, which you can apply to all your images for a uniform appearance.
Spot Removal
Product photos often reveal imperfections or dust spots that you’d rather not show to the world. The “Spot Removal” tool in Lightroom can help you remove these blemishes. Simply click on the spot, and Lightroom will intelligently replace it with nearby pixels.
Background Removal
Sometimes, you may want to place your product on a completely different background. While Lightroom isn’t ideal for complex background removal tasks, it can handle basic background changes. Use the “Adjustment Brush” tool to paint over the background, then adjust the exposure, contrast, and saturation settings to make the background solid white or transparent.
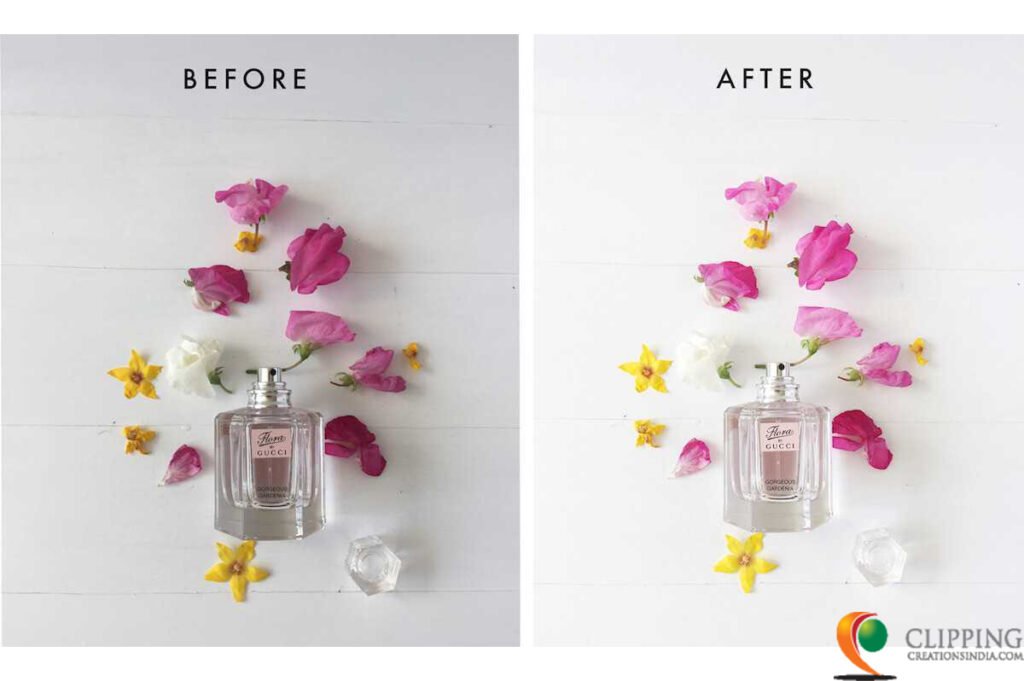
Add Highlights and Shadows
To add depth and dimension to your product, utilize the “Highlights” and “Shadows” sliders. This allows you to selectively brighten or darken specific areas of your photo. For instance, you can highlight the product’s shiny surfaces or darken the background to make your product stand out more.
Lens Corrections
If your camera introduces distortions or vignetting (darkened corners) into your photos, Lightroom’s lens correction profiles can help. Under the “Lens Corrections” panel, check the “Enable Profile Corrections” and “Remove Chromatic Aberration” boxes to correct lens-related issues automatically.
Graduated Filters and Radial Filters
To draw attention to your product, consider using graduated and radial filters. These tools allow you to apply adjustments selectively to specific areas of your photo. For example, you can use a radial filter to spotlight your product while darkening the background or apply a graduated filter to create a seamless transition between two different lighting conditions.
How to Edit Product Photos for Amazon?
Quality product photos for Amazon are essential to making your listings stand out and attract potential buyers.
Amazon has specific image requirements and recommendations to ensure that your products are presented professionally. Let’s walk you through the process of editing product photos for Amazon and ensure your listings are eye-catching and appealing to shoppers. Contact us to learn more.
Capture High-Quality Photos
Before you start editing, it’s crucial to begin with high-quality photos. Invest in good lighting, a clean background, and a high-resolution camera or smartphone. Ensure that your product is well-framed and in focus. Remember, the better your initial photos, the easier and more effective your editing process will be.
Select the Right Editing Software
For Amazon product photo editing, you don’t need complex or expensive software. Free tools like GIMP or online platforms like Canva can be effective. However, if you’re looking for more advanced features and are willing to invest, Adobe Photoshop or Lightroom can be powerful choices.
Crop and Resize
Amazon has specific image size requirements, typically 1000 pixels or larger in either height or width. You may also need a square image for your main product photo.
Use the cropping tool in your chosen software to resize and crop your images as needed. Ensure that the product is the main focus and takes up a significant portion of the frame.
Adjust Brightness and Contrast
One of the most important aspects of product photos is good lighting. Adjust the brightness and contrast to make your product pop without overexposing or underexposing it.
Most photo editing software has simple sliders for these adjustments. Ensure your product looks vibrant and well-lit but maintains natural colors.
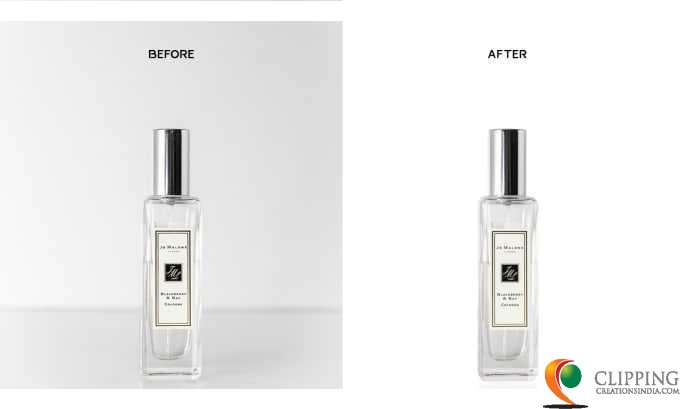
Remove Background
Amazon often requires product photos with a white or transparent background to maintain a clean and consistent look across listings.
Use the background removal or eraser tool to remove any distracting elements. For a white background, ensure it’s pure white (RGB values of 255, 255, 255). A transparent background is also acceptable if your product is showcased cleanly.
Increase Color and Sharpness
Make your product colors look true to life by adjusting the color saturation and vibrance. You want your product to look appealing but not overly saturated.
Increase the sharpness slightly to enhance details, making your product appear crisp and clear. However, avoid excessive sharpening, which can result in unnatural effects.
Maintain Consistency
If you’re listing multiple products, it’s vital to maintain a consistent look across your images. Use the same background, lighting, and editing style for all your photos to create a cohesive and professional appearance. This consistency helps build trust with potential buyers.
Save in the Right Format
Amazon accepts JPEG, PNG, and GIF image formats. For most product photos, JPEG is the preferred format due to its compatibility and balance between quality and file size. Save your edited photos in the highest quality setting possible while staying within Amazon’s file size limits.
Find Out What Amazon Needs
Before uploading your edited product photos, double-check Amazon’s image requirements and recommendations. Ensure that your images meet their specifications regarding size, format, and background color to avoid any issues with your listings.
Upload and Monitor
Finally, upload your edited product photos to your Amazon listings. Pay attention to how your images appear on the platform and monitor customer feedback. If necessary, make adjustments and updates to ensure that your product photos continue to meet Amazon’s standards and effectively showcase your products.
Now, you can successfully edit your product photos for Amazon, creating visually appealing listings that attract potential buyers and boost your sales.
Remember that high-quality images are a vital component of your Amazon selling strategy, and investing time in editing them can yield significant returns.
Wrapping Up
Congratulations! You’ve successfully navigated the world of product photo editing. With your newfound skills, you can now transform ordinary images into compelling, sales-boosting assets for your business or online store.
Remember, practice makes perfect, so don’t hesitate to experiment with different techniques and styles to find what works best for your products and brand. Happy editing!