How to Draw Hologram Effect in Photoshop – Quick Steps 2025
- August 9, 2023
The hologram effect in photoshop is a digital effect; it creates a three-dimensional and futuristic appearance. Best for Images, Artwork, or Graphics Design, Hologram effects have recently been a trend in the market.
It can also be a great way to add a futuristic touch to your artwork or design projects. Plus, you can make your designs unique and catch viewers’ attention. So, if you haven’t learned about this new trick, you should get yourself used to it.
We will take you through the steps to create a hologram effect in Photoshop and learn the tips and tricks to effectively enjoy the process. Hop in to learn more.
How to Draw Hologram Effect in Photoshop
It requires only a few steps to learn to draw the hologram effects in Photoshop. We have conducted the process ourselves and here’s what we have come up with:
Step 1: Select An Image
First, you have to select an image to apply the effects on.
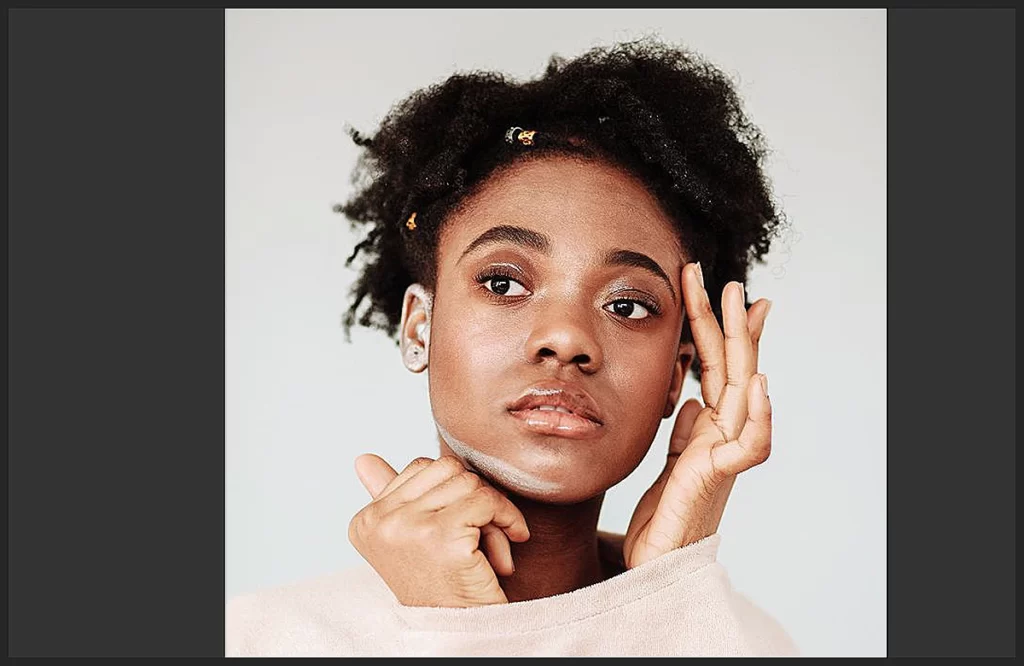
Select images with a simple, clean composition. A cluttered image can make it difficult to add the hologram effect and can make the final result look messy. Choose an image that has a clear focal point or subject, and avoid images with too much detail or complexity.
Step 2: Create A New Layer
This is an important step because it allows you to paint the hologram effect on a separate layer from the original image; making it easier to adjust and modify the effect later on, without affecting the original image.
Step 3: Select the Brush Tool
To add versatility to your image, use the brush tool in Photoshop. Brush tools are used to build a wide range of effects.
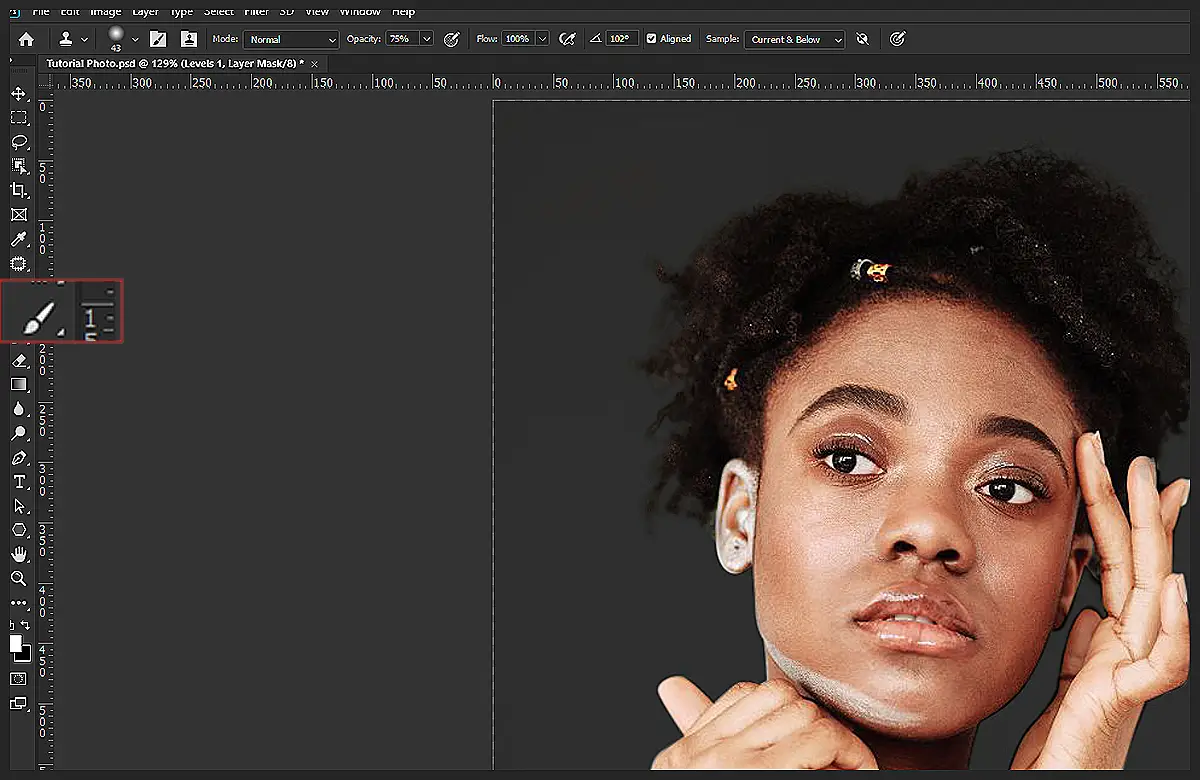
When creating a hologram effect, a soft-edged brush works best. Because you can create a more subtle and natural-looking result with it. You can experiment with different brush sizes and opacity levels to achieve the desired effect.
Step 4: Choose a Color
You have to choose the color carefully. Because what you choose for the hologram effect can have a big impact on the overall look and feel of the image.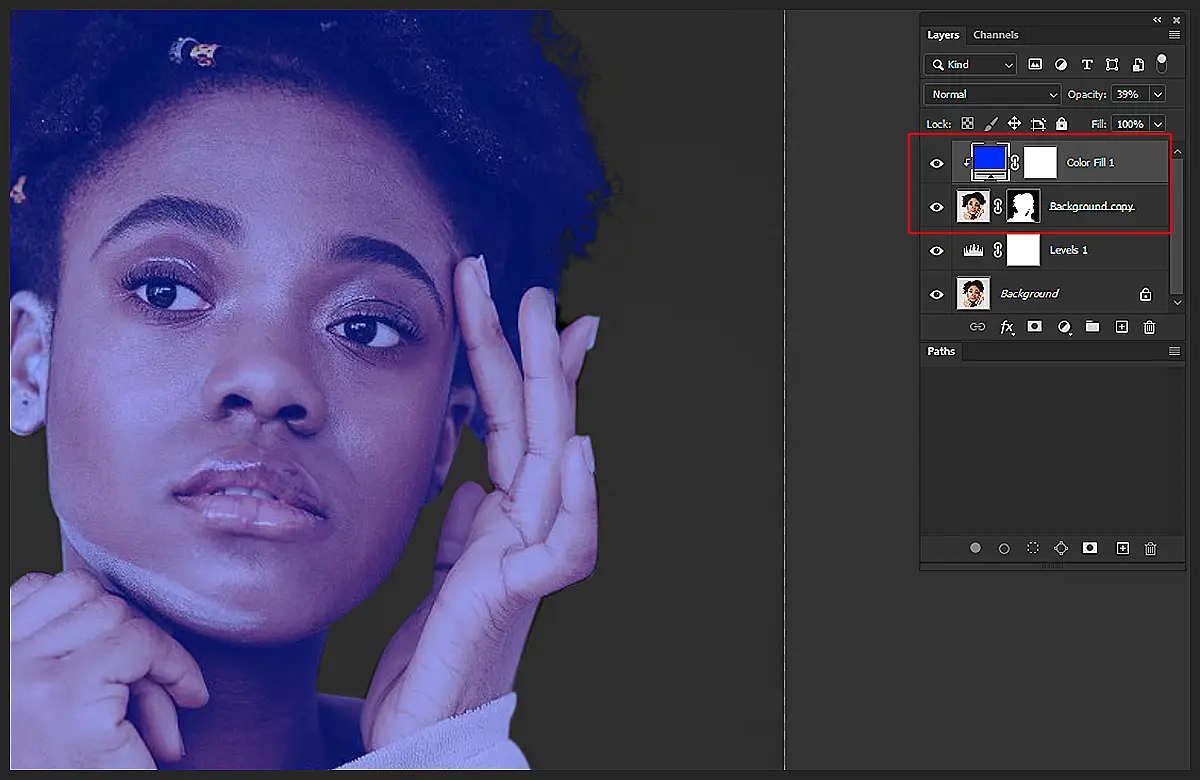 Blue and green are popular choices for a futuristic, sci-fi look, but you can use any color you like. Experiment with different colors to see what works best with your image.
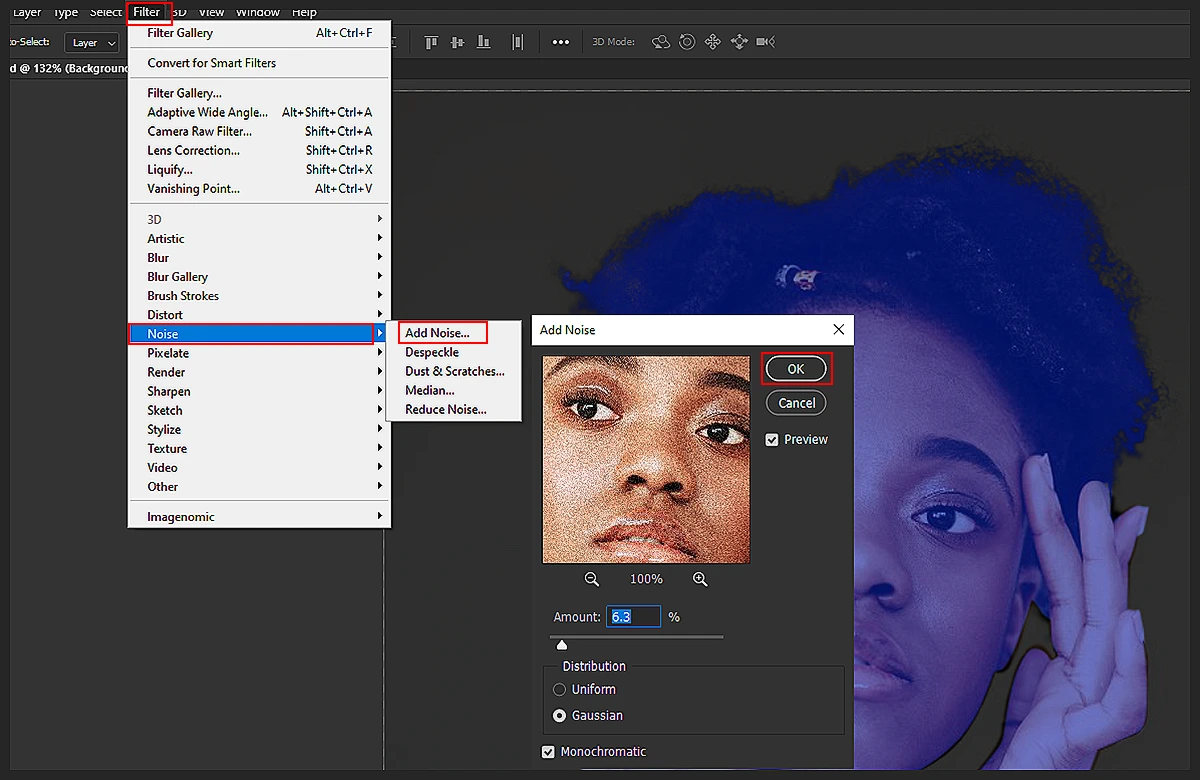
Step 5: Add the Hologram Effect
When adding a hologram effect, go to Filter > Noise > Add noise. Choose the monographic and introduce the glittering layer effect.
Step 6: Add a Layer Style
You can play with the outer glow in this step. Layer styles can help to enhance the hologram effect and make it stand out more.
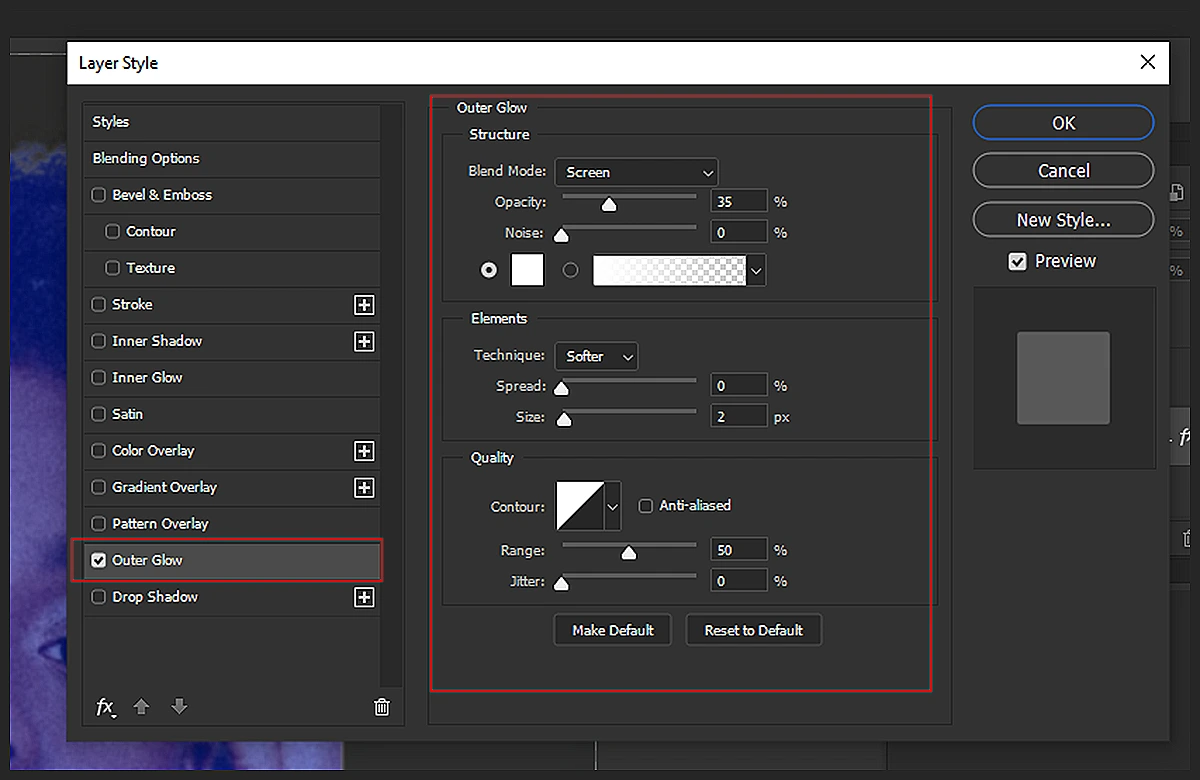 Outer Glow is a popular layer style to use because it creates a soft, glowing effect around the hologram. You can experiment with different colors and settings to achieve the desired effect.
Step 7: Add a Texture
Adding a texture can help to give the hologram effect more depth and realism.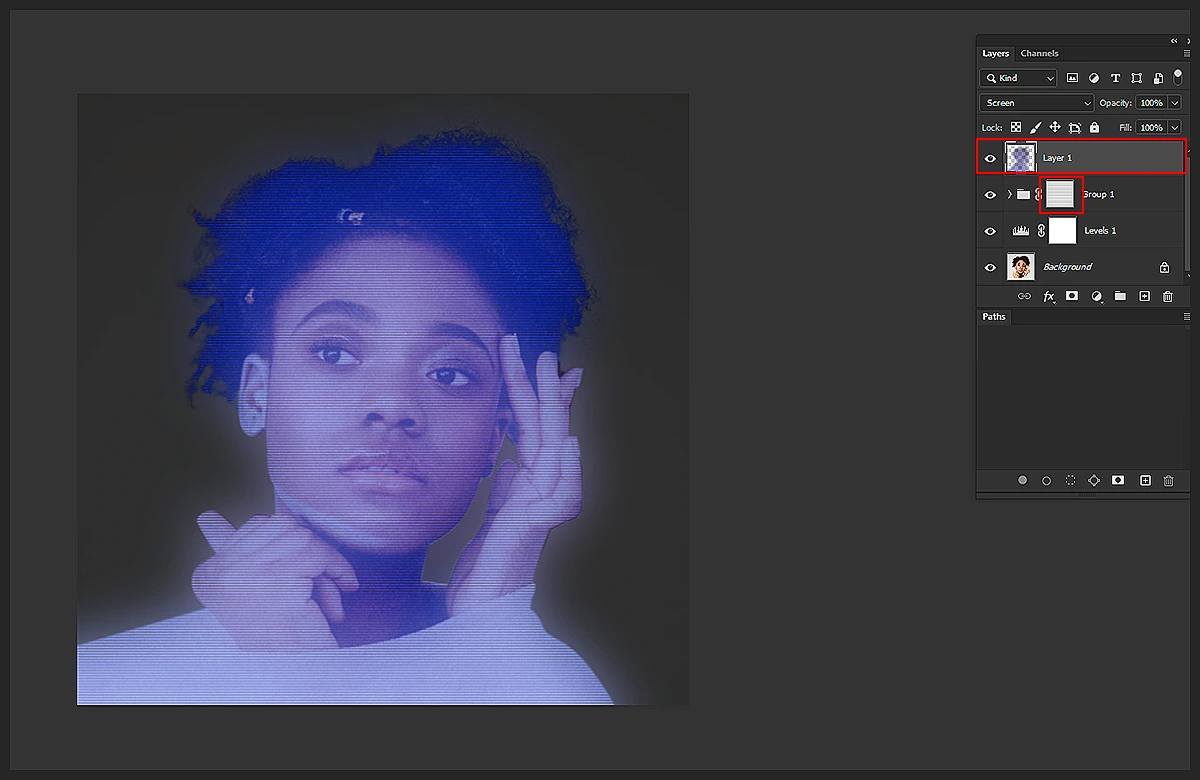 Textures like Canvas, Burlap, or Noise can work well for a hologram effect. Experiment with different textures and settings to see what works best for your image.
Step 8: Final Touches
When making final adjustments to the image, think about the overall composition and balance of the image. You may want to adjust the brightness, contrast, or saturation to make the hologram effect stand out more. You can also add additional design elements like text, shapes, or other effects to complete the overall look.
Step 9: Save and Export
Save a copy of the image in Photoshop format (PSD) to allow you to make future adjustments if needed.
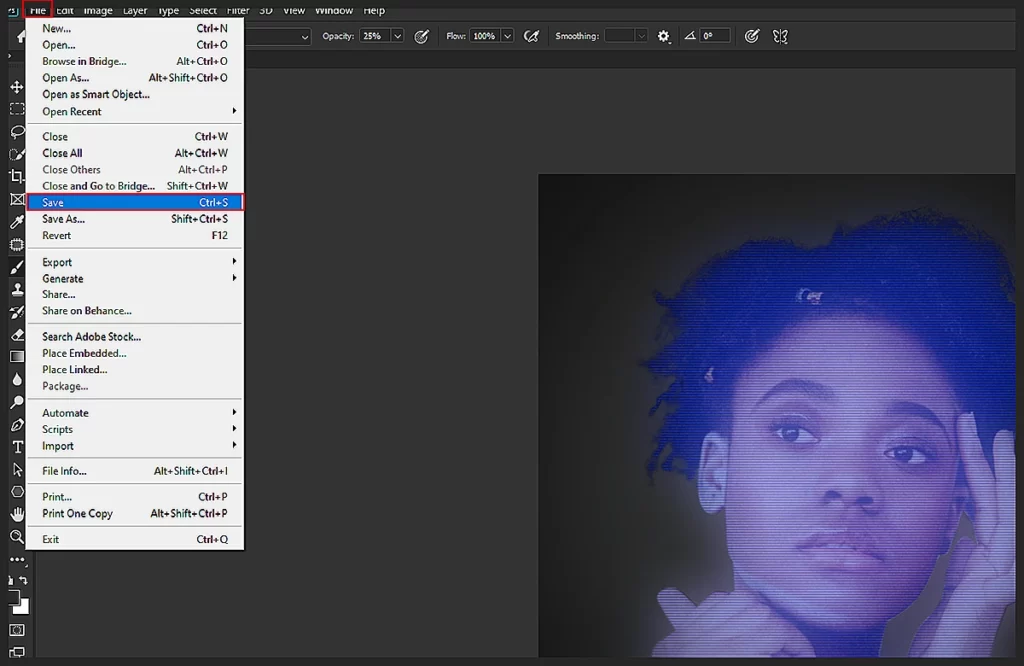
Then, export the final image in a suitable file format, such as JPEG or PNG, depending on your intended use and the requirements of your project.
Step 10: Share and Showcase
Now that you have created your hologram effect, it’s time to showcase it to the world! Share your artwork on social media, and portfolio websites, or use it in your graphic design projects.Remember to credit the original source of the image and any resources used in the hologram effect.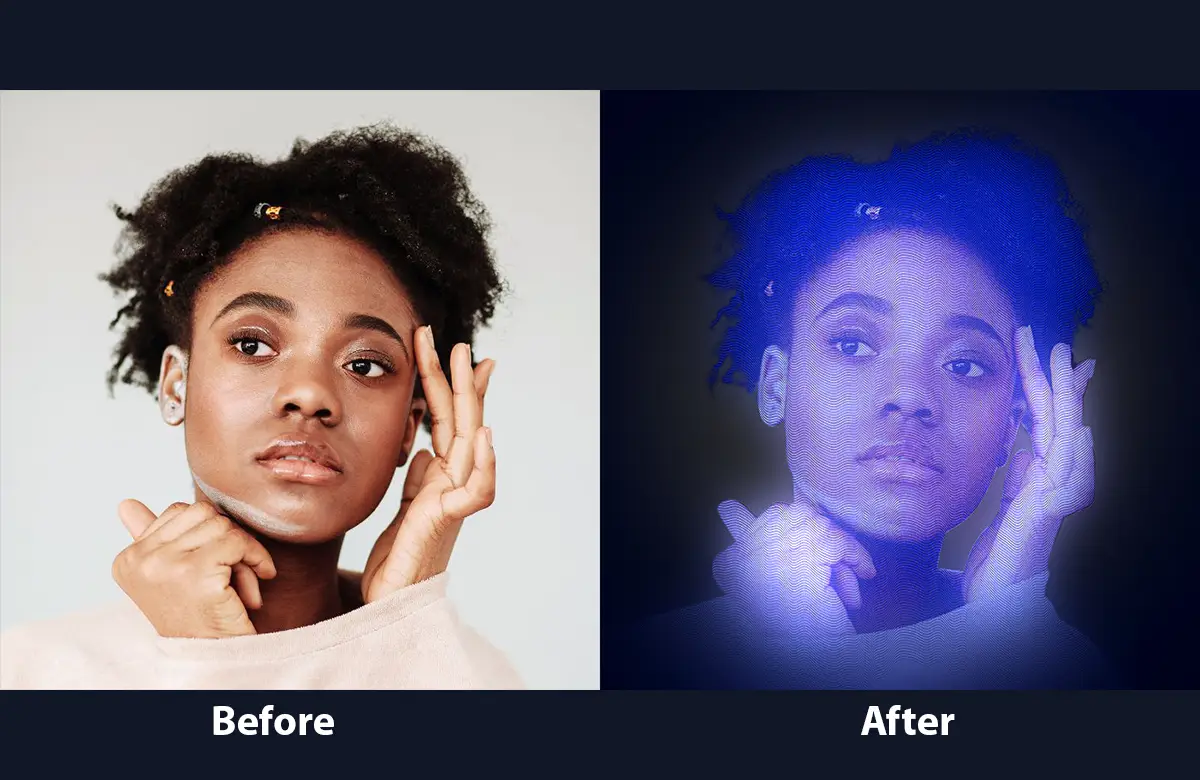
Hologram effects are creative for any designer or digital artist. With a little practice and experimentation, you can create stunning hologram effects that will enhance your artwork and take it to the next level. So, get started today and unleash your creativity!
How to Draw Hologram Effect in Photoshop: Tips and Tricks
It’s always best to learn some tips and tricks for hologram effects in Photoshop once you have mastered this strategy. Here are a few of them:
- Experiment with different blending modes and opacity levels to achieve the desired effect.
- Use a tablet or stylus to create smoother and more precise brush strokes.
- Create multiple hologram layers with different shapes, colors, and textures to add depth and complexity to the image.
- Have the Warp Tool adjust the shape of the hologram to fit the contours of the subject in the image.
- You can use Hue/Saturation adjustment layer to adjust the color and saturation of the hologram effect without affecting the original image.
- Always use reference images of real holograms to inspire your design.
Following these tips and steps to create a hologram effect; that is subtle, realistic, and visually appealing. Don’t be afraid to experiment with different settings and techniques to find the perfect hologram effect for your image.
Read More: How to Transform a Body Shape in Photoshop Fat to Skinny.
FAQs on How to Draw Hologram Effect in Photoshop
Here are a few common questions asked by enthusiastic people about the hologram effect in Photoshop.
Yes, you can create a hologram effect in any version of Photoshop. However, some features and tools may differ depending on the version you are using.
While some basic knowledge of Photoshop tools and techniques can be helpful, you do not need any special skills or knowledge to create a hologram effect. With some practice and experimentation, anyone can create a hologram effect in Photoshop.
It’s best to use an image with a simple, clean composition that has a clear focal point or subject. Avoid using images with too much detail or complexity, as it can make it difficult to add the hologram effect and can make the final result look messy.
Yes, you can use any color you like for the hologram effect. However, blue and green are popular choices for a futuristic, sci-fi look.
To add a layer style to the hologram effect, right-click on the layer in the Layers panel and select “Layer Style.” From there, you can choose from a variety of layer styles, such as Outer Glow, Inner Glow, or Bevel and Emboss.
To export the final image with the hologram effect, go to “File” > “Export” > “Export As.” Choose a suitable file format, such as JPEG or PNG, depending on your intended use and the requirements of your project.
Yes, using a tablet or stylus can help you create smoother and more precise brush strokes, making it easier to create a more realistic and professional-looking hologram effect.