How to Create a Gold Texture in Photoshop?
- April 7, 2023
You can download free gold textures and use them in design for quick results. But creating your own gold texture in photoshop is more exciting and cooler. You may think it’s complicated, but not. Now you must be asking, how to create a gold texture in photoshop?
Steps to create a gold texture in photoshop:
Step 1: Open a random photo
Step 2: Apply Gaussian Blur
Step 3: Liquify
Step 4: Set Distortion
Step 5: Sharpen
Step 6: Change Gradient Colors
Step 7: Add Text
Step 8: Create a Clipping Mask
Step 9: Add Finishing Touch
The list may look long, but the whole process is pretty simple. Continue reading till the end as we explain each and every step in detail to create a golden texture effect in Photoshop.
How to Create a Gold Texture in Photoshop: Step-by-step
Before starting, you may want to know what Photoshop version you need to follow in this tutorial. We are using Adobe Photoshop CC 2021 for this article. But a few earlier and the latest versions have more or less the same version. Hence, you should not have any problem following the tutorial.
The detailed step-by-step guide on how to create a gold texture effect in Photoshop:
Step 1: Open a random photo
First, open any random photo in your photoshop.
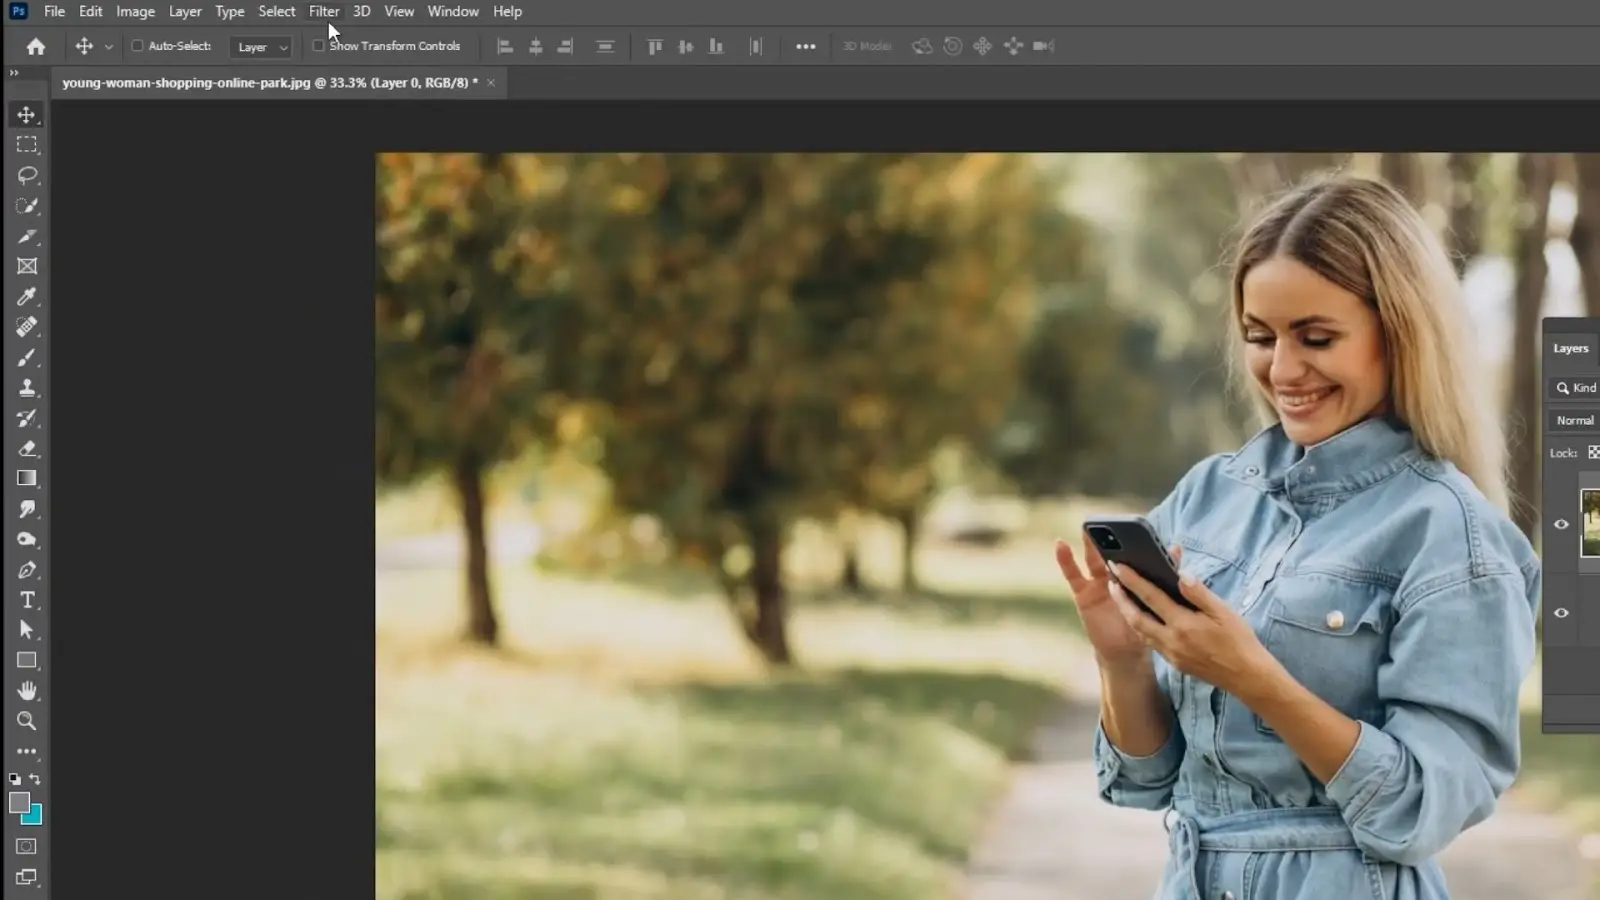
You do not need to pick any particular photo because we will distort the photo later. So, the real photo will be unrecognizable. However, try to use a high-resolution image to have a better visual.
Besides, create a solid color for the background. Click on the circular icon on the lower side of the layer panel and select a solid color. It will create an extra background layer.
Step 2: Apply Gaussian Blur
Now, go to the filter, select blur, and apply gaussian blur. A tab will pop up. Set the radius to 30 pixels and press ok.
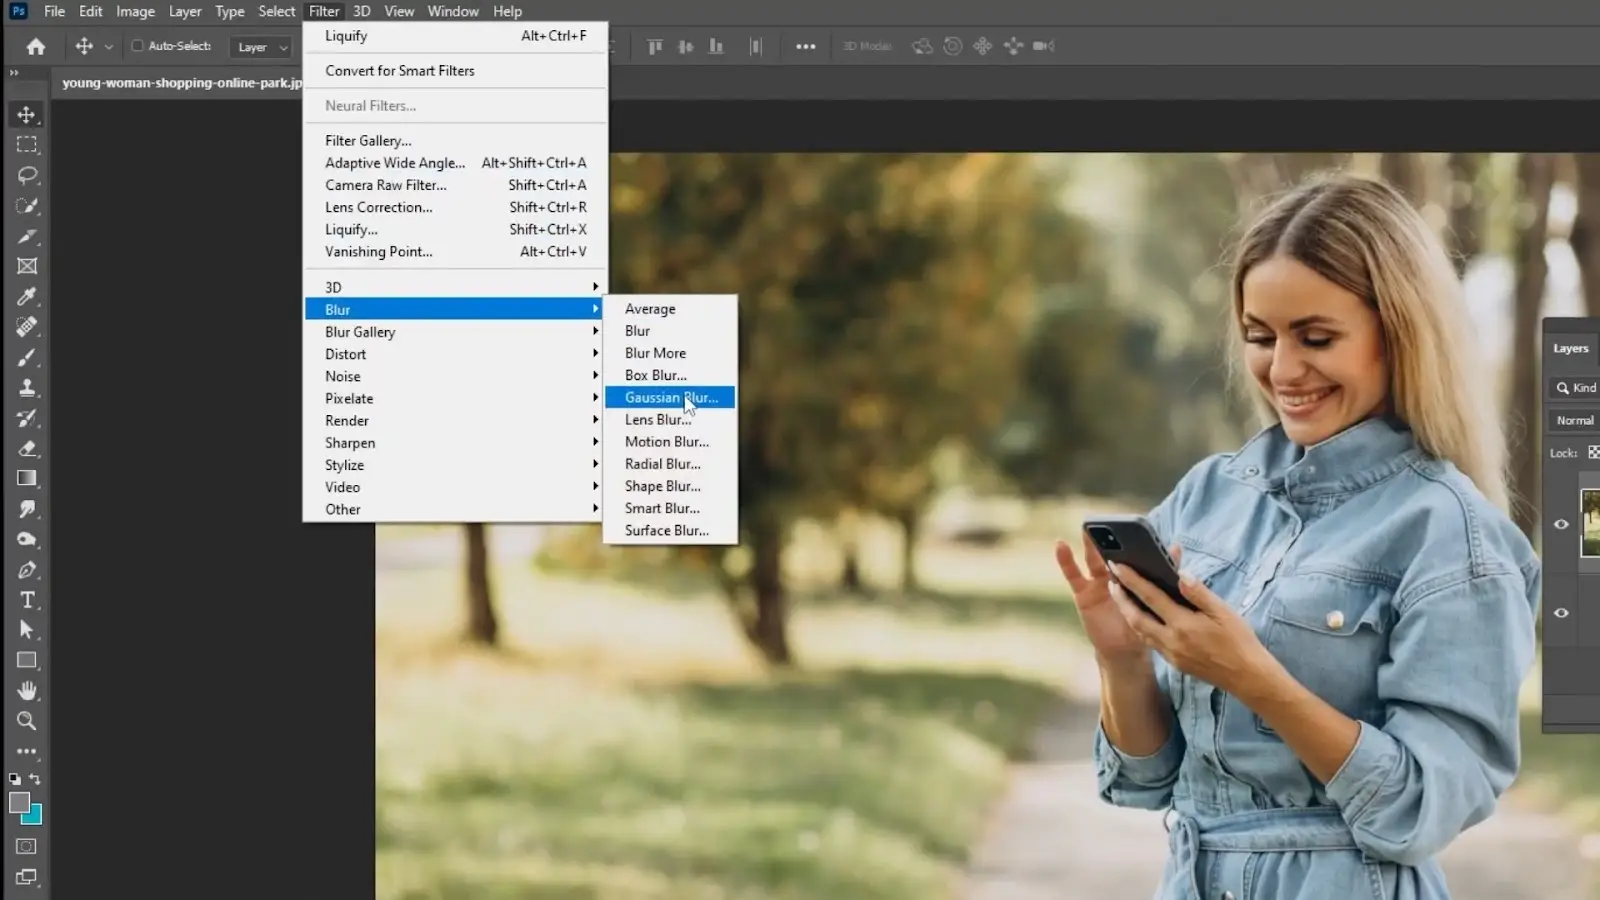
We did this to create the texture effect. Now, the main photo is almost unrecognizable.
Step 3: Liquify
Again, go to filter and select liquify. A circular brush will appear. Randomly spread by pressing and holding the left mouse key.
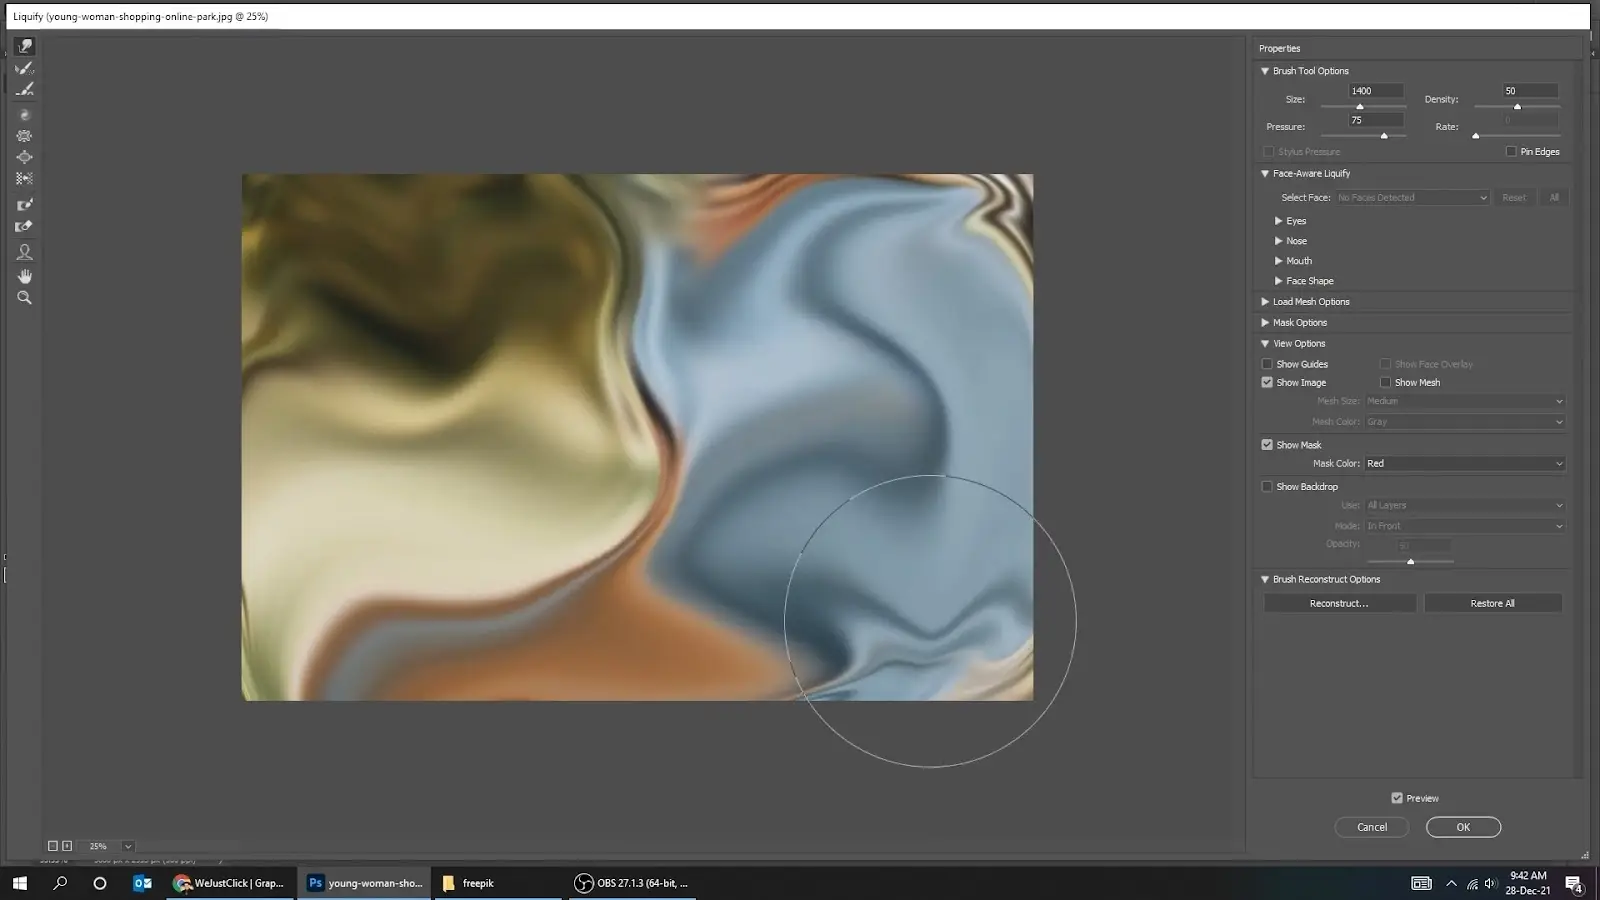
It will distort the image and create an abstract effect.
As you can see now, the appearance has changed significantly from the original one. That is why you can start with any random photo.
Step 4: Set Distortion
Although you already have liquefied the image, you can make it more attractive with the glass distortion effect.
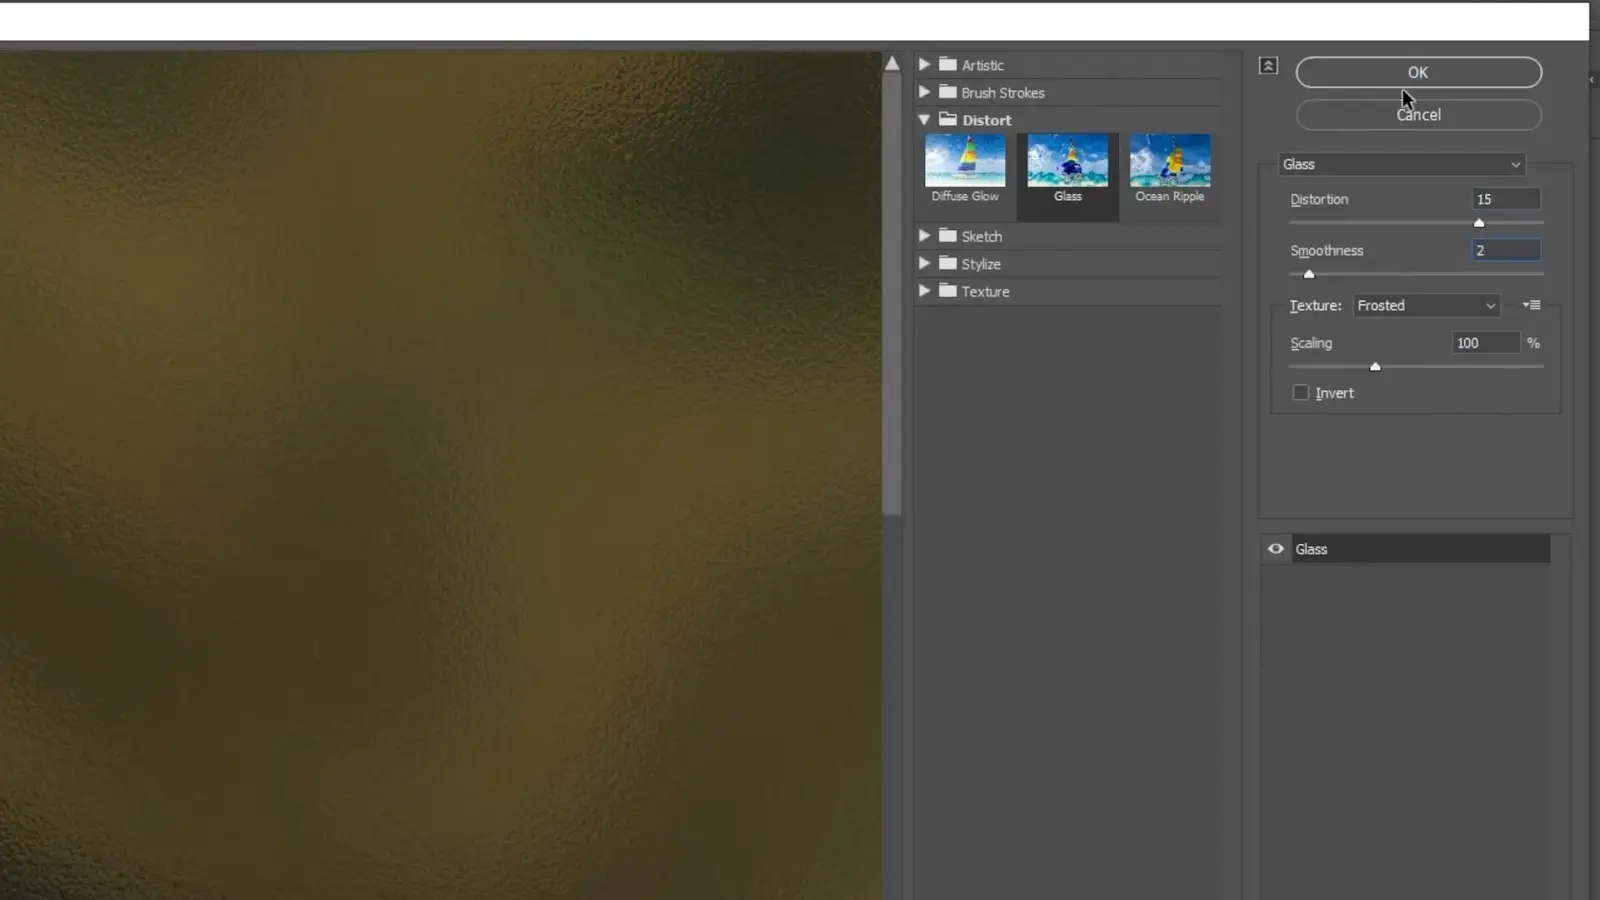
Go to filter and select filter gallery. A new filter panel will open on the left side of the screen.
Select distort and choose ‘Glass’ from the options. Then, on the leftmost panel, set the distortion to 15 and smoothness to 2.
Now, the photo looks like foil paper. You can adjust the liquify and distortion to create more texture effects such as the gold leaf, gold paper, or seamless gold.
Step 5: Sharpen
However, you can use the sharpen tool if the photo looks dull or low quality.
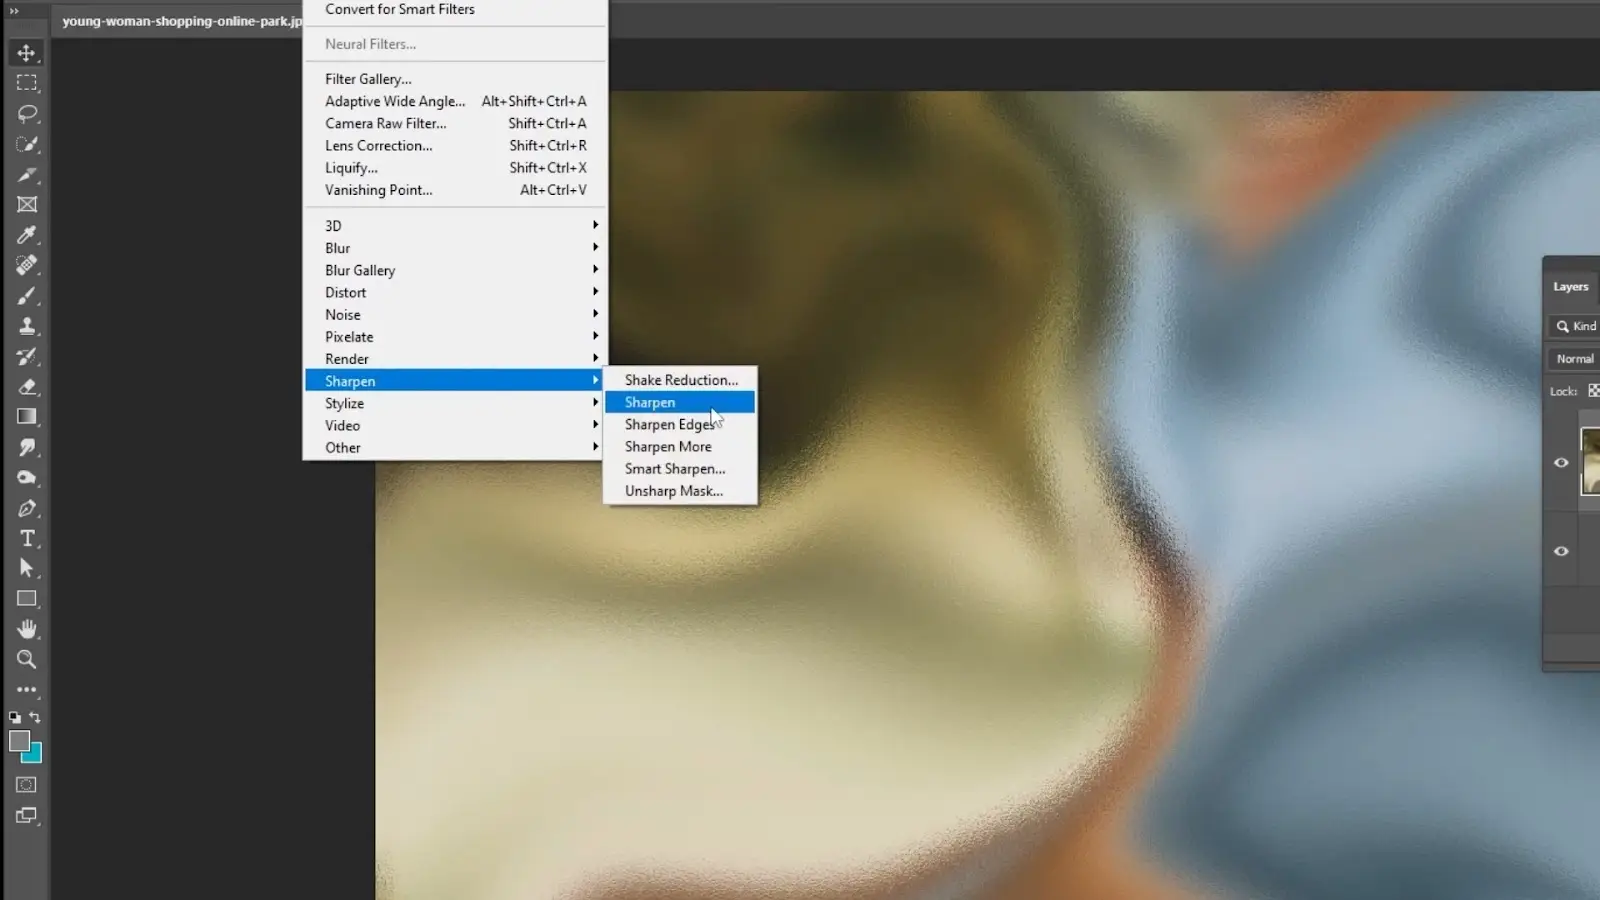
Go to filter, select sharpen, and again choose to sharpen to get a sharper and crisper look.
Step 6: Change Gradient Colors
Now comes the main part, where we will set the gold color effect to create a gold texture. There is a circular icon below the layer panel.
It is the adjustment layer. You can adjust the color, pattern, and other visuals of the layer.
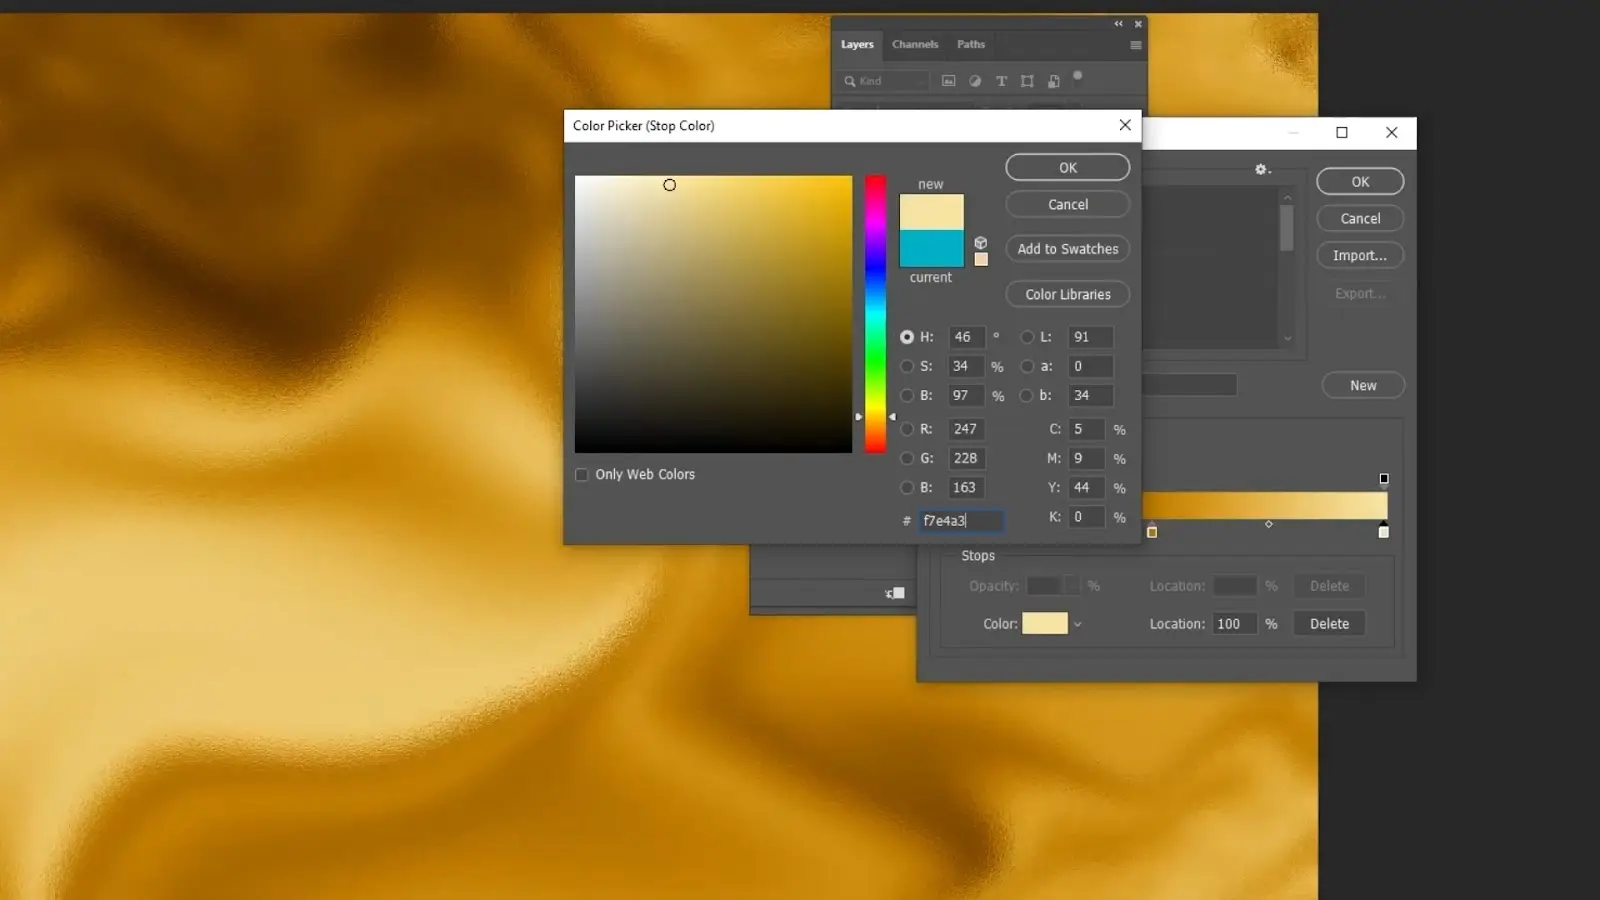
Go to the adjustment layer and select Gradient Map. Click on the colors, and a gradient editor window will pop up. Here you will get options to change the gradient colors.
Click on the different points of the gradient and change them to gold. Select different colors for the different points, but ensure they are close to gold.
For our photo here, we have selected the following colors:
Point 1: #2D1203
Point 2: #C07E00
Point 3: #F7E4A3
You may have noticed that we have selected a dark color in the first point. That is because we wanted to go from dark to light golden. However, you can slide the arrow on the color to change their position or color as per your requirements.
In the case of our photos, we have tried to create a gold foil texture. If you want to create a different color, such as rose gold, then you can use the following color codes:
Point 1: #B86B77
Point 2: #EABFB9
Point 3: #FFE8E5
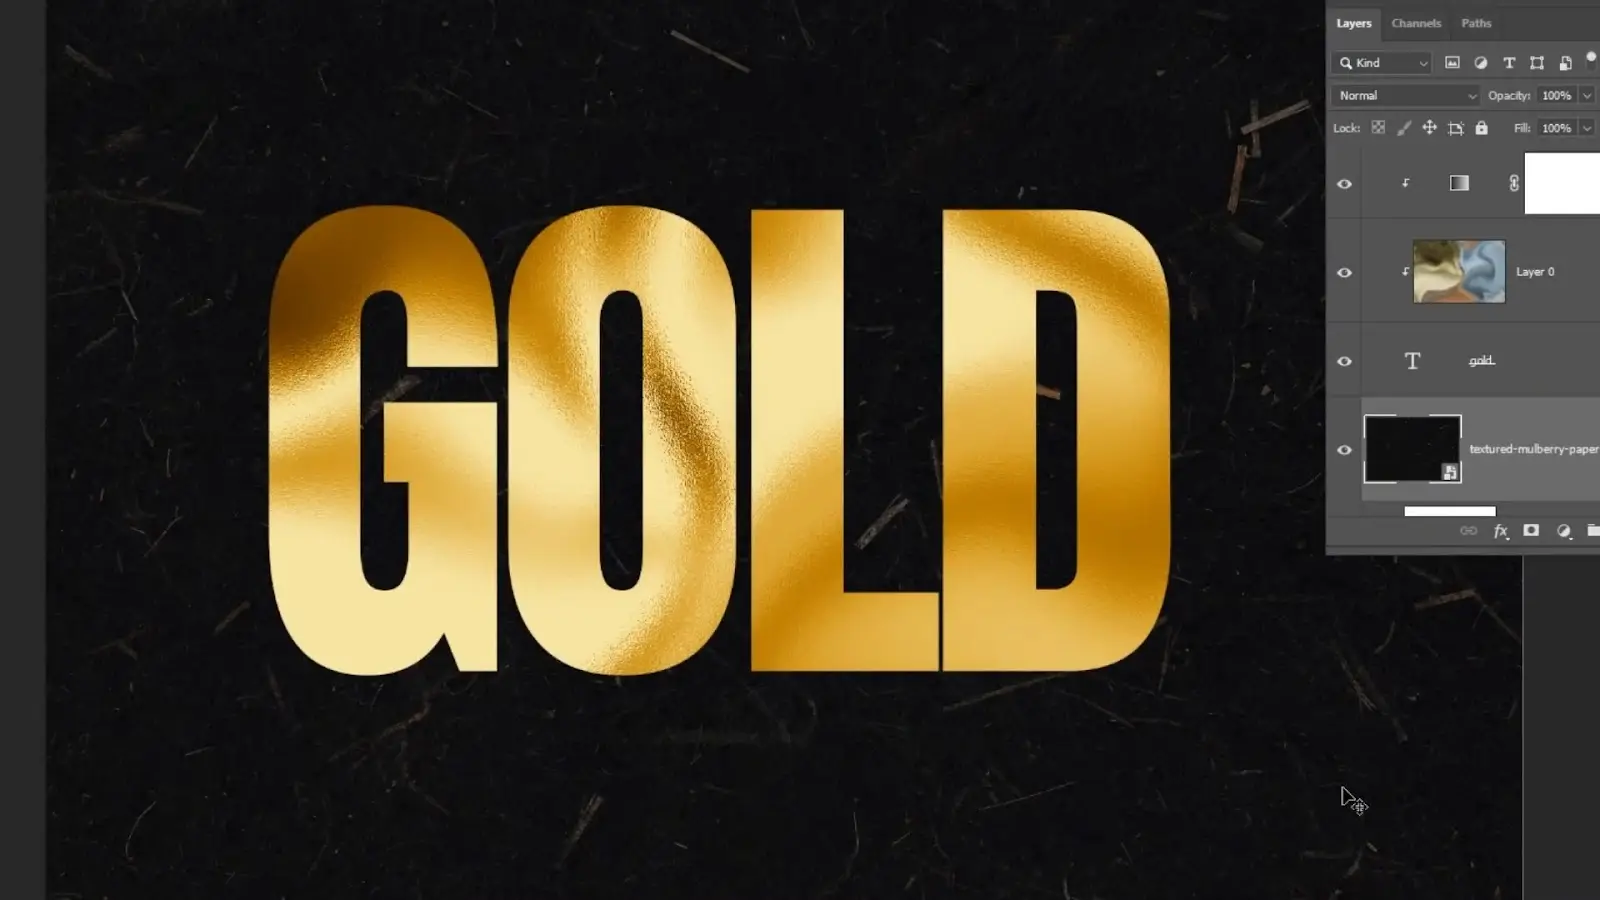
Step 7: Add Text
Now, click on the eye icon beside the layer option to hide all the layers. Then use the text tool from the left panel to write the text on which you want the gold effect.
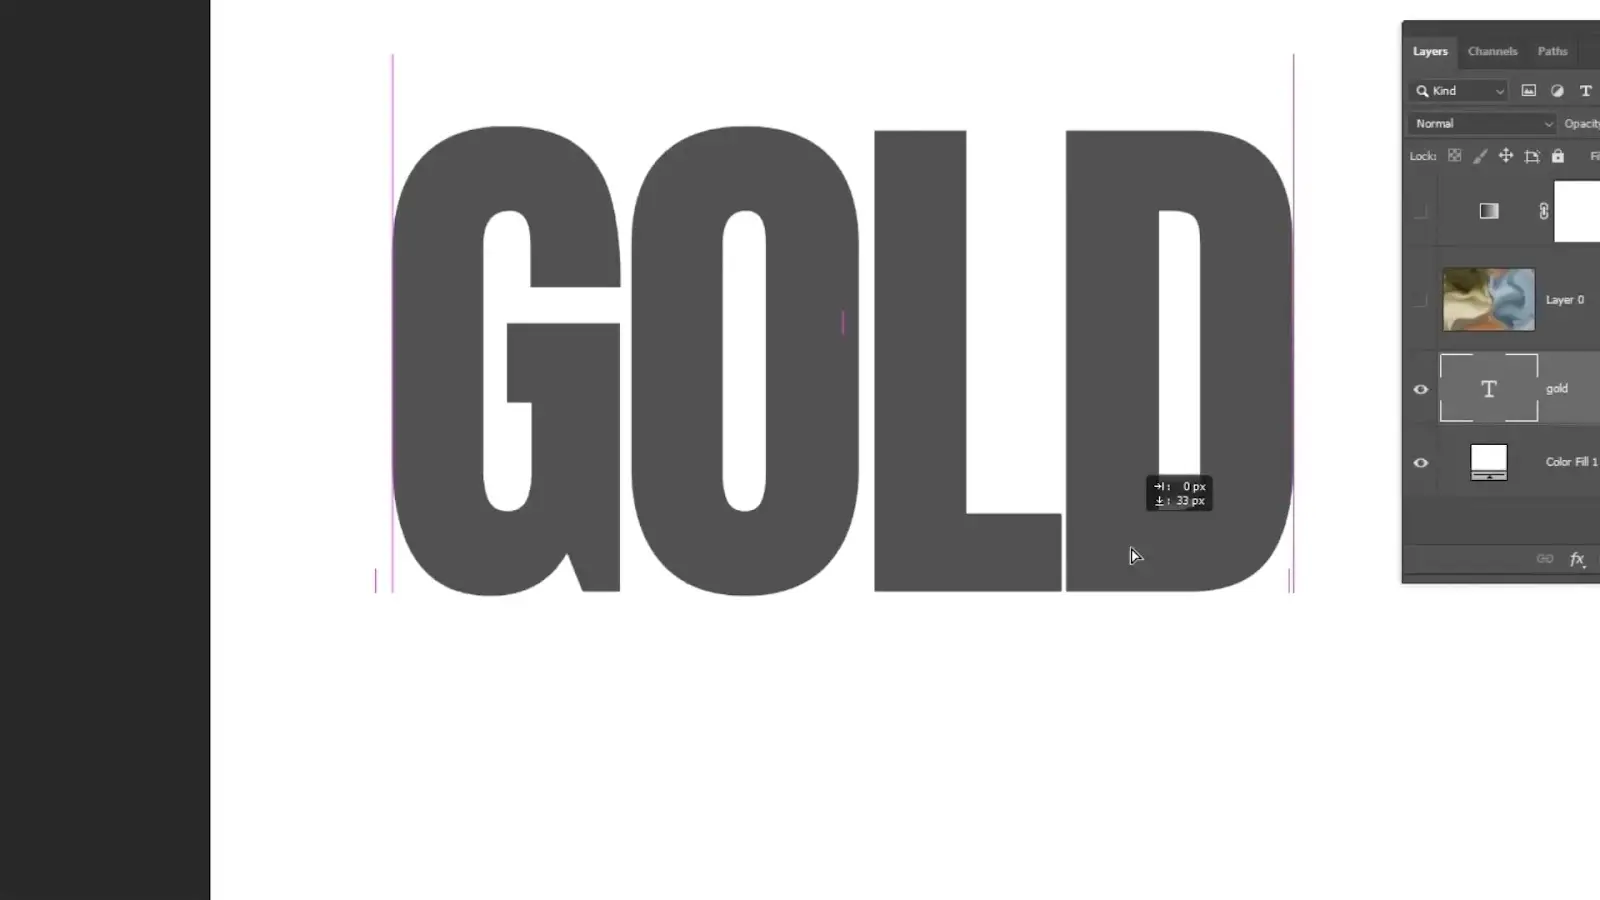
Here, we have written ‘GOLD.’
Step 8: Create Clipping Mask
Next, turn on the other layers as well. Then press & hold the shift button and select the picture and the color gradient layer.
Press the right mouse button and select the ‘Create Clipping Mask’ option.
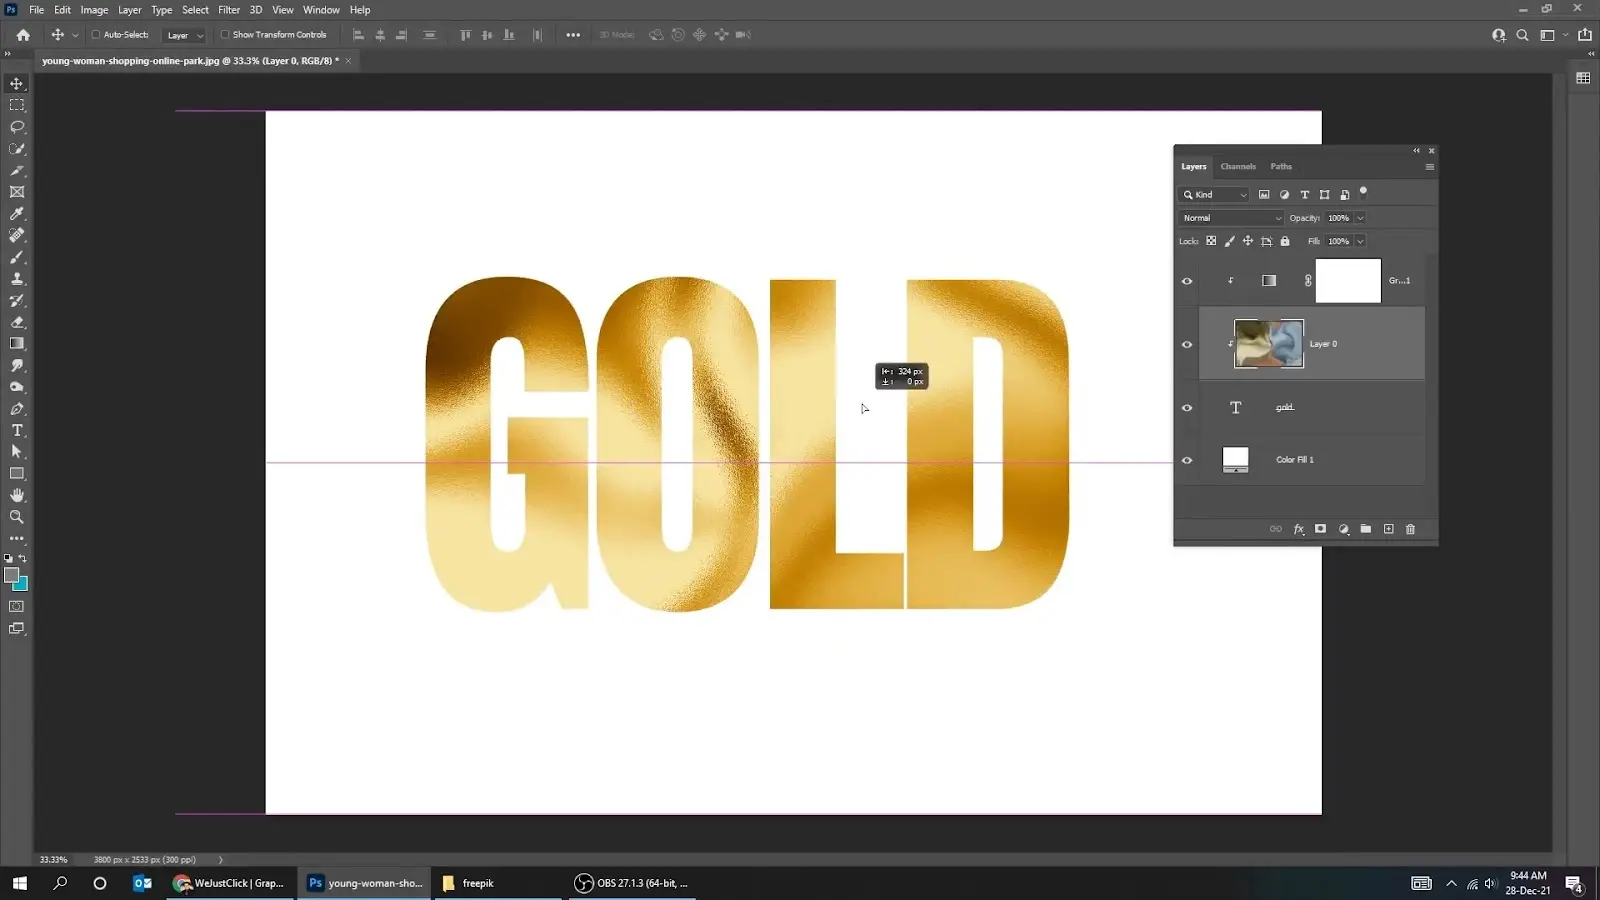
Now, you can see the Gold Texture effect on your written text. The text is on a white background that we had created earlier. If you want a transparent background, then you can delete this layer.
Step 9: Add Finishing Touch
Though the main work is done, you can add some finishing touches to make it better. For instance, you can adjust the position of the texture effect by sliding it while holding the left mouse button.
We are done creating eye-catching gold texture effects in photoshop. Now, you can save the photo.
How long does it take to create a gold texture in Photoshop?
It depends on the expertise you have in editing photos in Photoshop. However, creating a gold texture in Photoshop should take around 10 to 15 minutes on average.
But if you become a pro, you can do it only in a few minutes. Besides, once you have created one gold texture effect, you can manipulate it to create new photos within seconds.
Select the text layer and change the text if you want the texture on a new text. It will take you only a few seconds.
FAQs on Gold Texture in Photoshop
Here are a few questions frequently asked by our clients –
How do I make a gold metal texture in Photoshop?
You can make a gold metal texture the same way to create the gold texture with some changes. In step 2, instead of using gaussian blur, use radial blur. Then go to filter>noise>add noise. Set the amount to 100% and distribution gaussian.
Is it possible to create a gold texture effect without using Photoshop?
Yes! Besides Adobe Photoshop, you also can use Autodesk Mudbox, Blender, ZBrush, Adobe Illustrator, etc., to create a gold texture.
Where can I download textures for Photoshop?
Brusheezy, Unsplash, Amazing Textures, and Deviant Art are some of the most popular sites for downloading textures for photoshop. You can download various textures such as leaf texture, paper texture, and more.
Conclusion
This was the full step-by-step tutorial for gold texture for photoshop. You can use the texture for website design, logo making, etc. However, you can follow this tutorial to make other color textures as well. While choosing the colors in the gradient map in step 6, choose your desired color and you can have a different texture. We hope the article helped you to create your own golden texture.