5 Steps to Create Clipping Path Hard Corner on Photoshop?
- January 4, 2023
Photoshop clipping path is a manual image editing process. Thus, it’s tough and time-consuming. And creating a clipping path hard corner is even harder.
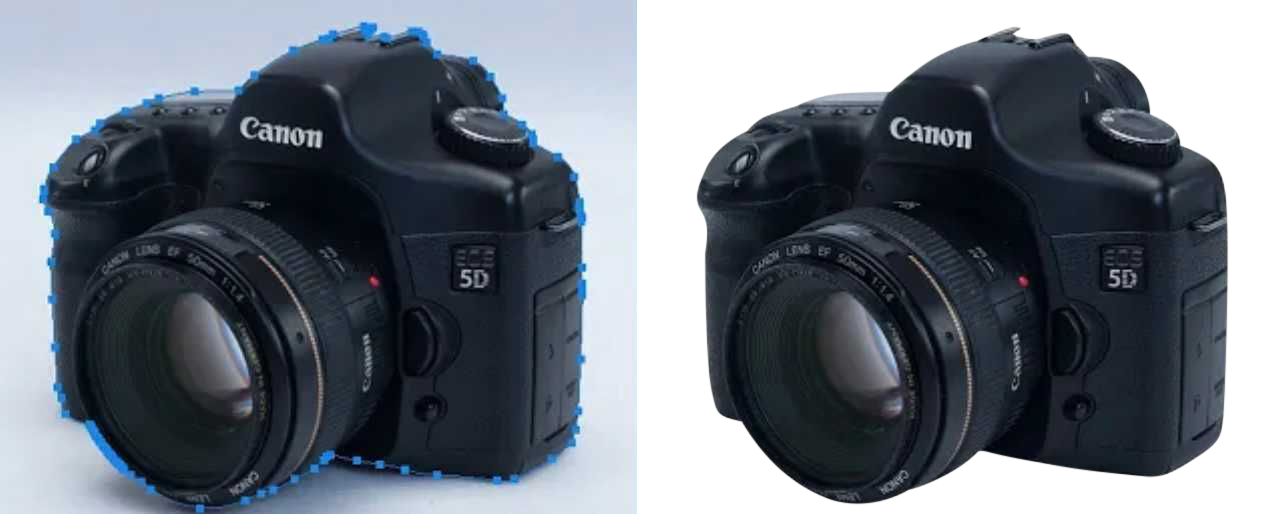
When creating a path of an image object, you’ll often find spots where the object’s shape changes, which are also known as corners, like the joints of a chair or sunglass frame.
To complete the path flawlessly, you need to adjust the anchor points of this sort of corner. Beginner photo editors find this part quite tough.
However, professional editors can handle this like a breeze.
In this guide, I’ll share the basics of clipping paths and help you learn this technique so that you can make a perfect set of anchor points.
Hard Vs. Soft Corner Clipping Path
The difference between hard corners and soft corners can be important when it comes to creating a clean, organized design.
There are two common types of clipping corners in graphics− hard corners and soft corners.
Hard corners are the sharp, angular borders of an object, while soft corners are rounder or curved.
Basically, these are differentiated based on the photo object that you’ll create a clipping path.
Hard corner clipping paths are comparably easier to create than soft turns. These require fewer anchor points than a curved corner. And because of the editing process, hard corners also need less time to complete.
- Hard corner clipping path object examples: Chair, computer monitor, house, t-shirt, etc.
- Soft corner clipping path object examples: Ornaments, models, globes, etc.
3 Basic Clipping Path Types
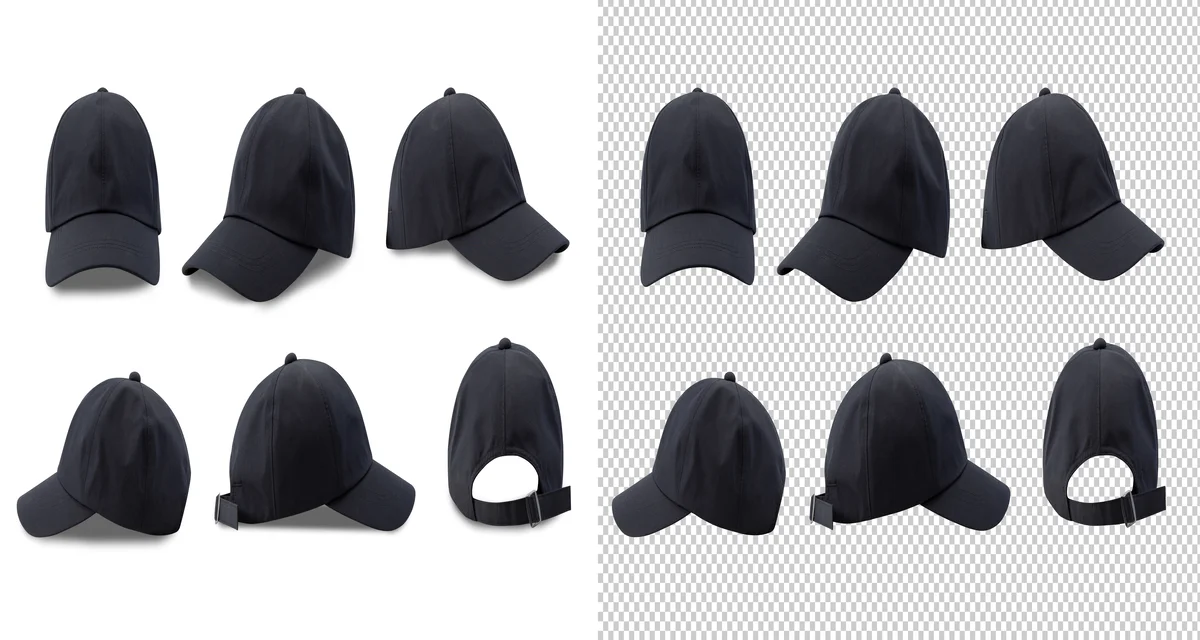
Clipping paths are one of the most popular image editing techniques used in the digital world today. It’s a process of using vector paths to isolate the subject in an image from its background.
There are three main types of clipping paths −
1. Simple Clipping Paths
The paths are used when a single vector path can isolate the subject in an image. They are used for single-layered, basic shapes like circles and rectangles.
2. Compound Clipping Paths
This clipping method is followed when multiple vector paths are required to isolate an object. It’s useful when the subject has complex edges.
If breaking down, these are used for more complex objects with multiple layers, such as product photos with multiple elements.
For example, dog photos, and product photos like shoes, etc.
3. Complex Clipping Paths

With the complex clipping paths method, you create single and multiple vector paths that can isolate multiple objects in an image.
These paths are often applied for images containing multiple subjects, such as a group photo.
For example, for more intricate shapes, like family photos, garments or jewelry, complex clipping paths are widely used.
What Is the Purpose of Clipping Path?
As mentioned, the clipping path is a graphic editing technique used to create a clean and organized edge around selected objects.
When created using Adobe Photoshop, the software separates the entire anchored paths into a layer. And the created path layer allows you to control the visibility of the selected elements.
For example, by clipping certain parts of an object, you can make it disappear from the image. This can be helpful when you want to keep a specific element out of view.
Clipping paths can also be used for other purposes, such as creating a border around an image. Besides, it also helps you avoid overlapping or intrusive graphics.
Without these, this technique also enables you to change the color of any selected elements.
However, the quality of the end result with a clipping path depends on the edges of the image object.
How to Make a Hard Corner Clipping Path?
To start creating your first clipping, you need a photo editing tool. Though there are tons of software, I prefer using Photoshop as it’s rich with the most advanced editing tools.
Step 1 − Select the Image

Run Photoshop on your Mac or PC. Open the image you want to create a path for. To do so, click on the ‘File’ tab (upper left corner of the interface), browse the file on your local computer folder and select it. It’ll open the image file.
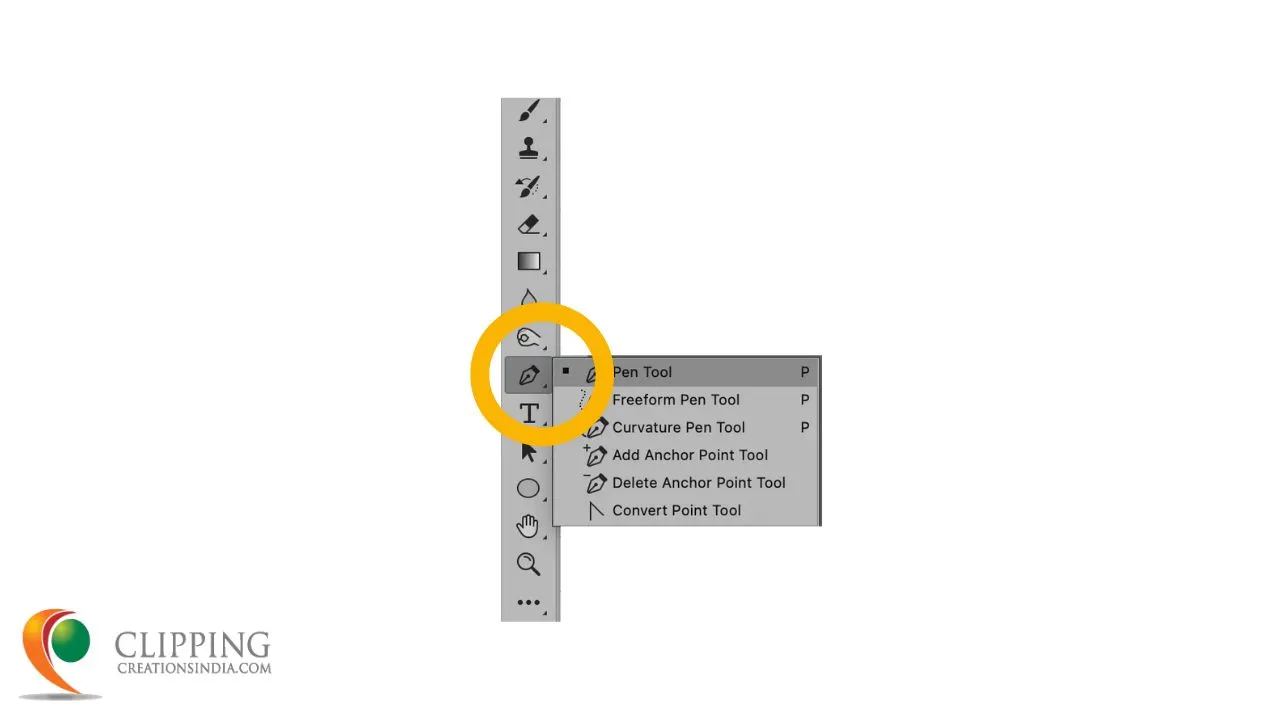
The pen tool in Photoshop is the most common tool used in Photoshop to create clipping paths. The functions are a bit like Illustrator’s Pen tool.
If you got the latest version of Photoshop, you can find it on the left toolbar section, as shown in the below image.
Also, pressing “P” on your keyboard will select the tool.
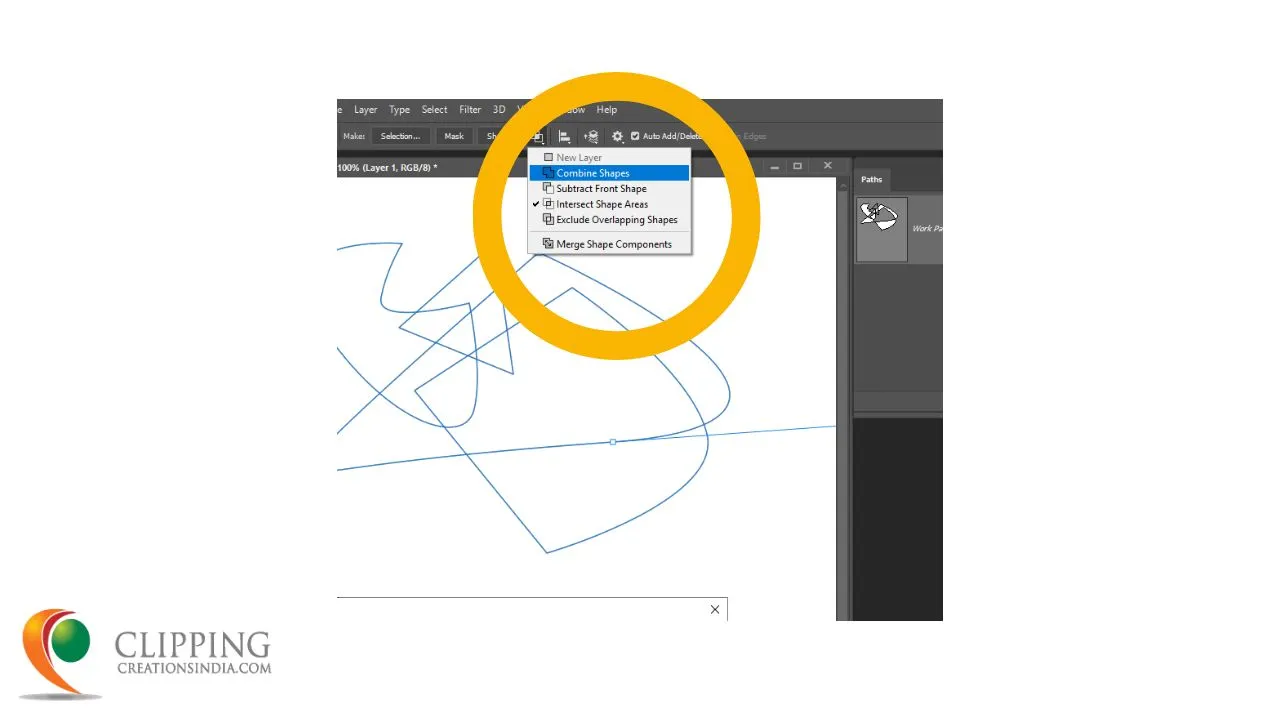
After selecting the tool, you’ll find a dropdown menu. Select “Combine Shapes” there.
Step 2 − Draw Your First Clipping Path
Clipping is a manual process, just like hand drawing. So, you need to draw a path to create a complete layer.
Choose a starting point on the image object for the path by hitting on the left mouse button. These are called anchor points.
Now you’ve to create the next anchor point following the first. Make sure to keep a little distance between each anchor point.
Upon clicking again on the mouse, the anchor point will be created, but don’t release your mouse key. Hold it and drag the mouse to match both anchors as the image object.
Step 3 − Create Paths for a Hard Corner
Following the object shape, you’ll find a few hard corners when you need to change the direction of the clipping path. It’ll help you clip the whole object just like its shape.
To do so, first, place an anchor point in the middle of the object corner. Upon clicking again on the mouse, the anchor point will be created, but don’t release your mouse key.
Hold it and drag the mouse to match both anchors as the image object.
By following this, you can create a clipping path for hard corners.
Step 4 – Close the Path

In order to close the clipping path, you need to reach again to the first anchor point.
What you’re doing is following the image object shape to create anchor points and finishing the path at the first point.
Step 5 − Save Your Clipping Path

You’re done with the path creation. Now your need to save it for future editing. Therefore, click on the ‘Windows’ tab, hit on the ‘Path’, and select ‘Path Panel.’
Then select the ‘Work Path’ option. On the new window, select ‘Save Path.’ Type a path name as you preferred and hit ‘OK.’
Frequently Asked Questions about Clipping Path Hard Corner
Comparatively speaking, it is simpler to create hard corner clipping paths than soft turns. In comparison to a curved corner, these require fewer anchor points. Hard corners also take less time to finish because of the editing process. Here’s a list of frequently asked questions about Clipping Path Hard Corner.
What is the difference between a clipping path and a clipping mask?
The main difference between a clipping path is used for mainly hard-edge object isolation. On the other hand, a clipping mask is required for isolating a soft-edge object from a photo.
What file formats support clipping paths?
PDF, PSD, AI, TFF, and EPS are the common file formats that support clipping paths.
Can a JPEG have a clipping path?
You can use JPEG to create a clipping path. However, to save any changes, save the project and file in PSD or Photoshop Document format.
Where is my clipping path in Photoshop?
You can find your created clipping path under the “Layer” tab. Using the layer, you can select the path (via the selection tool) or make it invisible from the interface.
Wrapping Up
In conclusion, you’ll need to use clipping path hard corners often since most image objects have angles.
Without having a proper image editing experience, you may end up with an imperfect clipping path, which won’t be of any use.
So, instead of scratching your head, you can get our clipping path service.
We, Clipping Creations India, provide the most affordable image editing service in Asia. Get your first image edit free now.