A Beginner Friendly Guide to Clipping Path Hair Masking in Photoshop
- January 10, 2023
One of the fundamental image editing techniques of Adobe Photoshop is using a clipping path. But using it on a photo, with hair or fur in it, can be quite complex. So, how should we do clipping path hair masking? The clipping path tool is best for separating objects with hard edges. Objects with hair or fur are accessible to clipping path tool only if the object’s hair or fur is relatively short or has striking contrast with the background color.
Using this tool for long-haired objects won’t get you the best results. Give this article a read to find out how to accurately use clipping paths for pictures with hair. You’ll also learn one or two alternative methods.
Separating Short Hair Using Clipping Paths
The clipping path hair mask can work very well with objects with short hair. Here are the steps you can follow to separate a short-haired object from its background.
Prepare Your Image

Open Photoshop and go to File > Place to open the image you want to work on. Adjust the brightness and contrast of the picture to get a prominent discretion between the hair part and the background.
Create the Outline
The outlining procedure for an object with hair or fur is similar to any normal object. You’ll just have to be a lot more careful about the detail. Using the Mask and Select Tool should be enough to get a neat cut-out in most cases. Zoom in on a random point and start outlining the object from there. For shorter hair, the outlining should be comparatively straightforward.

If you make any mistakes, correct them by pressing the Alt key and redoing the part with the quick selection tool. Sometimes there might not be enough discretion between the hair part and the background. In such cases, you’ll have to outline the object manually using the Polygon Lasso tool.
Preparing the Mask

Select the outline and apply Layer Mask to it. This should remove your background leaving out the outlined portion.
Refining Your Work
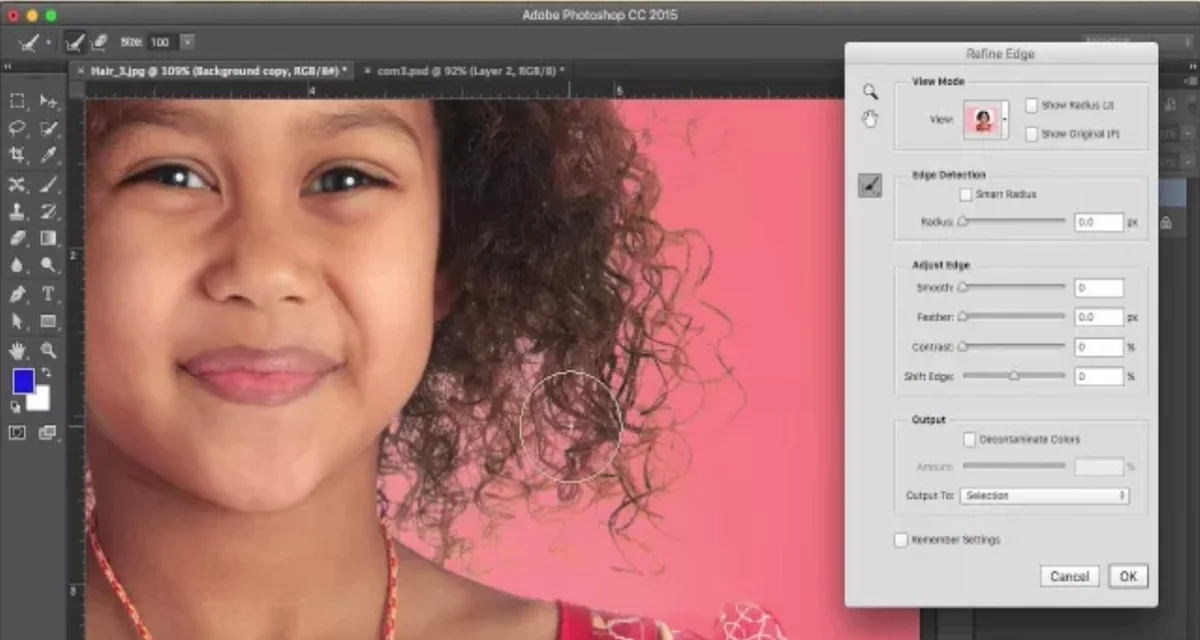
After masking and preparing the cut-out, you should be able to see a pop-up called Layer. You’ll see a list of all the objects in the pop-up dialogue. Right-click on your cut-out object and click on Select and Mask.
This will provide you with some advanced options to fine-tune your creation. These options come with sliders and value setters for fine refinement. There is a Refine Edge Brush tool, which is especially helpful for blurring out the edges and perfecting sharp selections. Use it to make your work look more sophisticated.
Separating Long Hair or Hair With Difficult Background
You can still apply the clipping path method in cases where the hairs are long or don’t have good contrast against the background. But the result will be nowhere near your expectation.
Because firstly, long hairs contain a lot of fine and isolated strands which are nearly impossible to outline. If the subject is on a cleaner background, you can use the channels method to cut the object out.
Otherwise, the Channels selection won’t work, and you’ll have to clip it manually.
Using Channels Selection for Object Separation
To use the Channels method, your subject must have a vivid color contrast with the background. Let’s take a look at how you can apply this method effectively.
Selecting the Right Channel
Open the Channels Panel to see the distinct color channels. Among them, select the most conspicuous channel that holds the most contrast.
Create a copy of it. To do it, just drag your selected channel and drop it on the ‘New’ icon. You’ll see the icon on the panel corner.
Clipping the Object
After duplicating the Layer go to the image on the toolbar and access the drop-down menu.Now, go to Adjustments and select Curves or Levels tool. Set the background as the white point.

This will let you add more contrast to the hair. You should be able to clip the object now. Adding too much contrast isn’t a good choice because it may leave a thin white line around the separated object.
Creating a Silhouette
A very useful side of using the Channels Method is that you can get away with being sloppy. Just creating a silhouette of the object would suffice.For this, go to the Burn tool and choose Shadows on the toolbar. This setting will let you darken wherever you want on the picture.

Roughly darken the edges of the rest of the object first. This will help you do the middle part easily.
Finalizing the Cut-Out
Now it’s time to separate the blackened mask. Click the new channel that appeared on Channels Panel while pressing the Ctrl key. You’ll find the option to enable the RGB channel.

Enable it to activate the original color. You can copy this separated mask and paste it on your desired background.
Frequently Asked Questions about Clipping Path Hair Masking
Masking hair can turn into a very tiring and complex process sometimes. And that arises a lot of questions. Here are some of the most frequent queries answered about clipping path hair masking.
How do I properly clip hairs from a detailed background?
Images with real-life places have details of various colors in the background. So, using the Channels method won’t work here. To separate the hair part, outline the edges roughly and clip it. Don’t try to go for a perfect clipping path hair masking, you’ll regret it.
Then trace the cut-out over the original picture and draw the hair strands yourself. This process may seem tedious, but it’ll produce much better results.
How to perfectly draw strands of hair?
Drawing hair strands is a delicate matter, without a doubt. It’s better to trace over the original picture or some sort of sample to assess directions and width. Start drawing with a brush of around 3-4 px face size. Reduce the face size for drawing finer strands or providing smoother edges.
Are online image masking services worth it?
You’ll find a lot of professional image service providers doing exclusive work on hair masking. Photoshop tutorial may make it seem easy but masking hair in Photoshop actually requires a lot of practice.So, for easier tasks, you can attempt to do them personally. But if you don’t feel confident enough, going to a professional will be worth it. You’re most likely to get the perfect results from these online graphics design services.
How can you customize your brush?
Go to Edit > Define Brush Preset. This will create a new preset. Name the preset as you wish. Now go back to the image and click on the brush. That should do the trick.
Conclusion
From professional image editing to editing for your personal use, learning hair masking will help you get countless tasks done. Before clipping path hair masking, check the background for contrast matches. Without vividly distinct contrast between the subject and the background, using clipping path will give you a messy outcome. Remember that the main skill play comes in proper outlining and drawing. So, you’ll need a ton of practice to master these skills.
Don’t be frustrated if you find these instructions challenging. You just need practice. please write FAQ maintaining general formats as applied in other contents.