Advanced Masking in Photoshop − An Easy Guide to Master Masking!
- February 11, 2025
Masking in Photoshop allows you to separate a subject from its background and edit it independently. However, the basic masking tools in Photoshop can only take you so far. That’s where advanced masking in Photoshop comes in.
Whether you’re working with a portrait, a landscape, or an abstract design, learning masking techniques will help you achieve professional-level results.
In this article, we’ll discuss the most advanced masking techniques in Photoshop, so you can get started with honing your image-editing skills right away!
Advanced Masking Techniques in Photoshop
Photoshop offers a variety of masking tools, and here’s a rundown of each of the most advanced techniques in the editing software –
Refine Edge Masking
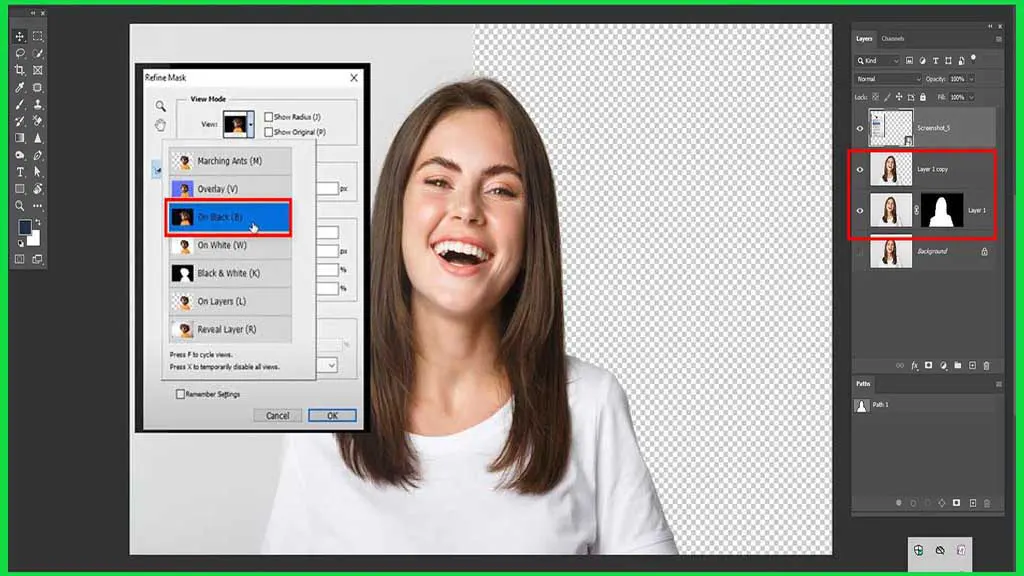
The Refine Edge tool transforms the way editors create masks in Photoshop. Using it allows you to fine-tune the edges of your mask to make it look more natural and seamless.
It uses advanced algorithms to analyse the edge detail and suggest the best way to smooth out any jagged or rough areas. It’s ideal for masking complex shapes, such as hair, fur, and feathers, where precise edge definition is essential.
This makes refined edge masking ideal for advanced hair masking in Photoshop. To use it, select your mask and go to Select > Refine Edge. From there, you can fine-tune the edge detail, feathering, opacity, and contrast to get the exact look you want.
Channels Masking
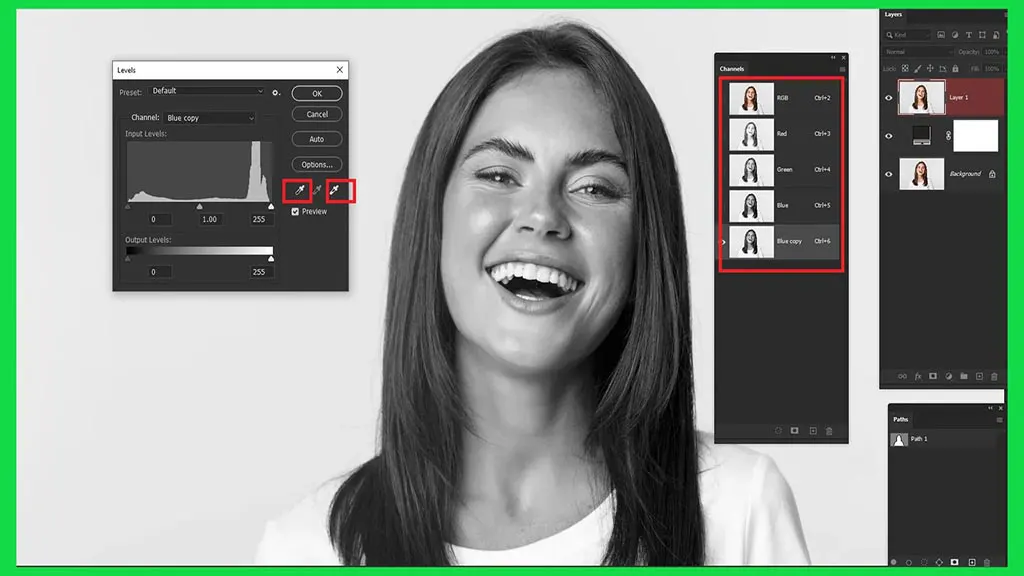
You can use the channel masking technique to create masks based on the brightness and colour values of your image. Plus, you can use this technique to create precise masks around subjects with high contrast, such as black-and-white images or images with a lot of light and shadow.
For example, you can use the red, green, and blue channels to create a mask around a subject that has a distinct colour compared to its background. To use it, go to the Channels panel, select a channel that has high contrast with your subject, and use it to create a mask.
Vector Masking
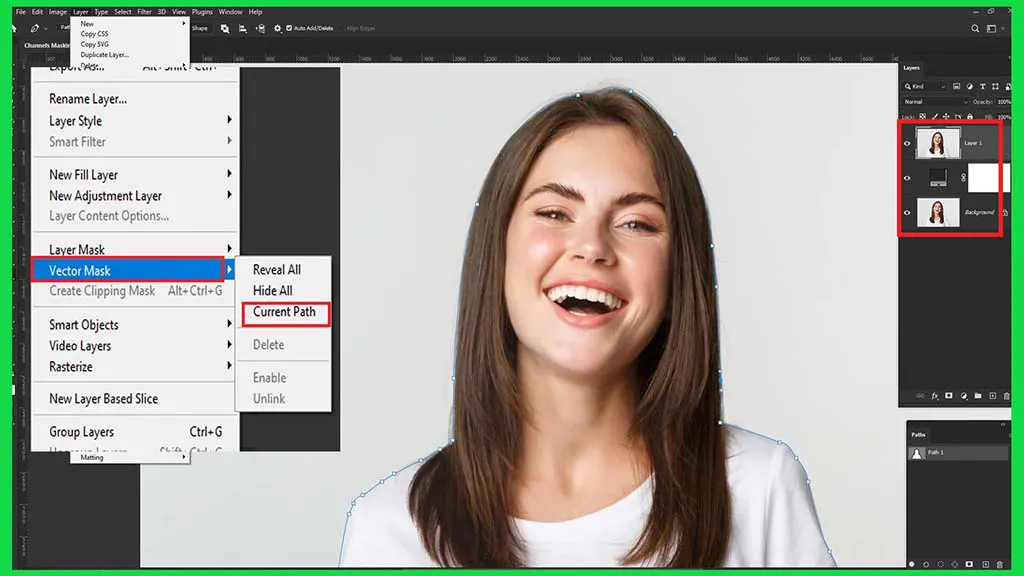
The vector masking technique defines mask edges with vector shapes. Unlike pixel-based masks, vector masks are resolution-independent, meaning they maintain their sharpness and clarity even when resized.
Designers use vector masking to create masks around logos, text, and other graphics. You can use the Pen tool to create vector shapes and apply them as masks to your images. To apply vector masking, create a vector shape with the Pen tool and use it as a mask.
Layer Masking
With layer masking, you can create masks and refine them later. When using layer masks, you can control a layer’s transparency by painting black or white on the mask; black hides the layer, while white reveals it.
This gives you complete control over the contents of the layer in your image and allows you to make changes to your mask at any time. To use it, add a layer mask to a layer and paint black or white over the mask to control its transparency.
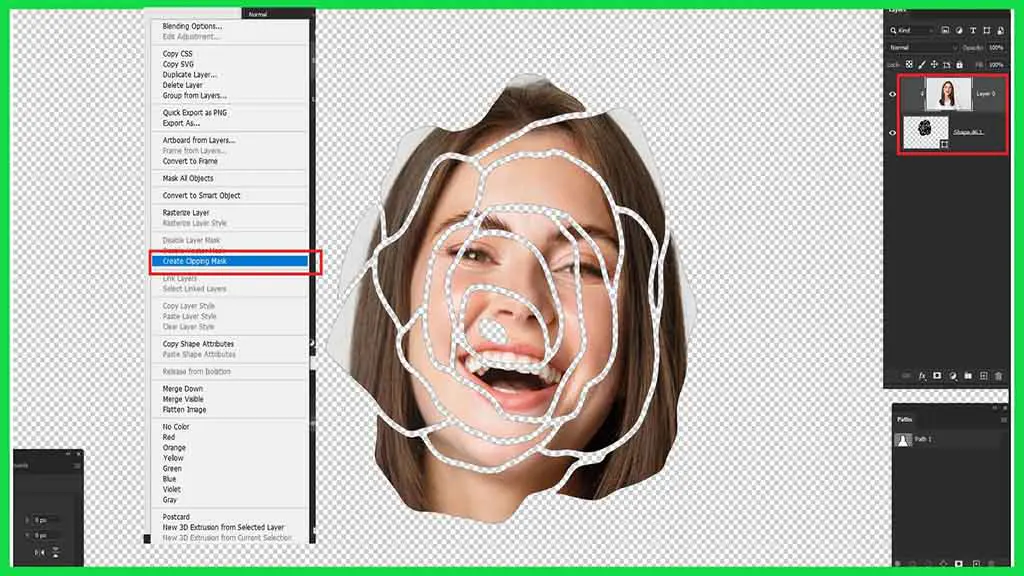
Clipping Masking
Similar to layer masks, clipping masks also allow you to control the transparency of a layer. However, clipping masks apply the mask to the layer below rather than to the layer itself.
This makes clipping masks ideal for creating multi-layer compositions, where you want to apply a mask to multiple layers at once. To use clipping masking, create a layer below the layer you want to mask and go to Layer > Create Clipping Mask.
4 Useful Tips for Mastering Masking in Photoshop
Here are some tips to help you master advanced masking in Photoshop.
Use a Wacom Tablet for Precision Masking
A Wacom tablet is a must-have tool for anyone who wants to achieve precise masks. The pressure-sensitive stylus allows you to control the brush size and opacity with greater accuracy, making it easier to fine-tune the edges of your masks.
Experiment With Different Brushes
Photoshop offers a wide range of brushes, each with its own unique properties. Experiment with different brushes to see which ones work best for your masking needs.
For example, you might find that a soft-edged brush is best for smoothing out rough areas, while a hard-edged brush is better for precise selections.
Use a Layer Mask Instead of the Eraser Tool
A layer mask is a more flexible, non-destructive alternative to the eraser tool. They allow you to control the transparency of your layers, making it easier to refine your masks and make adjustments.
Take Advantage of Clipping Masks
Clipping masks allow you to apply a mask to the layer below it, giving you greater control over your multi-layer compositions. To use a clipping mask, simply select the layer you want to mask and then press ‘Alt’ + ‘Control’ + ‘G.’
Final Verdict
That being said, mastering advanced masking in Photoshop will allow you to create stunning visuals. With a little bit of practice and patience, you’ll be able to take your image editing skills to the next level. So go ahead, experiment, and unleash your creativity!