Lamborghini Car Photo Editing: Transform Lambo Pictures with Speed and Style
- March 15, 2025
Lambo aficionados are not as skilled at Lamborghini car photo editing as they are in revving their V12S. No wonder the pictures of their vehicles look terrible, dulling the supercar’s radiance.
This is why learning how to edit car snaps is essential. And thanks to the advent of Lightroom, it is now easier than ever to revive the Lamborghini’s true colours. To edit a picture of your Lambo, adjust the white balance, correct the colour, and apply a linear gradient.
In the article, we will guide you step by step through all the necessary adjustments. We will also show you how to draw attention to your beloved car in the surrounding area. Let’s jump right in!
How to Edit Lamborghini Car Photos in 7 Steps (Lightroom)
You can use both Photoshop and Lightroom to edit the magnificent photographs of your Lambo. However, since automobile photos require extensive colour adjustments, Lightroom seems like the better choice. Let’s take a look at how this program enhances the visuals of your ride.

Step 1 – Set the white balance
As a rule of thumb, first, adjust the white balance in Lightroom. Consider the lighting of your image when changing it. Most raw pictures tend to have warm tones. In that case, set the temperature at 5600 and the tint at 10. Regarding the remaining sliders, try different values until you get the right colour.
Having said that, don’t alter highlights, exposure, or whites excessively. These are directly related to colour and texture or the details of the image.

Step 2 – Adjust each colour separately
In this step, we will focus on one of the most crucial aspects of car photo editing: individual colour correction. To view all colours, go to HSL/Color/B&W and choose All.
Before discussing the changes to be made, remember that the goal here is to refine the exposure and colour of Lamborghini and its surroundings. Let’s see how you can accomplish that.
- Red
Avoid increasing the red hue or luminance. For a more vibrant shade, bump the saturation slightly by +30.
- Green
Put the hue slider at -100. This minimises oversaturation, although the image may appear darker. Make sure you increase the luminance to prevent it.
- Yellow
Boost saturation to at least +20 while reducing luminance to -5.
- Aqua
Aqua should have a hue of +50.
In addition, you can customise the slider for Orange, Purple, Blue, and Magenta. However, change them only if any part of their colour matches your Lambo’s.

Step 3 – Fine-tune the colour grading
The last step was a nudge in the direction of colour tweaking. Now it’s time to perform the most drastic changes in colour. Open the Colour Grading Panel, and you will see several big circles with smaller ones inside. As soon as you drag them, the highlights, mid-tones, and shadows in that area will shift.
If the circle is kept close to the centre, it will apply a very subtle hue, whereas bringing it closer to the edge will increase the saturation. Those without previous experience shouldn’t manipulate the balance slider. It is quite tricky for a beginner to get used to.
As for the colours, the shadows must be blue, while the highlights are much better in yellow and orange. You are free to pick other highlight colours since it is a matter of personal preference.

Step 4 – Make use of the linear gradient tool
People often overlook the primary subject when editing. Here, our subject is the spectacular Lamborghini. The idea is to draw attention to the car by making the background less prominent. This is exactly where the Linear Gradient Tool shines. It dims both the sky and road to diminish their significance.
To get to this feature, navigate to the toolbar at the top of the Basic Panel and select Masks. If your photo contains masks, press the Plus icon, then click Linear Gradient.
When no mask is present, a dialogue box appears. Scroll down to the middle to locate the Linear Gradient tool. Now drag the image up from the bottom until you reach the car.
Three white lines will pop up, centred with a black dot.
- Moving the top line changes the filter’s length.
- Moving the middle line repositions the filter.
After you finish the lines, press the O key to reveal the filter overlay. Make sure you have ticked the Show Selected Mask Overlay box. Now is the moment to adjust the ground’s exposure. Reduce it to -1.50 to make the surface darker.

Step 5 – Edit the overlay
Using the gradient tool is not enough to offset the effects of all those surrounding elements. You have to modify the overlay colour, too.
In the Tools menu, place your cursor on Adjustment Mask Overlay to access a colour palette of four overlays. Make sure the one you pick does not coincide with the area you are dealing with.

Step 6 – Create a dark sky
The ground has been successfully pushed aside. However, one thing is still stealing the spotlight from the Lambo. Yes, that’s the sky.
Darkening is the only viable solution that calls for a second linear gradient. Here are the edits needed for this one:
- Bring down the highlights.
- Reduce the exposure
- Get rid of haze
- Warm it up a bit

Step 7 – Use the brush tool
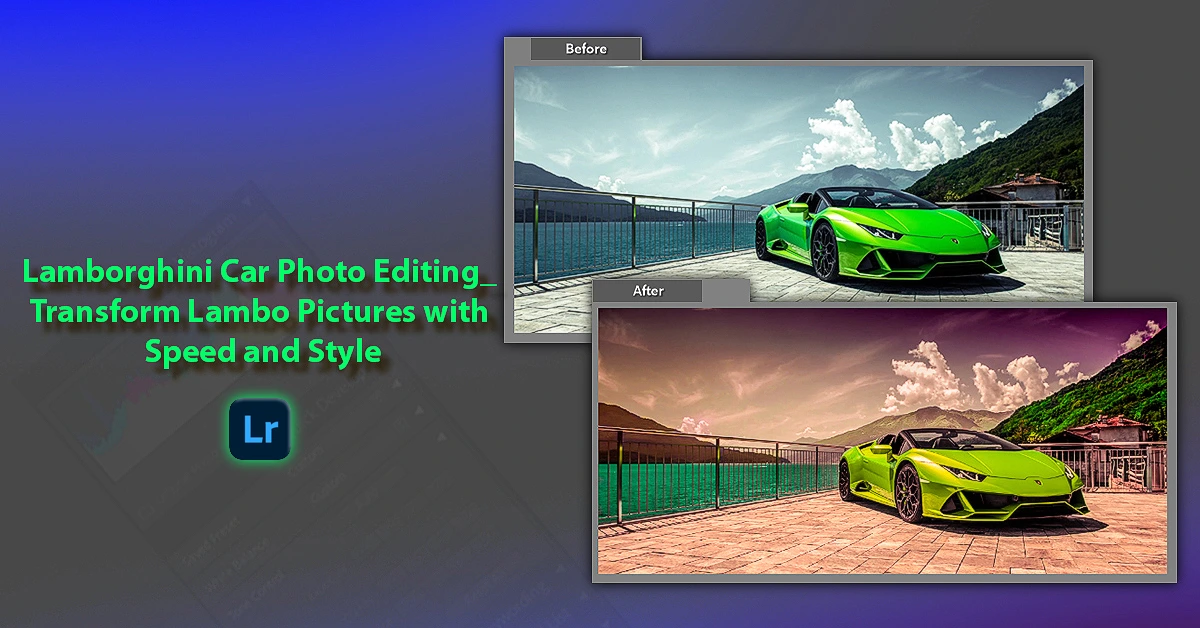
To put it simply, the editing is already complete. Compare the Lamborghini before-and-after pictures to get a sense of the incredible transformation.
Although you can now close Lightroom and admire the photo to your heart’s content, we recommend a couple more tweaks for further polishing.
Open the Brush Tool under the Masking Panel and make the following adjustments:
- Feather – 20
- Flow/density – 100
- Size – 17
Afterwards, the first step is to darken the vehicle’s windows. Selecting the windows accurately is the most challenging part of this task. Once the selection looks good, set Dehaze to 40.
Now let’s add more contrast to those sporty wheels. Similar to before, select the shape (it doesn’t have to be perfectly circular), turn up clarity and contrast to 30, and saturation to 20.
And there you go; all eyes are on the Lamborghini, the colours pop, and the surroundings remain gloomy yet captivating. Learn more: Jeep Car Photo Editing—A Simple Guide to Edit Stunning Jeep Photos!
Final Words
As the article illustrates, adding a touch of beauty to your automobile pictures is not difficult at all. Simply adjust the colours accurately, then use the gradient tool for an impressive Lamborghini car photo editing result. Also, don’t forget to finish off your wheels and windows. Despite being trivial, the final image would look more polished as a result.