How to Set up A photo studio for product shots
- October 24, 2025
Although product photography can appear difficult, it remains vital for achieving business success. Visually appealing, high-caliber imagery draws in shoppers and boosts revenue. Yet image editing and Photoshop tasks often prove challenging for many people. Clipping Creations India simplifies this workflow by offering expert clipping paths and image editing solutions. Establishing your own photo studio is feasible even on a tight budget. Success requires only the correct attitude and the readiness to begin.
Here are the tips that you will need.
1. Select the right equipment
When we say the right outfit, we mean using an outfit that you can wear, and that will satisfy your requirements and wants. It’s easy to overspend when you do n’t have to. This is essential because good photography is dependent on the quality of your outfit and how effectively you set it up. There’s always the law of cause and effect in everything. And product photography, in this case, is no different. However, you’ll end up with a lousy print that nothing wants if you ignore the laws of cause and effect.
Setting up a successful print plant will determine how productive you’re going to be in the future. It’s key to note that the usual case is that most companies or individuals want further prints. This is because it generates deals in the long term and ensures that you stay in business. Before you probe how to organise your plant, you should know what you need.
- Camera
- Table
- White background
- Tripod stand
- Duct tape
- Window
- Foam Core Board
- Memory Card
You might also need to carry your enthusiasm and confidence!
2. The step-by-step procedure
The key thing about creating a photo studio is to understand that businesses are unique. This means that your constraints and advantages won’t be the same, and you will have to work your way around them. There’s no perfect business because of the context you are in, the type of product you are producing, the studio space, expertise at hand, and the budget you have. All these factors ought to be put under consideration.
Anyway, you can set up a photo studio using these easy steps:
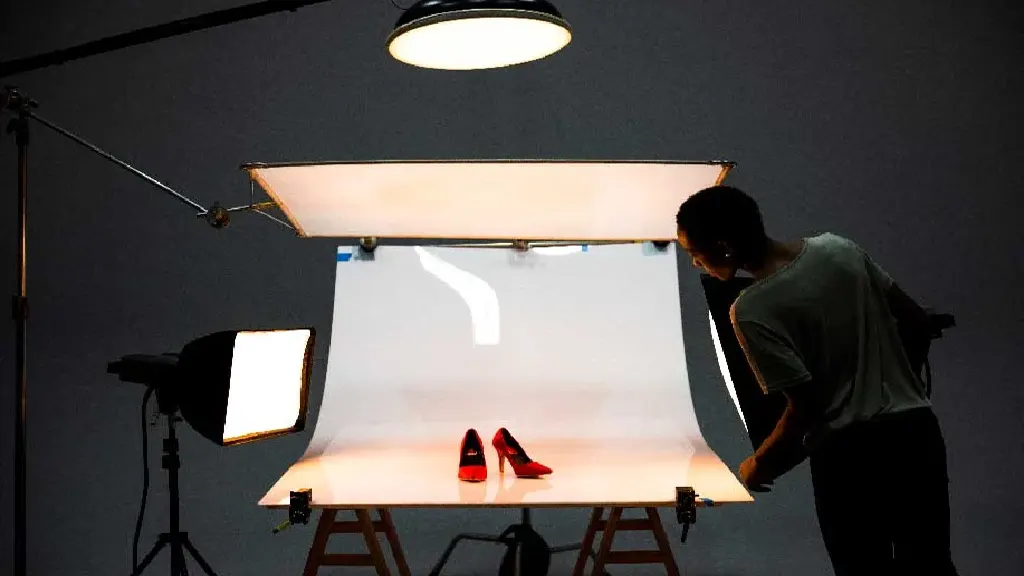
- Set up your table near a window. The goal is to have natural light on the product.
- Unroll your white background paper and tape it to the ceiling, wall or something. Stabilise your paper by taping it also to the able and ensure that it is clean and organised. This will reduce the time that you will spend editing the photo.
- Sweep and clean your product. Make sure your product is dry and fresh. In this step, take several pictures of your product. This means that you change your angle momentarily. Having a tripod stand comes in handy and allows you to be creative and play around.
- The last step is to adjust your camera and tripod stand. This means you adjust the tripod’s leg and the camera’s focus range. Ensure that the image you are about to take has enough negative space and doesn’t appear too squeezed.
3. Prioritize efficiency
When dealing with effects, you must prioritise effectiveness. In this case, image product and image editing are a thing; it’s a process. It would be stylish to maximise the affair while using the least input to make it better. This is the top description of peak performance. However, you also need to optimise or be careful with the quality of your images and the speed of operation, if you want to perform efficiently. However, a real entrepreneur can set up a print plant cheaply and quickly, If you’re one.
For product photography, it means that you cannot afford to mess around. Otherwise, if you do, the game is over. It is far better if you follow some protocol and procedure. This will ensure that your heart beats at a fair pace and there’s nothing to worry about after the job is done:
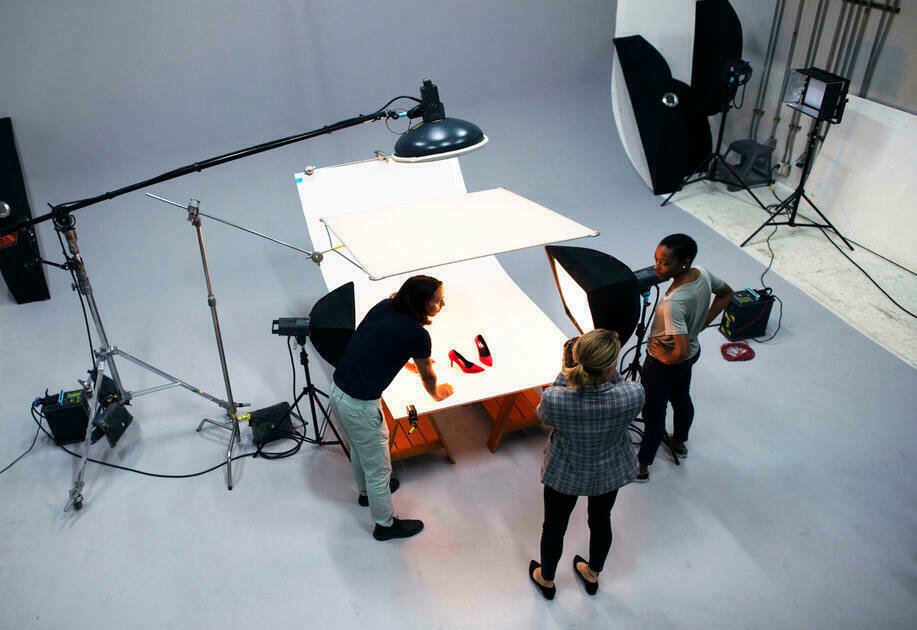
- Make sure products are grouped into the project they belong to, priority, and product type. An efficient studio operates under these principles so that work doesn’t get mixed up. Workflow ought to be consistent with yielding production both in the short-term and long-term.
- Images uploaded and captured ought to be managed by an online project management system. It is trivial to handle repetitive work. You need to move forward with little to no mistakes constantly.
- Make sure you have the right team. In this context, you prioritise hiring some of the best product photographers you can get on the market. This is because you will need them. Most average companies or individuals make a mistake when setting up a studio, picking up anyone who has good photography skills. Don’t do this. You need a specialist who knows how to handle capturing exceptional images of a product. If you want to assist this particular person, then surround them with hardworking studio helpers or assistants
- The last tip is about having a consistent style and sticking to it. If you deal with a particular product consistently over the year, your camera crew should minimise camera and light adjustments. This will increase productivity because you will be taking way less per the product photo.
Conclusion
Setting up a product photography studio doesn’t require a massive budget—just smart planning and the right tools. By using natural lighting, simple equipment, and an organized workflow, you can produce high-quality product images that attract customers. Consistency in style and efficient processes will help scale your business over time. Investing in proper setup and technique ensures better visual marketing and higher conversions. With dedication and creativity, anyone can build a professional product photography studio at home.