How To Cut Out Hair From Image In Photoshop? [Step-By-Step Tutorial]
- April 10, 2025
Hair has complex edges. That is why cutting them out is more challenging than the subjects with straight edges. Is it possible to accurately separate hairs from the background? Yes, it is. Then, how to cut out hair from an image in Photoshop?
In Photoshop, you can use the Layer Mask option to precisely cut out complex hair from an image. First, separate the subject from the background using the select subject tool. Then, refine the edges and remove excess parts with the brush tool.
It was a quick overview of the detailed process. Today, we will discuss the entire process in detail. Continue reading till the end to learn how to cut out hair from images in Photoshop.
How to Cut Out Hair from an Image in Photoshop: Step-by-Step Guide
Can you precisely cut out hair from images in Photoshop? Yes, you can. You can achieve a straight hairline in various ways. But when the edges are complex, it becomes tougher. That’s why we always prefer using hair masking. Image masking can do the job perfectly, whether the edges are straight or complex. Here is the full step-by-step tutorial for cutting out hair from images in Photoshop:
Step 1: Open the photo
First, open the Photoshop software on your desktop. We are using Photoshop CC 2020, but the process is the same across the latest versions and earlier ones.
Then click the File option in the top-left corner and select Open. Then, select the photo you want to edit, and it will open in Photoshop.

Step 2: Select Subject
Now, you need to separate the subject from the background. The subject here is the human. To remove the background, first, you need to select the subject. Click on the Select option and then choose Subject. It will automatically detect the subject in the photo and select it. You will notice some flickering lines around the body.
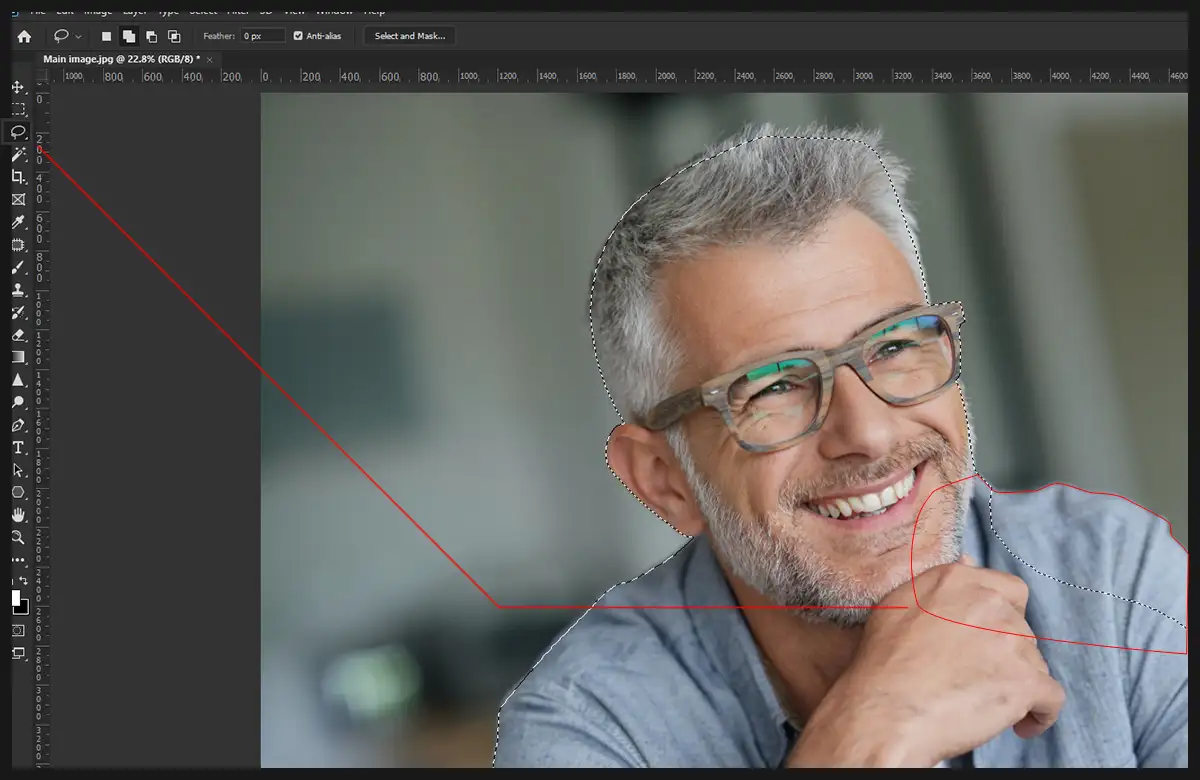
Step 3: Add & Remove the selection
However, the select subject option does not always work perfectly. If the background is a single color or the edge of the subject is straight, then it may do the job accurately.
But in our photo, it failed to detect the edges with 100% precision. That is why we will make corrections manually using the lasso tool.
Click on the lasso icon from the toolbar on the left. Now, you must add some parts inside the selection area and remove some parts from the area.
- Add: Press & hold the Shift button and select the areas that you want to take inside the selection area.
- Remove: Press & hold the ALT button and select the areas that you want to remove from the selection area.
While adding or removing the areas, zoom in on the edges to select more precisely.
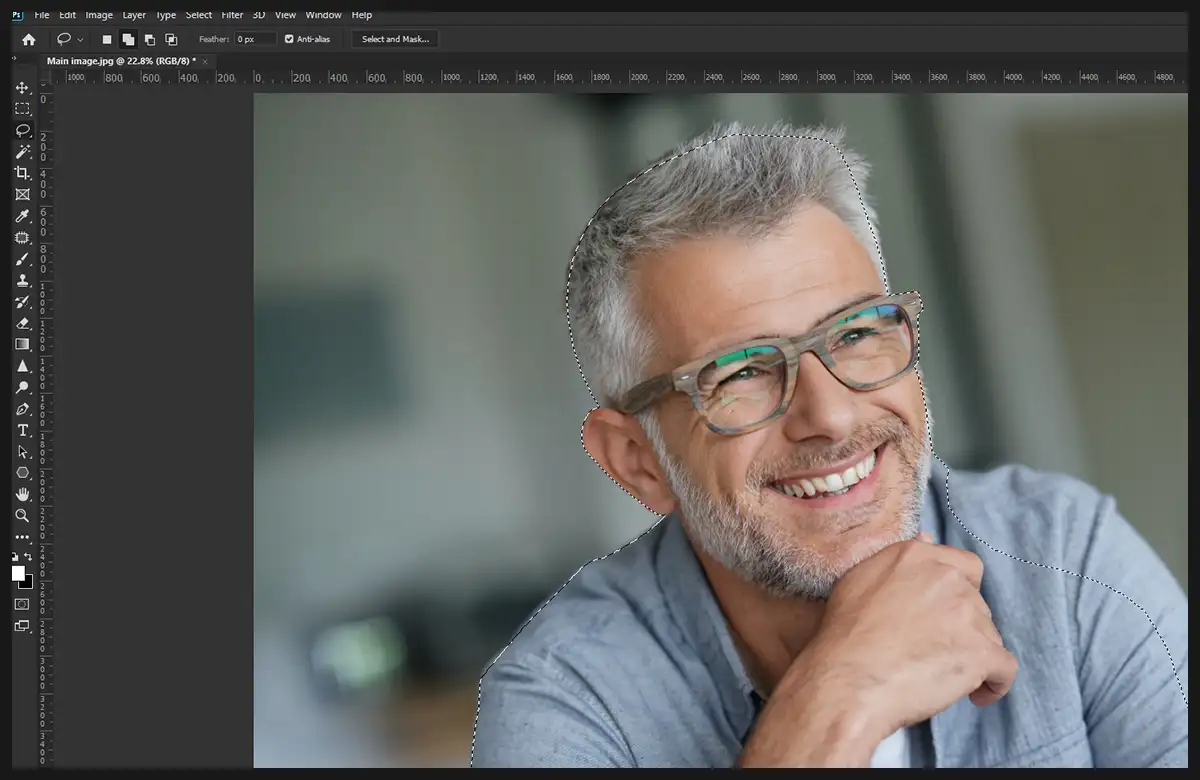
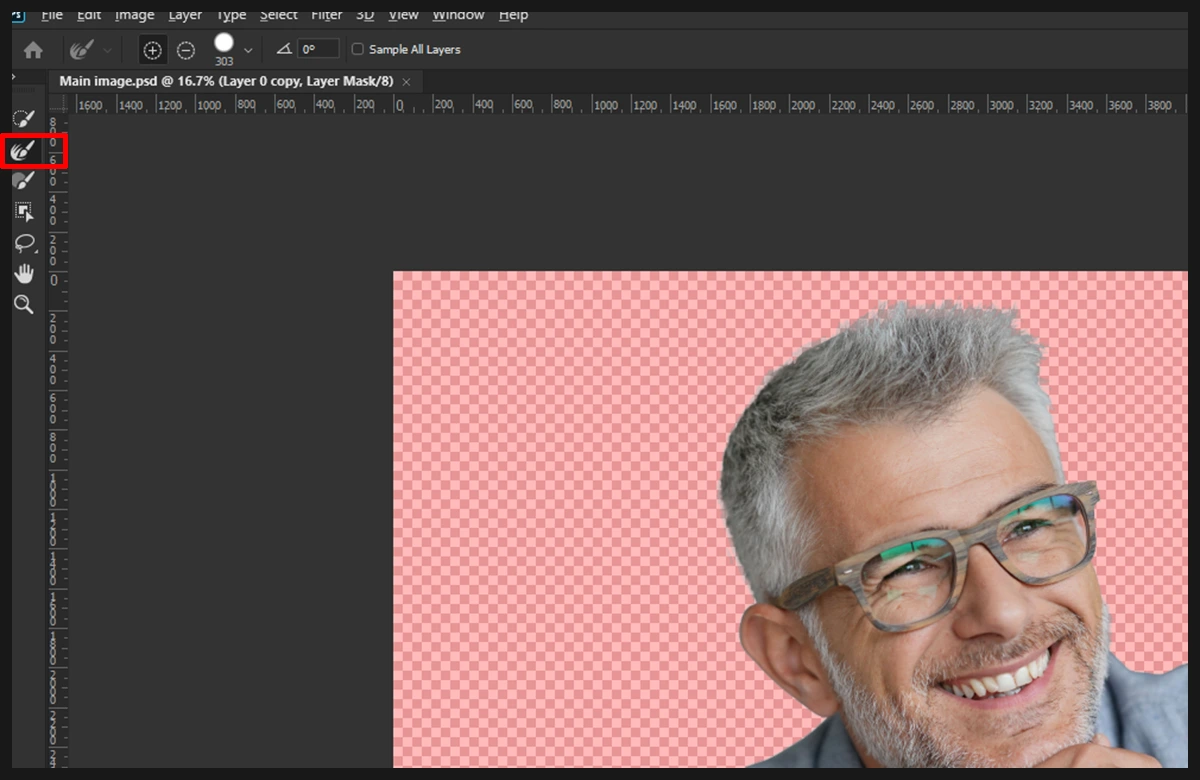
Step 4: Layer Mask
After finalizing the selection area, click on the Layer Mask icon at the bottom of the right window. The icon looks like a circle inside a rectangle or square shape. It will remove the photo’s background.
If the edges are sharp and straight, you will get a perfect result in this step. Follow the fourth step to remove anything from an image. But the hair’s edges are complex, so we need to do a little more work.
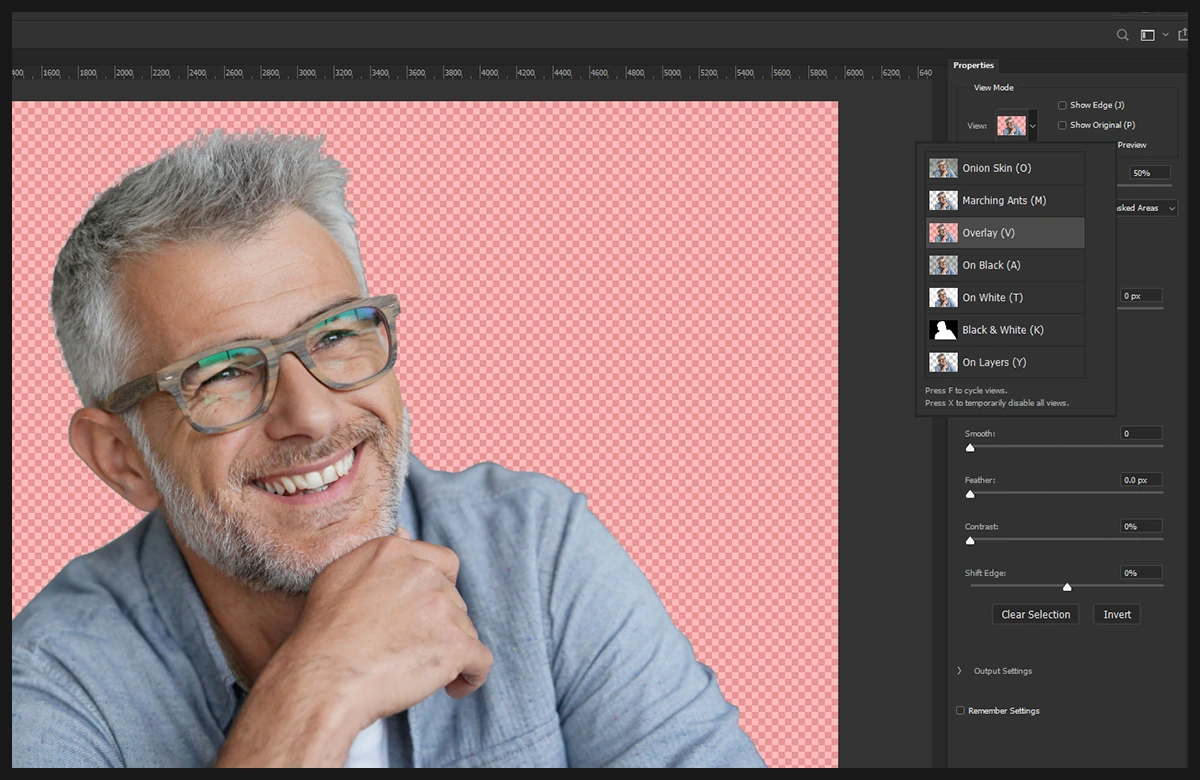
Step 5: Select and Mask
Now, click Select from the menu bar, then choose Select and Mask. A new select and mask dialogue box will appear on the right side.
You can select different background views from here, such as onion skin, on black, on white, and more. You can select the one that you like and proceed. However, we like to work with the overlay mask. You can also change the opacity of the background from the dialogue box. Keeping it between 50 and 60 is usually more helpful.
Step 6: Refine Edges
When you are masking the image, you will notice a new toolbar appearing on the left side with only a few options. Select the Refine Edge Brush Tool from here.
The tool helps to mask hard-to-select parts from the background. It will sample the texture from the background color and keep the texture inside the selection area.
Click and drag the brush all over the edges of the hair. Find areas where you need to separate the hair from the background. Continue doing it until you properly separate the hair. Be careful not to use the brush too much in the inside area. It may make the hair transparent, too.
Now, set the output to Layer Mask in the dialogue box on the right, then click OK at the bottom. Now, you can see the updated layer mask.
Step 7: Overlay
Even after refining the edges, the hairlines may still be imperfect. Press the ALT button and click on the layer mask. Now you will have a better look at the edges. The white area is our main subject and is visible. Besides, the black area is the background and is invisible. You will find some shadowy or cloudy areas around the edges. You need to remove them to cut the hair perfectly.
Press B or select the Brush Tool from the toolbar on the left. Then change the mode to Overlay from the option bar. Then drag the brush around the edges to remove the cloudy areas. It will not modify the black or white areas due to using the overlay mode.
Lastly, click View Mask, and you will see the updated subject. The work is done, and you have perfectly cut out the hair. Now you can export the cut-out image to your desktop or use it as a new background. Read more: How to Edit Senior Photos Like a Pro in 6 Simple Steps?
Conclusion
We have provided you with the best guide on cutting out hair from Photoshop images. While using the different tools, adjust them based on the photo’s nature. It will help you get better output.
Here at Clipping Creations India, we provide support of all kinds. To get cut-out hair images from a professional, feel free to reach out to us. You can also try a free trial and receive free samples of our work.