Learn Clipping Path Flatness: Remove Image Backgrounds!
- April 20, 2025

Clipping path flatness is a technique for removing the background from the most complex shapes, such as animal hair or fine details. The flatness in the clipping path can only be achieved by placing the clipping paths close to the image edge point. In this article, we learn about the clipping path flatness, clipping paths, and some photo editing protocols. ‘Clipping’ is a powerful tool in Photoshop where you remove the subject of your image from the background. The more complex the object in the image, the flatter you need to make it for the desired results. This article will help you in learning how to make use of clipping paths and achieve desired clipping path flatness through practice.
What Are Layers in Photoshop?
Layers in Photoshop are like stacks of glass on which you can work. These layers are transparent and independent. You can work on each layer individually, get creative, and play with different effects until you get the results you want. And these layers remain independent until you merge them.
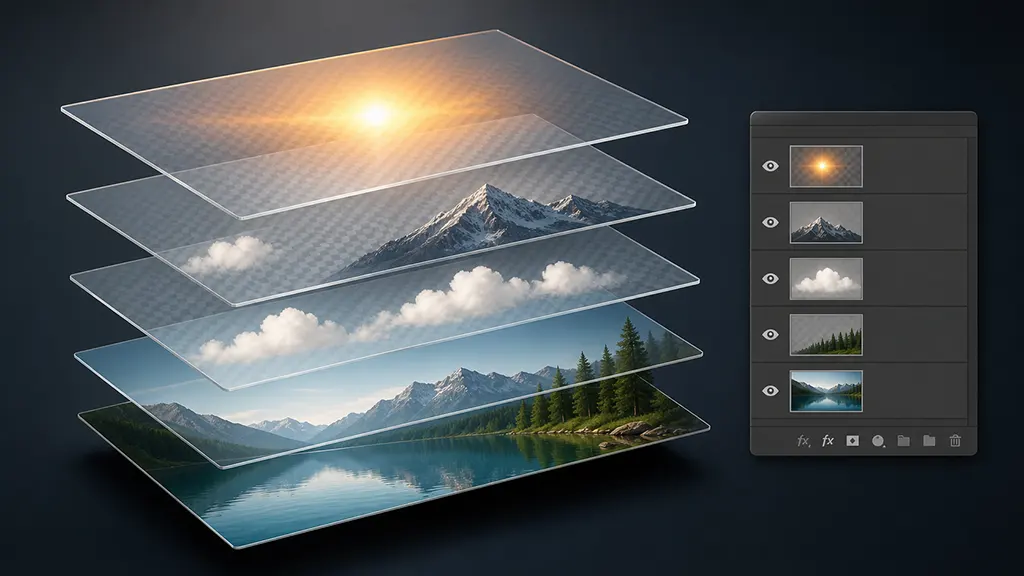
Working in layers lets you take your time and develop your photo down to every detail. Fine-tuning your images requires working with multiple layers before you can develop the finished product.
Why We Use Clipping Path Tools?
The clipping path tool is a powerful Photoshop feature that you can use whether you are a graphics designer or a marketing professional. Part of growing your brand requires clean, attractive visuals.
How Do You Create a Clipping Path in Photoshop?
There are a few steps to creating your clipping path; they are as follows:
1. Set Up Your Pen Tool
You need to use the Photoshop Pen Tool to create clipping paths. You can find it in the Toolbar or press “p” to have it selected automatically.
2. Draw a Path Around Your Product
This is pretty simple: draw around the object you want to remove from the background by clipping. Click on the edges of the image you want to clip. Click again and place it at the next point without letting it go just yet. You can pull along the edges until you achieve a curve that properly fits your image.
Continue on the edges until you have completed the outline of your object; hover your Pen Tool over the starting point until a circle appears right next to it. That’s your cue to start closing the path. To close the path, click on your first point. Then select the direct selection tool.
3. Save Your Path
Happy with your desired shape? Now, go to the Paths panel option in Photoshop. If you do not see it, click Windows > Paths to make it appear, then select Save Path.
4. Create Your Clipping Path
Simply click on the saved path you just created in your Paths panel to create a traditional clipping path. Select Clipping Path from the panel menu once more.
You will not see the difference in your Photoshop file, but if you save your image as a PSD and place it in InDesign or Illustrator, you’ll see the clipping path in effect.
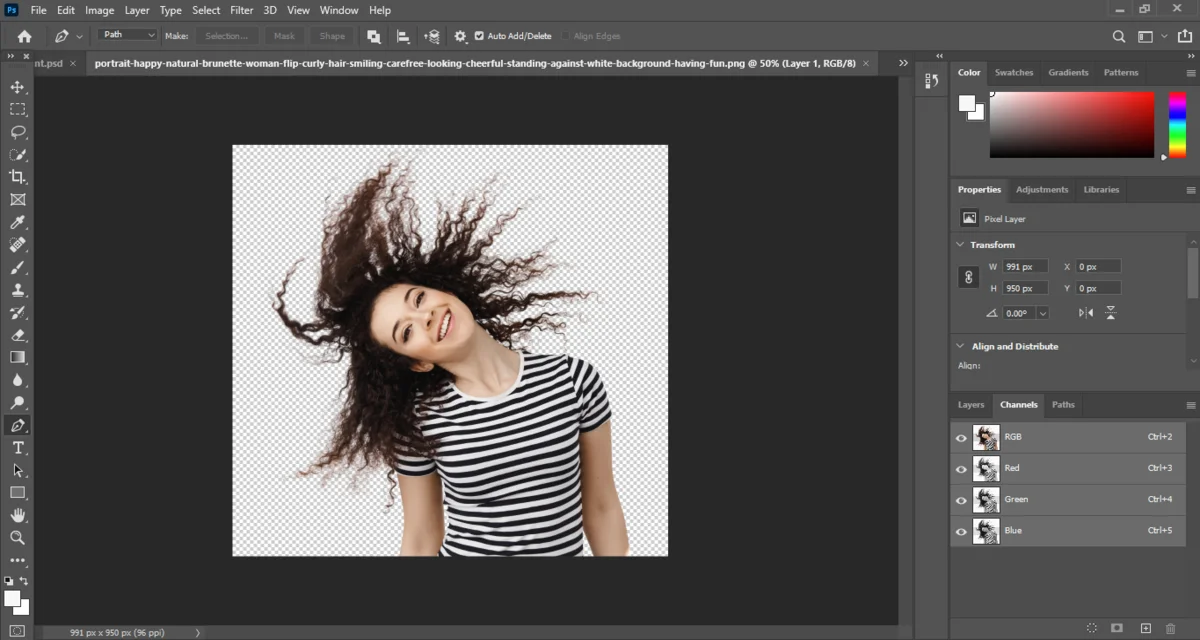
5. Create a Selection from Your Clipping Path
Navigate to the Layers Panel. If the panel is not visible, select Window > Layers from the dropdown menu at the top of the application window.
Make sure your new Path is selected in the Paths panel. Then, from the Panel’s menu, select Make Selection Check and ensure that the Feather Radius is set to 0. Then, select “OK.”
6. Create a Clipping Mask
Return to the layers panel. The Add Layer Mask icon is at the bottom of your Layers panel and looks like a black rectangle with a circle cut out of its center. Select that icon.
You’ve just finished making a Layer mask that separates your product image from its background. You can easily place another background beneath Layer 0 to set your product in a different setting, or leave it on a transparent background.
What Is Flatness in a Clipping Path?
If you want to master a technique for the most complex edges, like animal skin or hair, then clipping path with flatness is something you should master. The flatness of the clipping path indicates how close the clipping path is to the edge of the image. This is a difficult technique to master and requires a lot of patience and dedication.

Conclusion
Now you have learned how to create clipping paths and separate the image’s subject from its background. The more practice you put into this technique and time with the tool, the more you will soon be able to master flatness in your clipping paths. Whether you are a graphics designer or a marketing professional, having attractive visuals for your business or company will surely set you apart from your competitors.