The Blueprint for Basic Masking in Photoshop CS5
- February 21, 2025

Learning masking in the newer versions of Photoshop is easier, as they’re more user-friendly. But you can’t run them on an old potato PC. In such cases, Photoshop versions like CS5, CS6, and CC can be your solution. So, how do you do basic masking in Photoshop CS5, CC, CS6, or other older versions?
Although an older version of Photoshop will be a bit less intuitive, the basic masking process will be very similar. You’ll only need to master two basic tools, the brush tool and the pen tool, for two different masking kinds. Here is a guide on masking in CS5, along with some neat tricks and tips.

What is Basic Masking in Photoshop CS5?
When editing images, we often need to remove or hide portions of an image. Or suppose you want to remove the background from a portrait of yours, what will you do? That’s where masking comes in. Masking is an editing method that lets you hide or show selected parts of an image.
Uses of Masking in Image Editing
From professionals to beginners, masking is a ubiquitously appreciated method for editing and enhancing images. And the main reason behind it all is its diverse usefulness. Here are some significant uses of masking in Photoshop.
- Removing the background from an image
- Replacing the background of an image
- Editing or adjusting specific portions of an image
- Restoring damaged or lost parts of a picture
- Control the transparency of different parts of a picture
- Blurring sensitive or unwanted objects from a photo
- Creating a composite image by combining two or more
- Blending two images seamlessly
Types of Basic Masking in Photoshop CS5
You can divide masking in Photoshop into two simple categories:
- Layer masking
- Vector masking.
Let’s take a close look at what they are.
Layer Mask
This is the most widely used masking method in Photoshop. Masking is the process of hiding or revealing a specific portion of a picture, and layer masking makes it very easy to do.
With a layer mask, you can just paint a picture with a brush tool to show or hide parts. It’s just that simple. The process actually controls the visibility of a chosen layer in selected areas.
Think of the layer mask as a grayscale image where the colors determine the content’s visibility. A grayscale image can only contain black and white colors. The black areas would be fully transparent, while the white areas would be completely opposite. Gray areas are partially transparent, depending on the depth of gray.
Vector Mask
Making a vector mask is a more complex form of masking, as it uses vector paths and shapes to define which parts of an image will be hidden or shown.
The benefit of a vector mask is that it’s resolution independent, meaning you can resize or scale it as much as you want, and the quality won’t be compromised.
Creating a vector mask mainly requires a shape outline. You can create a cutout using only basic shape objects, such as circles, rectangles, etc. But for outlining a complex object with curves and edges, you’ll need to use the pen tool.
How to Create a Basic Layer Mask in CS5
A basic layer mask will let you remove objects from an image by simply painting on it. Follow the steps below to create a basic layer mask in Photoshop CS5, CC, and earlier versions.
- Document Set Up
- Add Layer Mask
- Controlling the Opacity
- Using the Brush Tool
Let’s take a look at these steps in detail.
Document Set Up
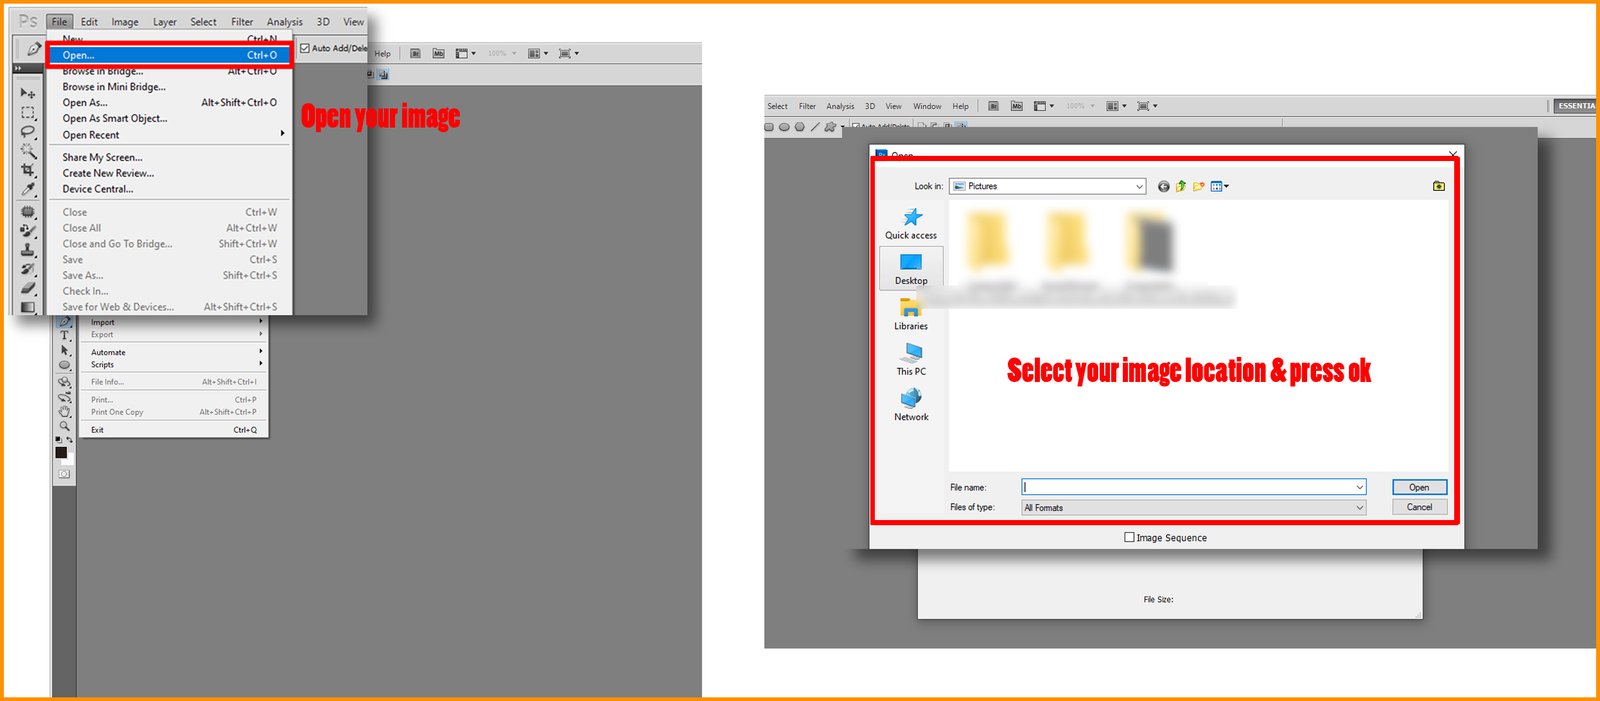
As you want to create a layer mask, ideally, you should have two photos. You’ll need to import your selected photos into a Photoshop file or document. Not only that, but the images also need to be in two separate layers, as you’ll create a mask of one of them over the other.
To directly import two images into two different layers, go to the File menu in an open Photoshop document. There, you will see Scripts>Load Files into Stack. Click on that, and a ‘Load Layer’ dialog box should appear.
In the dialog box, click on Browse, and you should be able to select your photos. Click Open to import the images into separate layers.

Add Layer Mask
To create a layer mask, go to the Layers panel and select the layer you want to add the mask to. You’ll ideally want to add the mask to the top layer. That way, you can keep the bottom layer intact and get the outcome you want.
After selecting the desired layer, click the ‘Add Layer Mask’ icon at the bottom of the layers panel. You’ll immediately notice a small white rectangle has shown up right next to your selected layer’s thumbnail. This layer mask thumbnail indicates that a mask has been added.
Controlling the Opacity
Now that the layer mask has been added, you can tune the visibility of this layer in a few different ways. The most basic way would be simply controlling the opacity.
You’ll find the opacity slider right above your layer thumbnail when you click it. This method will simply fade the entire picture instead of particular spaces. So you might not find it handy in most situations.
Using the Brush Tool
To get fine control over the visibility of specific portions of the image, simply paint over them using a brush tool. As I stated earlier, the layer mask is now a grayscale image in a sense.
When a layer mask is added, every bit of it is visible by default. That’s why the rectangle beside your masked layer’s thumbnail is completely white. Now click on that white rectangle to select the mask.
Select the brush tool and paint black over the parts you want to hide. Painting with white over the black parts will make them visible again. If you want to fade specific areas, paint them gray.
How to Create a Basic Vector Mask in CS5
Creating a basic vector mask will just require an outline of the object or portion you want to keep. The mask will make the rest of it go away.
Follow the steps below to get a proper understanding of vector masking basics in Photoshop CS6, CS5, CC, or other similar versions.
- Set Up Your Document
- Draw a Path
- Use the Direct Selection Tool
Let’s see how these steps work.
Set Up Your Document
Vector mask works on one image and lets you create a vector cutout that you can use over other images. So, selecting only one image would do for this tutorial. Open your image in a new document of the appropriate size. Make sure there is only one background layer in the document.
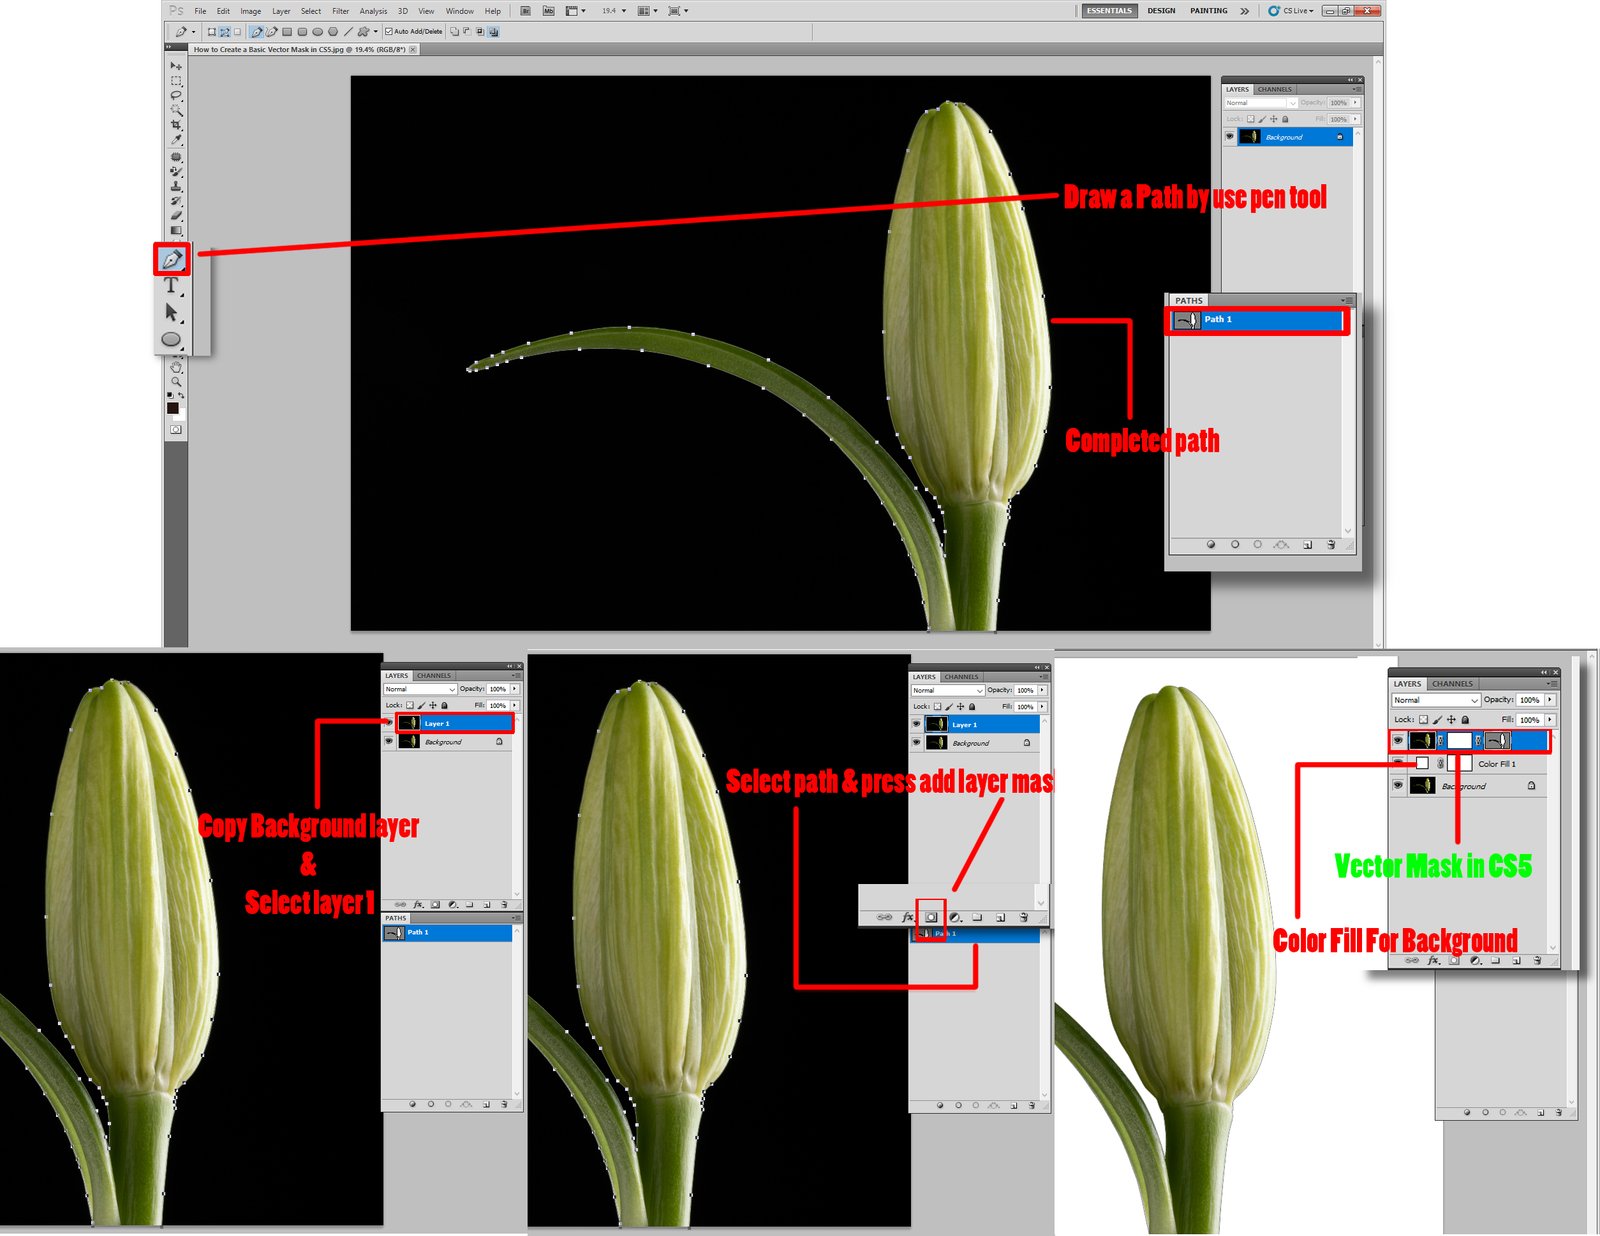
Draw a Path
This is where you’ll really need practice, as this step depends on your expertise with the pen tool. If you’re not familiar with the tool, for now, just focus on creating a cutout rather than perfection.
You’ll find the Pen tool on the toolbar on your left. Using this tool, you’ll have to draw an outline of the object you want to create a cutout of. The tool works in a drag-and-draw manner, and the more points you add, the better you can outline your object. But also remember that more points mean harder control and management. So, don’t bite more than you can chew.
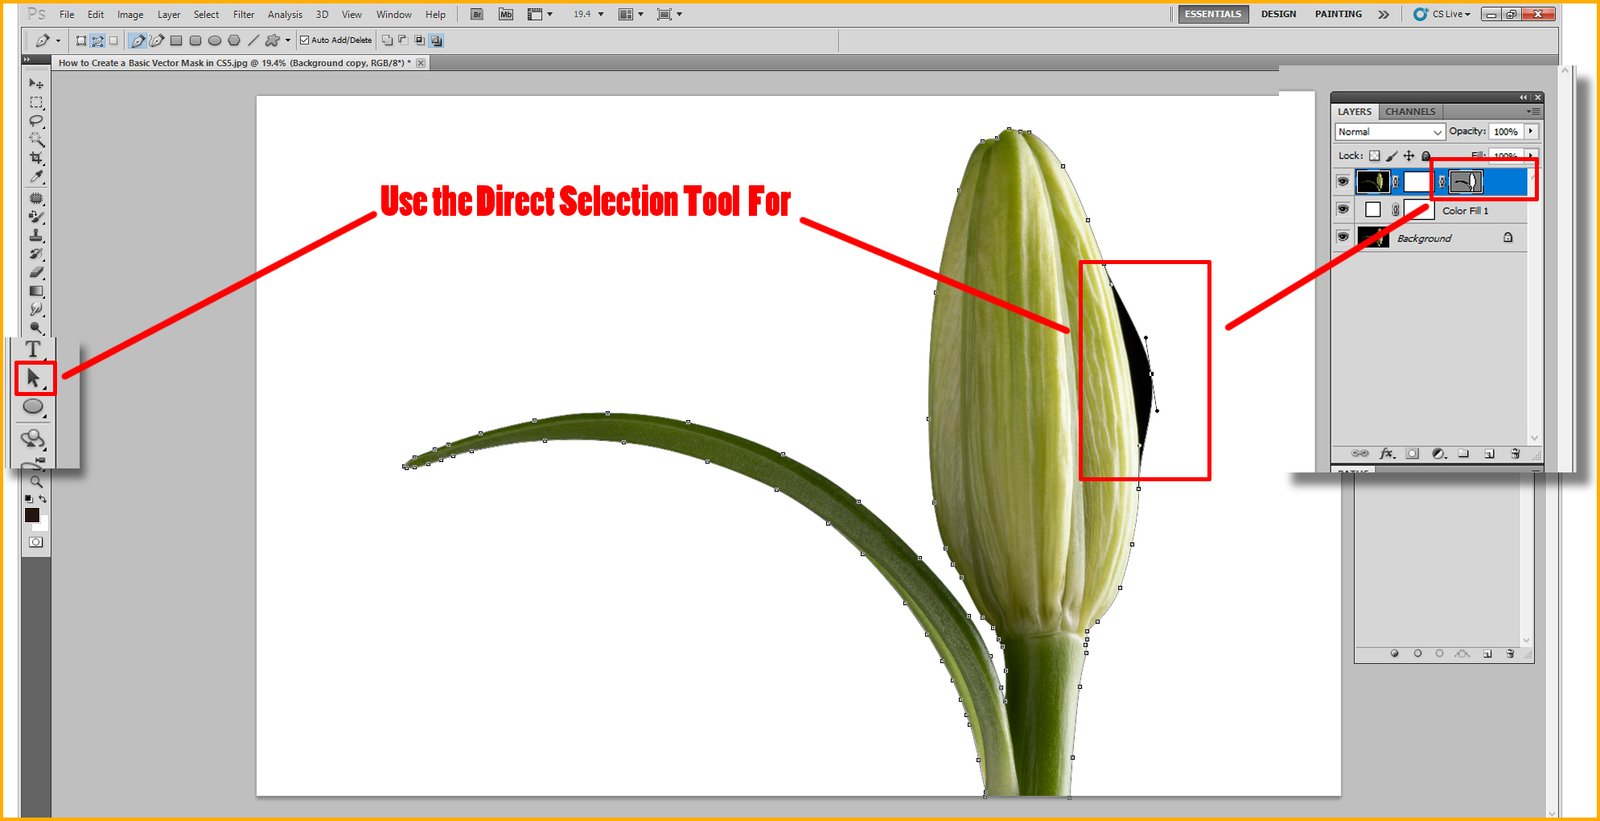
Use the Direct Selection Tool
Now, select the outline you created using the direct selection tool and right-click on your mouse. In the drop-down menu, you’ll find the option to ‘Create Photoshop Vector Mask.’ This should generate your vector cutout.
Benefits of Using Masking in Professional Editing
While the main goal of applying masks is to hide or reveal image parts, they also have many other uses and benefits. Let’s take a look at some of them below.
Selective Editing
Basic masking in Photoshop CS5 lets you adjust and edit specific areas of an image without affecting the other parts. This feature is beneficial when applying an intricate effect in a limited space. One of the reasons professionals love masking is the finer control it grants them over their work. Also, the end result looks more natural.
Integrating Images
With the help of masking, you can combine two or more images seamlessly. Just take two images, cut out the parts you don’t want to keep, and blend them together.
A vector mask can make this process even more interesting. With vector masking, you can cut out a specific object from a picture and place it on another. Doing a bit of tweaking, the object will appear as if it’s originally in the second picture.
Non-destructive Editing
Masking is a non-destructive editing process. It means you won’t lose any pixels through the editing process. This means you can always revert your work if something goes wrong. Learn more: How to Add Fog to A Photo in Photoshop.
Things to Avoid While Creating a Mask in Photoshop CS5
Basic masking may be simple, but there are certain things you must avoid doing if you want to get pro at this. Let’s take a look at these.
Overusing
Adding too many masks to a single image makes it increasingly difficult to manage. The end result also looks lifeless and fake in most cases. If a situation arises where you require too many masks, you may be doing something wrong.
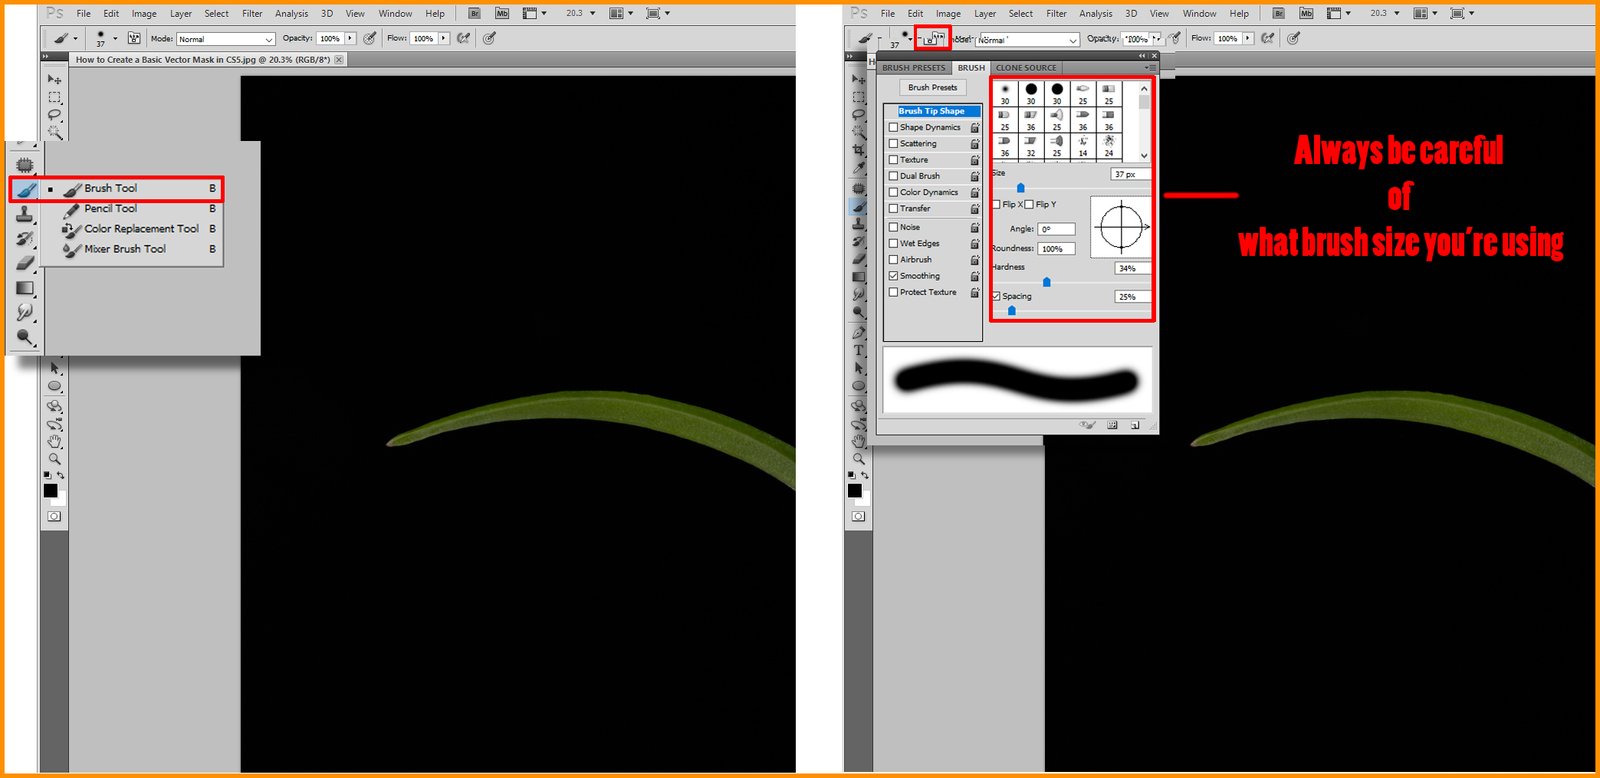
Wrong Brush Size
Always be careful of what brush size you’re using. Applying the right brush size in different situations offers improved results. While using the wrong brush size causes inaccuracies, making the image look very unprofessional.
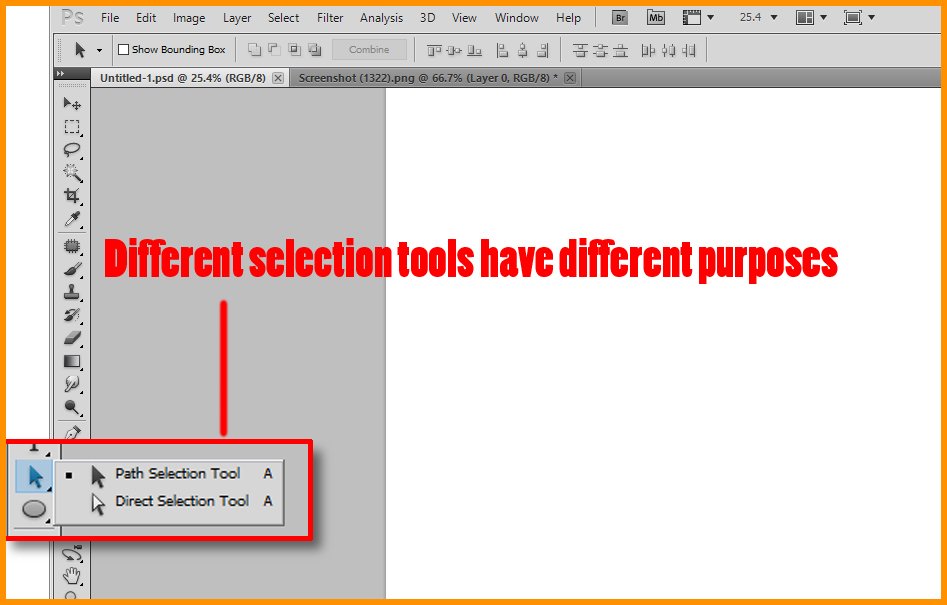
Wrong Selection Too
Different selection tools have different purposes. Make sure you’re using the right one for your work for finer results.
Not Keeping the Mask Editable
Even after finalizing your image, make sure to keep the mask editable. If you don’t, you’ll need to redo the whole thing from scratch for any changes.
Conclusion
Masking in Photoshop is the process of hiding or showing particular portions of an image. And you’ll often find the necessity of this method while editing images in Photoshop. If you have a PC with lower specs, it’s important that you learn basic masking in Photoshop CS5 or a similar version. For old or low-spec PCs, Photoshop versions like CS5 or CS6 will run smoothly and process images at a comfortable speed.