How to Remove Background in Illustrator?
- June 8, 2026

If you’re working with product photos, logos, marketing graphics, or eCommerce images, you may need to know how to remove background in Illustrator. Clean, transparent backgrounds help create professional visuals that improve branding, marketing, and online sales.
Fortunately, Adobe Illustrator offers several methods for background removal. Whether you’re creating product images for an online store or preparing graphics for print, learning how to remove background on Illustrator can save time and improve your workflow.
In this guide, you’ll discover step-by-step methods, common challenges, best practices, and professional tips for achieving clean and accurate results.
Why Learn How to Remove Background in Illustrator?
Background removal plays a crucial role in professional image editing.
Businesses use background-free images for:
- eCommerce product listings
- Marketing materials
- Social media graphics
- Catalog design
- Website banners
- Advertising campaigns
Moreover, clean image cutouts help brands maintain a professional appearance across all digital channels.
How to Remove Background in Illustrator Using Image Trace
One of the most popular methods involves the Image Trace feature.
This technique works best for logos, illustrations, icons, and simple graphics.
Step 1: Open Your Image
- Launch Adobe Illustrator.
- Click File > Open.
- Select your image.
Step 2: Select the Image
Click directly on the image to activate editing options.
Step 3: Open Image Trace
Navigate to:
Window > Image Trace
The Image Trace panel will appear.
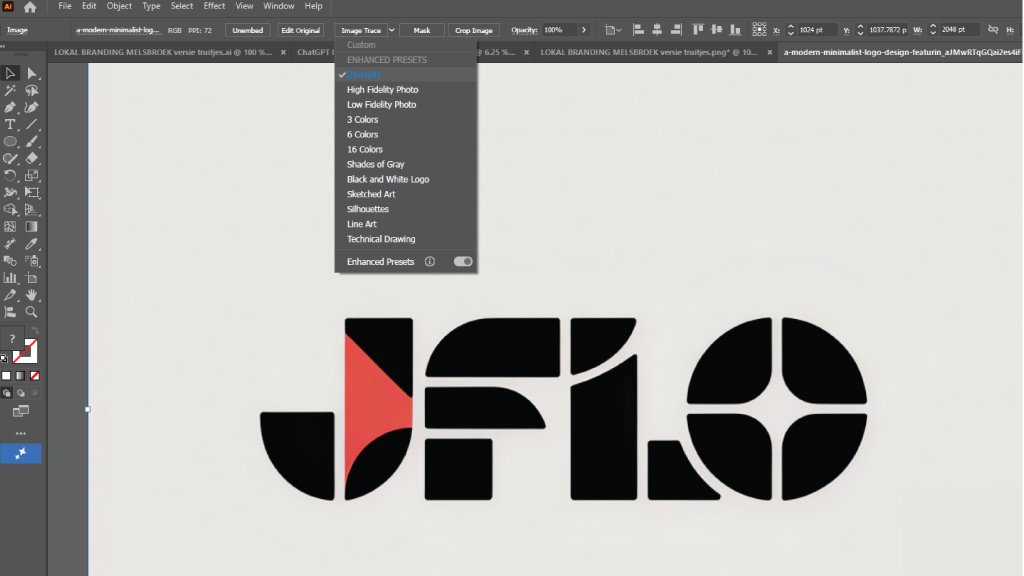
Step 4: Choose a Preset
Select a preset based on your image type:
- Black and White Logo
- High Fidelity Photo
- Low Fidelity Photo
- Shades of Gray
Step 5: Adjust Settings
Fine-tune:
- Threshold
- Paths
- Corners
- Noise
As a result, Illustrator creates a more accurate vector version of the image.
Step 6: Expand the Image
Click Expand in the top toolbar.
Illustrator converts the traced image into editable vector paths.
Step 7: Delete the Background
Use the Direct Selection Tool (A) to select unwanted background elements and remove them.
How to Remove Background from Image in Illustrator Using Clipping Masks
For photographs and complex images, clipping masks often provide better control.
Step 1: Import Your Image
Place the image into Illustrator.
Step 2: Draw a Shape Around the Subject
Use the Pen Tool or Shape Tool to create a path around the object you want to keep.
Step 3: Select Both Objects
Hold Shift and select:
- The image
- The clipping path
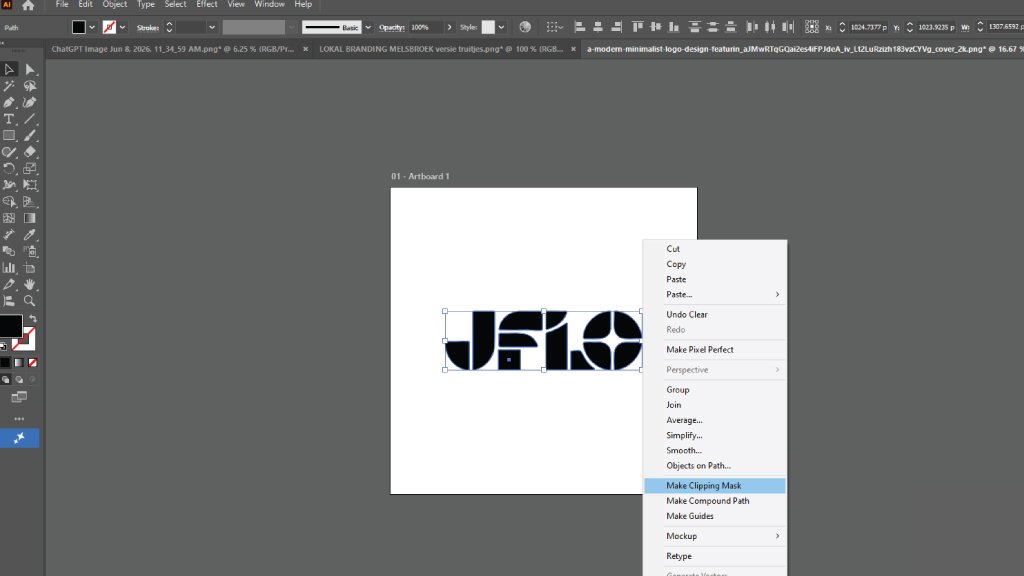
Step 4: Create the Clipping Mask
Go to:
Object > Clipping Mask > Make
Alternatively, use:
Ctrl + 7 (Windows)
or
Command + 7 (Mac)
Now Illustrator hides everything outside the selected path.
How to Remove White Background in Illustrator
Many users specifically search for how to remove white background in Illustrator because logos and graphics often come with white backgrounds.
Fortunately, this process is straightforward.
Method 1: Using Image Trace
- Select the image.
- Open Image Trace.
- Choose an appropriate preset.
- Check Ignore White.
- Click Expand.
Illustrator automatically removes the white background while preserving the main object.
Method 2: Manual Selection
For simple images:
- Select the white area.
- Delete unwanted elements.
- Save the file with transparency.
This approach works well for vector graphics.
Remove Background Not an Option in Illustrator? Here’s Why
Many users become frustrated when they discover that remove background not an option in Illustrator.
Unlike Adobe Photoshop, Illustrator does not include a dedicated “Remove Background” button for all image types.
Common reasons include:
You’re Working With a Raster Image
Illustrator primarily focuses on vector graphics.
Consequently, some photo-editing functions remain limited.
The Image Is Embedded Incorrectly
Sometimes imported images lose editing capabilities.
Try re-placing the image using:
File > Place
You’re Using an Older Illustrator Version
Newer Adobe versions offer improved image editing features.
Updating Illustrator may solve the issue.
The Selected Object Is Not Editable
Always ensure the image itself is selected before attempting edits.
Best Practices for Background Removal
Removing backgrounds effectively requires more than simply deleting pixels.
Follow these professional tips:
Use High-Quality Source Images: Sharper images create cleaner selections.
Zoom In for Precision: Working at higher zoom levels helps identify edge imperfections.
Preserve Natural Edges: Avoid overly aggressive tracing settings.
Save Multiple Versions: Keep an original file before making major edits.
Export Correctly: For transparent backgrounds:
- PNG
- SVG
- EPS
These formats preserve transparency.
Common Mistakes to Avoid
Even experienced designers occasionally make mistakes.
- Using Low-Resolution Images: Poor-quality images produce rough edges and inaccurate traces.
- Over-Tracing Details: Too many anchor points can make editing difficult.
- Ignoring Transparency Settings: Always verify transparency before exporting.
- Using the Wrong Method: Image Trace works well for logos but may struggle with complex photographs.
- Forgetting to Review Edges: Always inspect edges closely before finalizing.
Professional Alternatives for Complex Projects
Although Illustrator offers useful tools, some projects require advanced editing techniques.
For example:
- Hair selections
- Transparent fabrics
- Jewelry photography
- Product cutouts
- Complex shadows
In these situations, professional image editing services often deliver faster and more accurate results. Many businesses outsource background removal to maintain consistency across large image catalogs while saving valuable time.
Final Thoughts
Learning how to remove background in Illustrator can significantly improve your design capabilities and image editing workflow. Whether you use Image Trace, clipping masks, or manual path editing, Illustrator offers powerful tools for creating professional transparent images.
However, when projects become more complex or volume increases, professional image editing services can help ensure consistent quality while saving valuable time. By applying the techniques outlined in this guide, you’ll create cleaner graphics, stronger visual branding, and more professional digital content.