Beginners Guide on How to Edit Car Photos in Lightroom Classic [PC & Smartphone]
- March 2, 2025
Do you want to know how to edit car photos in Lightroom? It is a perfect app for beginners, non-professionals, and professionals for car photo editing. You can make your car photo look sharper, crisper, more alive, and more attractive in just a few minutes. But how to edit car photos in Lightroom?
First, upload the car photo to Lightroom and adjust the lights. Then, enhance the color using the color mixer and color grading. After that, adjust the effects to improve the photo’s details. Make any finishing touches you want, and it’s done.
It sounds easy, but you may find it challenging if you do not know the whole process. Today, we will show you how to edit car photos on your phone and PC using Lightroom Classic. We have selected the Classic version for today’s tutorial because it is more beginner-friendly.
How to Edit Car Photos in Lightroom PC in 6 Easy Steps
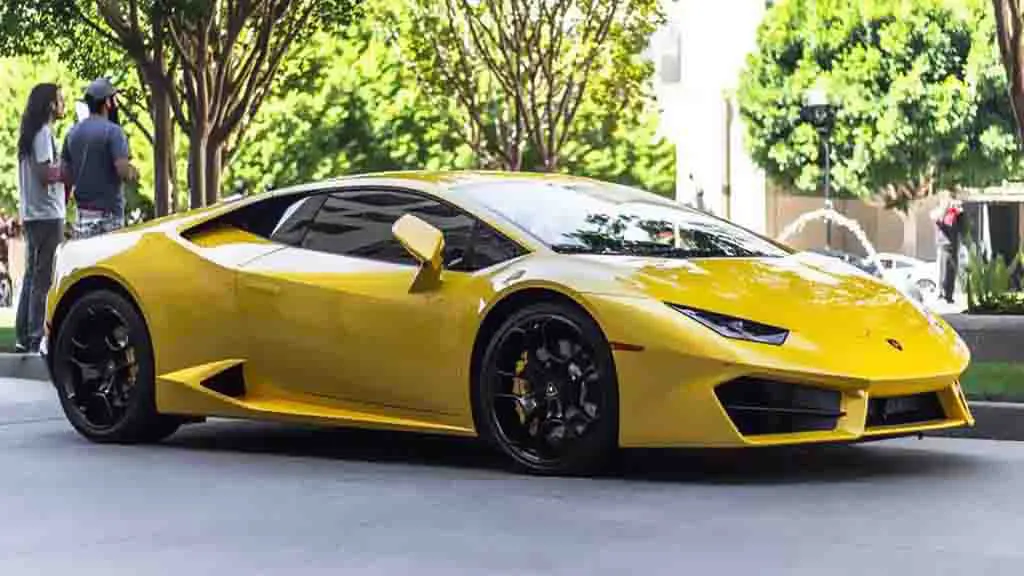
Editing car photos in Lightroom is pretty convenient, and many professionals do that. It results in amazing color and overall detail enhancements, making the photo look more attractive. We will be using the following photo for today’s Lightroom car editing tutorial.
Follow the steps below to edit your car photos on your PC using Lightroom:

Step 1: Add a Car Photo
First, locate the “+ Add Photos” text on the top left tab. Then go to where you have saved the photo, and then open it.
You can add multiple photos together, too. Then the app will show you the photos on your Lightroom app. Double-click on the car photo that you want to edit, and it will enlarge with some editing options on the right tab.
Step 2: Light Enhancement
First, you should adjust the lighting. The lighting is rarely perfect, whether you are taking pictures indoors or outdoors. Hence, you need to make some adjustments here.
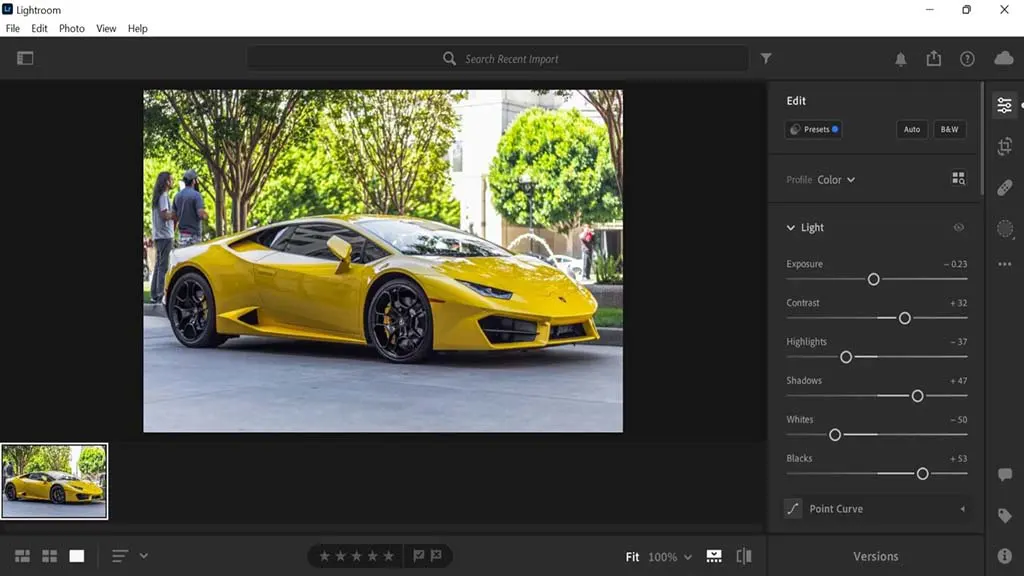
Click the three-line icon on the right-hand tab in Lightroom, and a new tab will open with various lighting and color enhancement options.
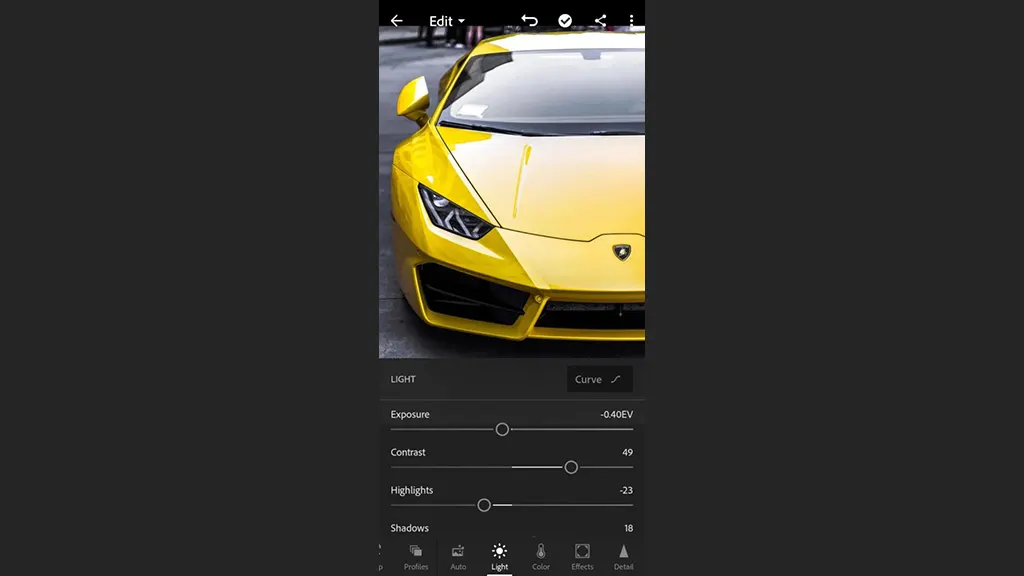
Now start changing the light editing options as you want. Here are the changes we made in our photo:
- Exposure: If the photo seems too bright, you should reduce the exposure, or else increase it. In this photo, the building in the background seemed too bright, and that is why we reduced exposure.
- Contrast: Then we increased the contrast, making the colors pop out and have deeper textures.
- Highlights & shadows: We reduced highlights and increased shadows to reduce the background’s flashy look.
- Whites & blacks: We also decreased the whites and increased the blacks to balance the background light.
Now the car, tree colors, and the building with dynamic range are better than in the original photo.
Tip: If you do not understand whether to increase or decrease the settings, do both and see which looks better.
Step 3: Color Adjustment
Once you have adjusted the basic lighting and contrast, next you should go for the color adjustment. The color editing option has three different sections, and we will discuss them individually.
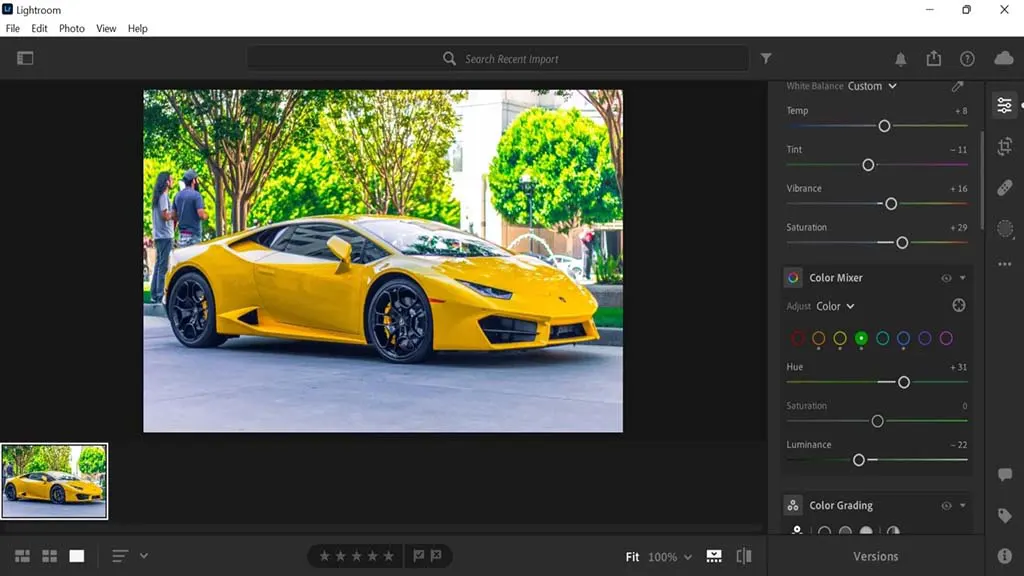
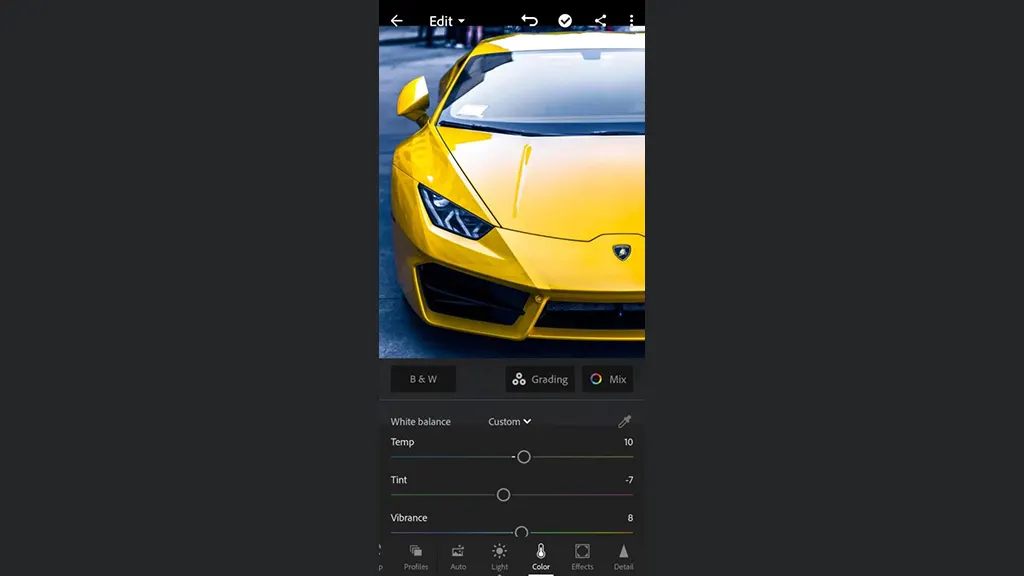
- White balance: The white balance section has four options. If you want a warmish tone in your photo, then you should increase the temperature; if you want a bluish tone, then decrease it. We reduce the tint slightly to balance the higher temperature. Then we also increased vibrancy and saturation to make the color pop up. You can reduce them if you want a photo with less color.
- Color mixer: The next option in the color tab is the color mixer. We love this option as it can totally change the colors of the whole photo. As you can see in the screenshot above, various color options are available in the color mixer tab. Click on different colors and change that particular color’s hue, saturation, and luminance on the car photo to manipulate it. For instance, if we select yellow, the color of the car, and then change the balance, it can completely change the color of the photo.
- Color grading: If you want to set a particular color tone for the whole photo, color grading will be beneficial. Click on the small circle on the mid-tones, shadows, and highlights, and slide them toward the color that you want in your photo.
The overall color options can really help you enhance the color of your car photo. As you can see in the photo above, the initial photo color was quite dull, but now the colors are popping out and looking attractive.
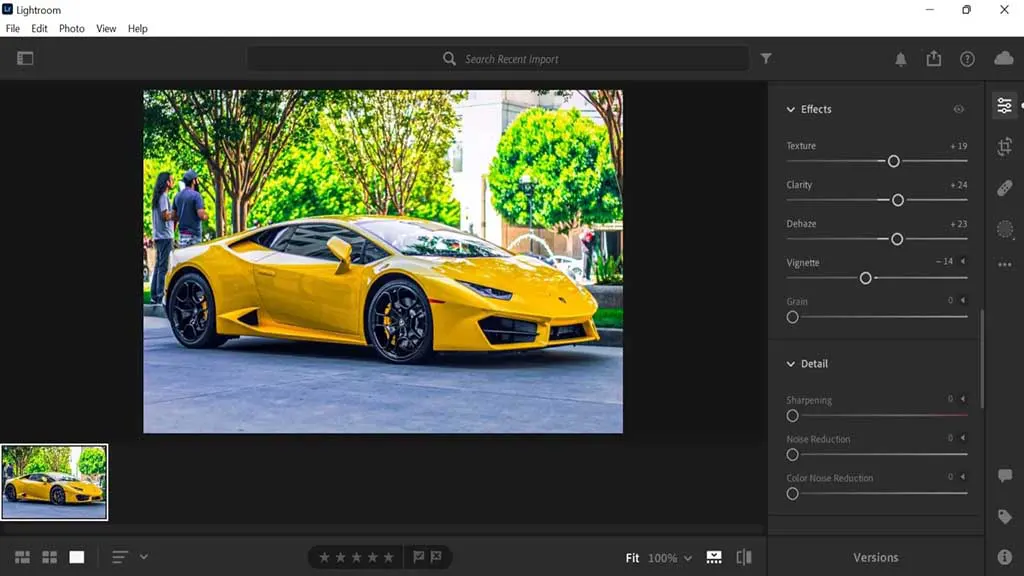
Step 4: Altering Effects
Next, there are effects options below the color that will help you adjust the photo’s clarity.
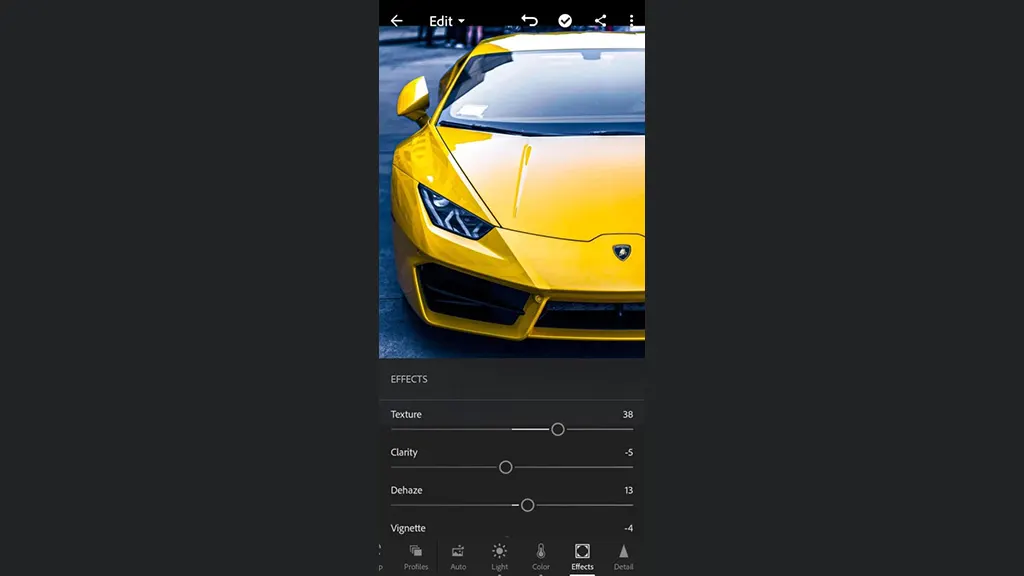
- Texture: Decreasing the texture makes it smoother and blurry, but that does not look good for car photos. That is why we are increasing the texture as well as the clarity here.
- Dehaze: We increased the “dehaze” to make the darker areas and shadows in the photo look better.
- Vignette: We reduced the vignette to create a slightly darker shadow around the photo. If you increase it, you will get a white shadow, but that does not look good.
- Grain: Lastly, increasing grain often offers a unique look for landscapes or human photography. Car photos always look better, sharper, and crisper. That is why we kept the grain at zero.
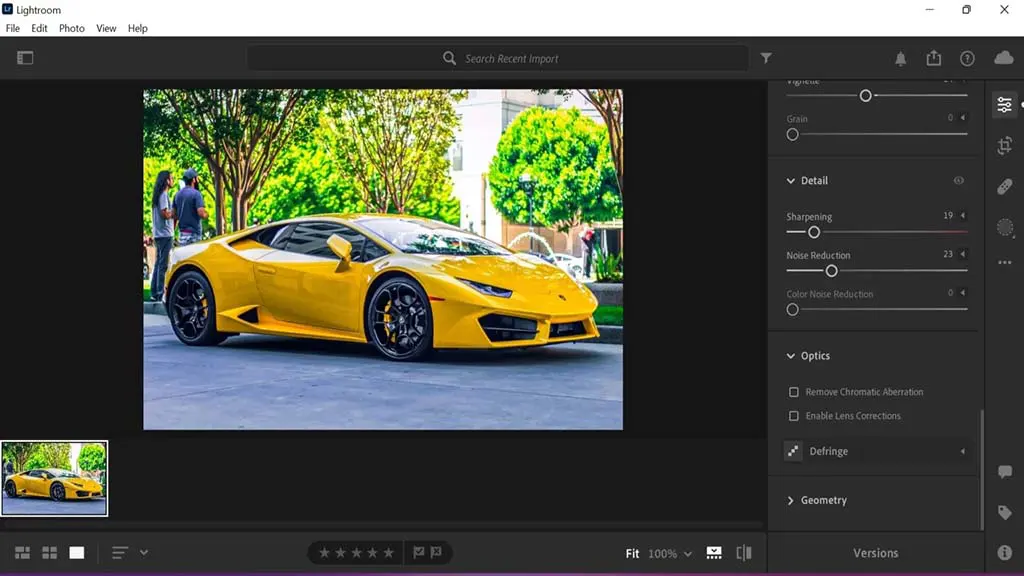
Step 5: Detailing
If the photo is not sharp or there is too much noise or grain, then the detail editing option can be a lifesaver. I did not have many issues with sharpness and noise in my photo. That is why we didn’t do much except for increasing the options to make it look sharper and less noisy.
Step 6: Finishing & Saving
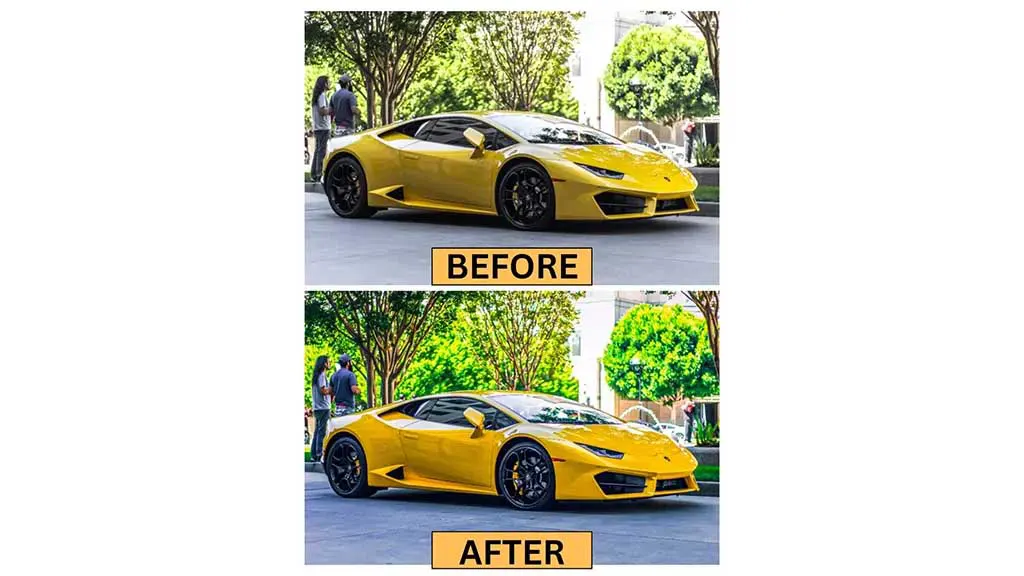
If you want to tune the colors or light a bit more, you can do that for the finishing touch. Then click on the share icon on the top ribbon to find various saving options.
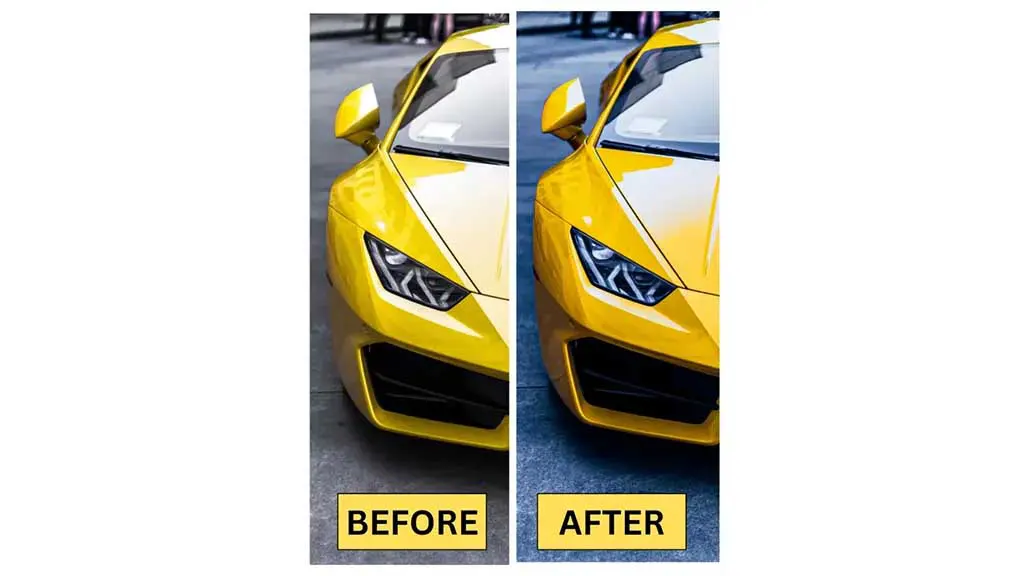
Click on the original + settings to save the photo in the original quality. Now you can compare the photos side by side and see how good the final photo looks.
How to Edit Car Photos in Lightroom Mobile: Brief Step-by-Step Guide
Although professionals edit photos on a PC, you can also do it on your smartphone. The Lightroom app is available both on the Play Store and the App Store. The interface is quite similar to the PC. Hence, we will briefly explain the steps. Download the app and follow the steps below to edit car photos on your phone:
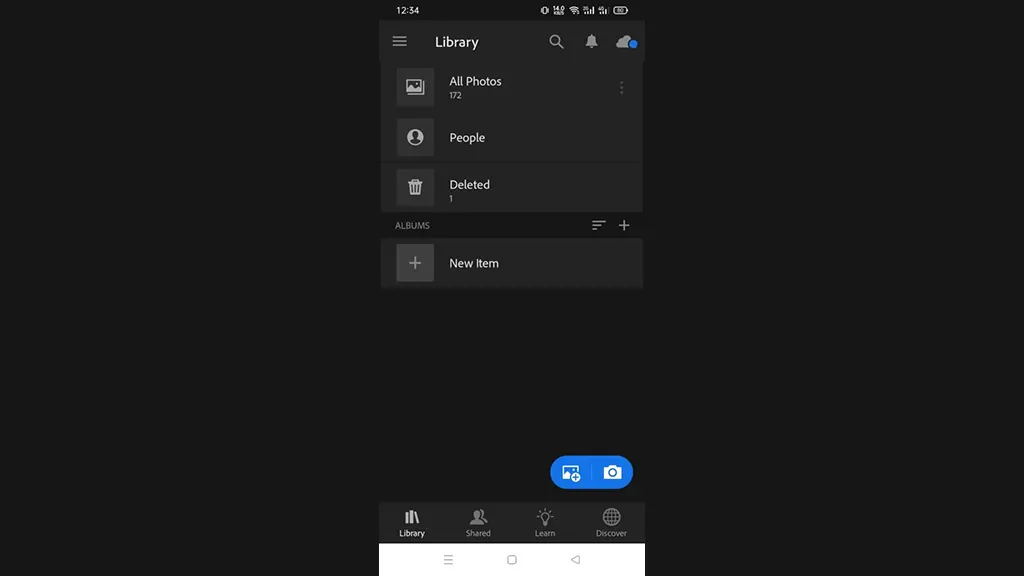
Step 1: Add a Car Photo to Lightroom
First, click on the gallery plus icon in the bottom right corner and select the car photo you want to edit. You can also add the photo directly from your phone’s gallery.
Go to the gallery, select the car photo, and go to the share option. Then select Lightroom from the share and open the Lightroom app. You will find the photo in all photos.
Step 2: Light Enhancement
Now, select the light tab and alter different editing options similar to those explained in the above section.
Step 3: Color Adjustment
On your Lightroom phone, you also get similar color editing options. Edit them as per your preferences.
Step 4: Adjusting Effects
Again, increase the texture for better architecture. If you have noticed, we increased the clarity when we were editing on PC. But on my phone, we have decreased it because it looked better this way.

Step 5: Improving Detail
Next, select the detail tab and alter the settings to have a better view of the photo with sharp details.
Step 6: Finishing
When you are satisfied with your editing, click on the share icon to the left of the three-dot icon in the top right corner. Then click save to your phone to save the car photo. The following photo clearly shows the differences. The color boost looks amazing in the final photo. Learn more: Car Background for Photo Editing – Tips and Tricks for Stunning Car Photos.
Conclusion
Now that you know how to edit car photos in Lightroom, you can edit any car image you want. However, remember that there are no standard edit settings for car photo editing.
Change the lights, colors, effects, and details depending on the photo’s condition. Try different combinations on the same photo to see which one looks better. We hope you have found this article helpful in learning about car photo editing in Lightroom.