
2 Beginner-Friendly Methods on How to Do Shadow Masking in Photoshop
- February 9, 2025
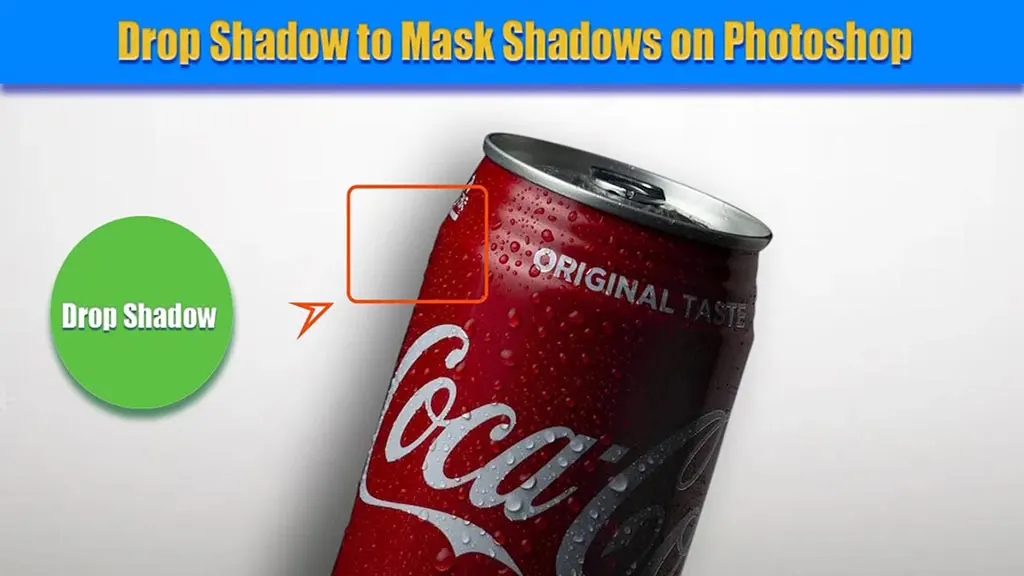
This article will provide you with 2 methods of shadow masking. So, if you’re here to learn how to do shadow masking in Photoshop, along with a guide on how to do drop shadow, follow this article.
While making a composite, giving the object a shadow effect in Photoshop is a must, or it would seem unrealistic and out of place. There are several ways to add a shadow. Some do it by painting the shadow using a brush. It’s relatively easier, however, doesn’t feel seamless. I prefer creating a drop shadow or using the original one.
How to Do Shadow Masking in Photoshop: Things You Must Know
We consider giving an object a shadow when we change the background of an object. Now, removing and adding any object is straightforward. You just select it, fix the edges, and create a layer. Then you blend the layer with the background image and play with the size and placement until it fits.
After placing the object, the main task arises—adding a shadow. You can add a perfect shadow in two ways: by creating a drop shadow and using the original one. If you want the most realistic shadow, using the original shadow is the best possible way. Or you could just create a drop shadow. Whatever floats your boat. That said, there’s a matter of suitability. If you choose the suitable method based on the object, you could get a better outcome.
You could create a drop shadow if the object is simple, i.e., an orange. However, use the original shadow when it is of something complex—a horse or a human. Again, you do it however you feel comfortable. Learn more: What Is Shadow Clipping and How to Fix It?
Using the Original Shadow to Mask Shadows on Photoshop: Method #1
Using this method is better if the subject has a complex design, for example, an animal. There are 2 methods available to use the original shadow. Follow these 4 steps of the first method to give your subject a sense of belonging.
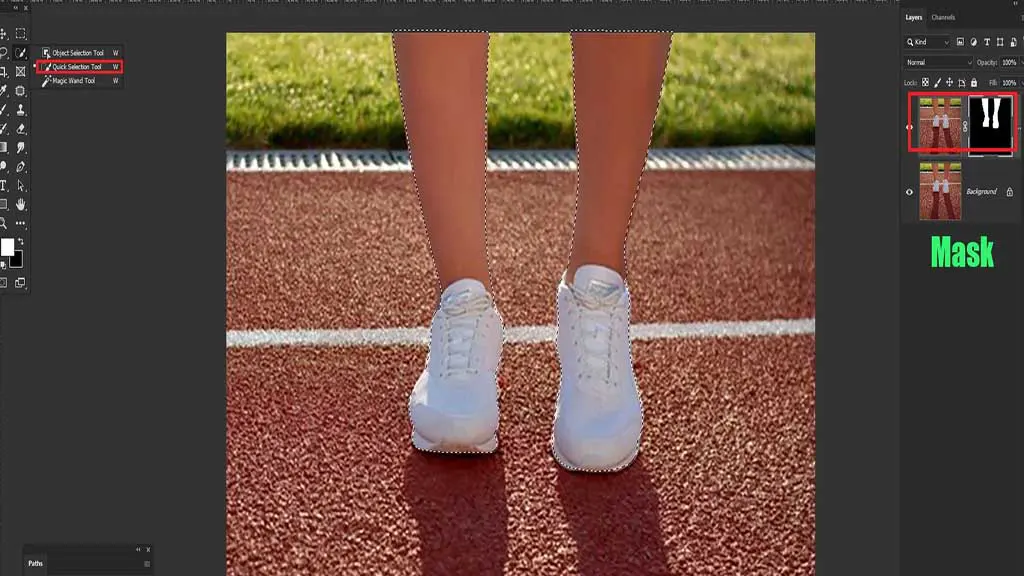
Step 1: Select the Subject
First, activate the Quick Mask Tool. You will find the mask button on the layers panel. Don’t forget to choose Selected Areas in the Quick Mask Tool options.
You select the object first. To do so, click W, and the three selection tools – Object Selection, Quick Selection, and Magic Wand – will be active. Or you can manually choose a selection tool and mark the areas of the object.
On the upper side, you will find Select Subject. Click on it, open the drop-down menu, choose Cloud for detailed results, and click Select Subject.
The software will mark the subject’s areas. Then click Select and Mask, and you will find that the object’s background is now gone and replaced by a black overlay.
Photoshop can’t always perfectly separate the object, so you might need to use the Refine Edge Brush and fix the edges. Additionally, use the refine hair tool if the subject is a human. After perfecting the edges, create a layer of it. Let’s call it “layer 2.”
Step 2: Get the Shadow
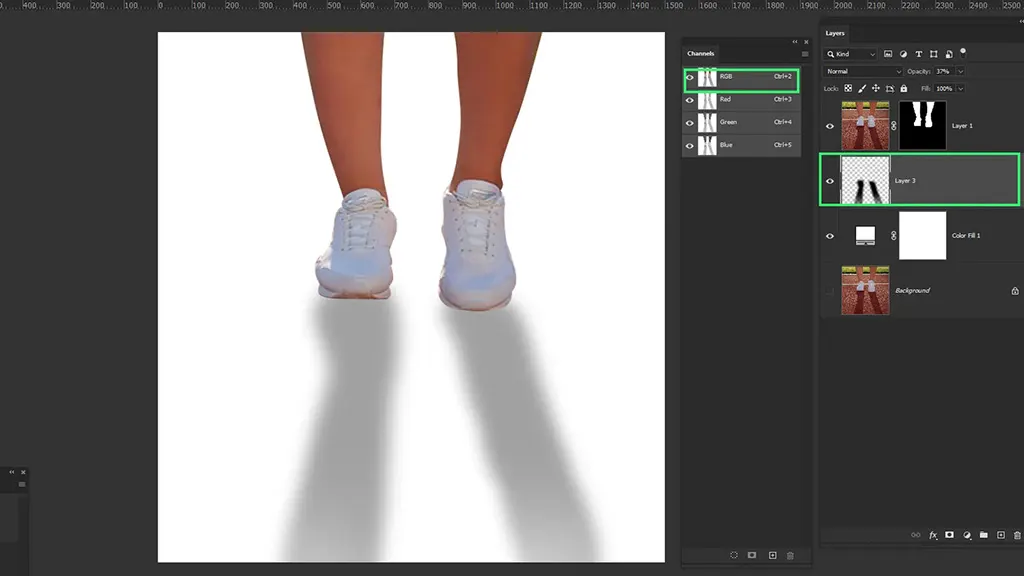
Turn off layer 2 by clicking on the view button. It will hide the content of the layer. Now select the original background image. Click on the Channels toggle. You will find this option above the layers.
Hold the Command (Mac) or Ctrl (Windows) key and select RGB. You will see that the subject is now selected. Next, open the quick mask mode by hitting Q. Most of the image’s background will turn red. Next, inverse it by pressing Command+I (Mac) or Ctrl+I (Windows).
Now you will notice that only the subject and some shadows are bathed in red. Press Command+L or Ctrl+L and bring up Levels to select all the shadows. Play with the slider key of input levels and cover up all the shades with red.
Go to the layer and turn off Quick Mask Mode by hitting Q. You will notice the selection. If you intend to create a new layer from the selection, press Command+J (Mac) or Ctrl+J (Windows). We will call it “layer 3.” The subject on the new layer should be almost transparent.
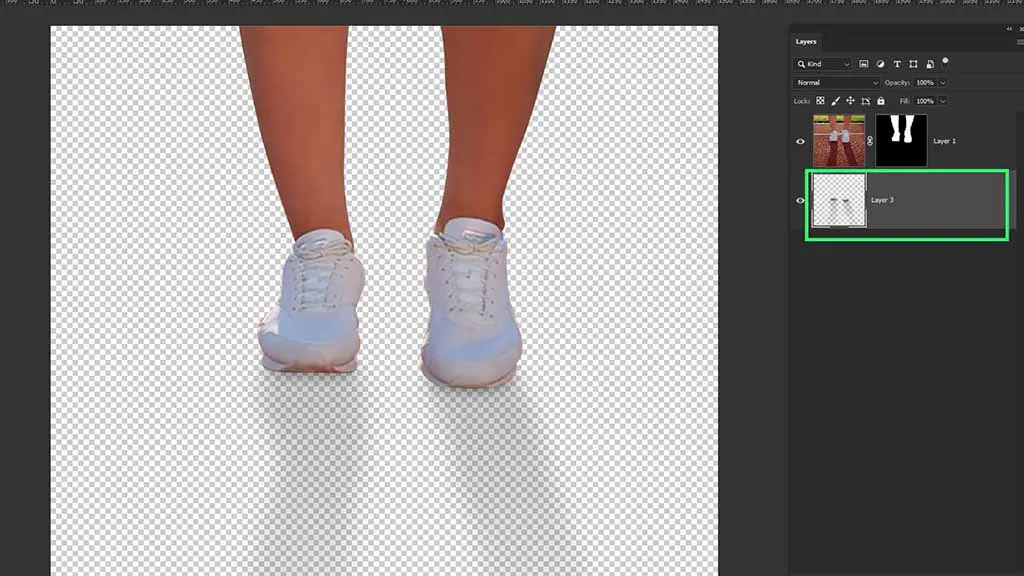
Step 3: Merge the Layers You Created
Layer 3 should contain the subject and the shadow, even though the subject looks almost transparent. However, it will look real after turning on layer 2. Turn off the background layer, as you don’t need it anymore. And turn on layer 2. Remember to put layer 2 above layer 3 and merge them into one layer by pressing Command+E or Ctrl+E. Let’s call this “layer 4.”
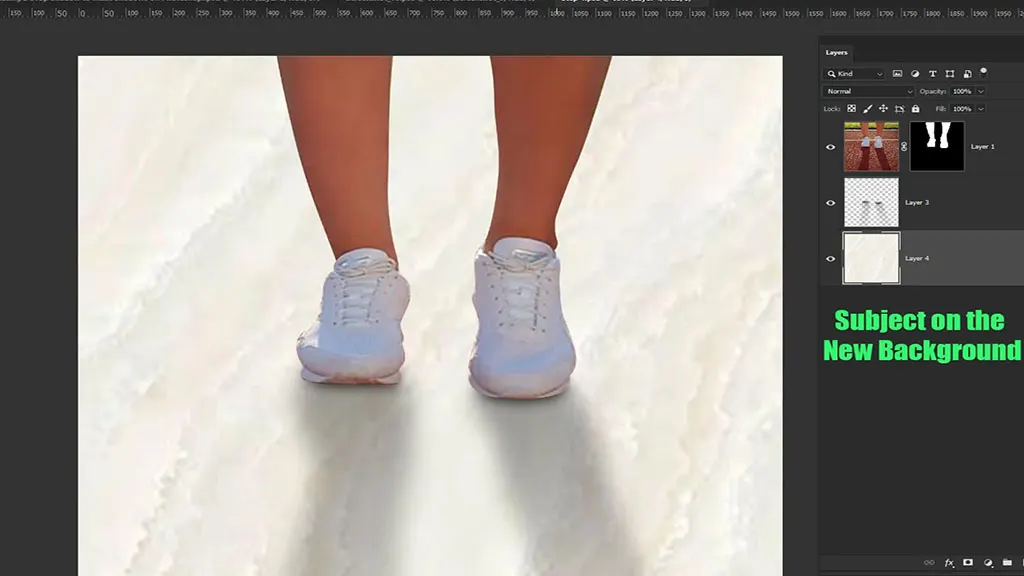
Step 4: Place the Subject on the New Background
Press and drag the subject from layer 4 and put it on the desired background image. Press Command / Ctrl+Minus to make the screen smaller, and then press Command / Ctrl+T to enter Free Transform Mode.
Resize the subject and place it in a suitable place. This is the final task. Your job is done as soon as you calibrate with the size and placement. Check whether the subject’s original shadow is in the light’s opposite direction. Well, in that case, flip it. Just right-click on the subject and select Flip Horizontal, and boom! You’re done.
Using the Original Shadow to Mask Shadows on Photoshop: Method #2
If you want to use the original shadow and the first method isn’t your cup of tea, use this method. Do exactly as I say.
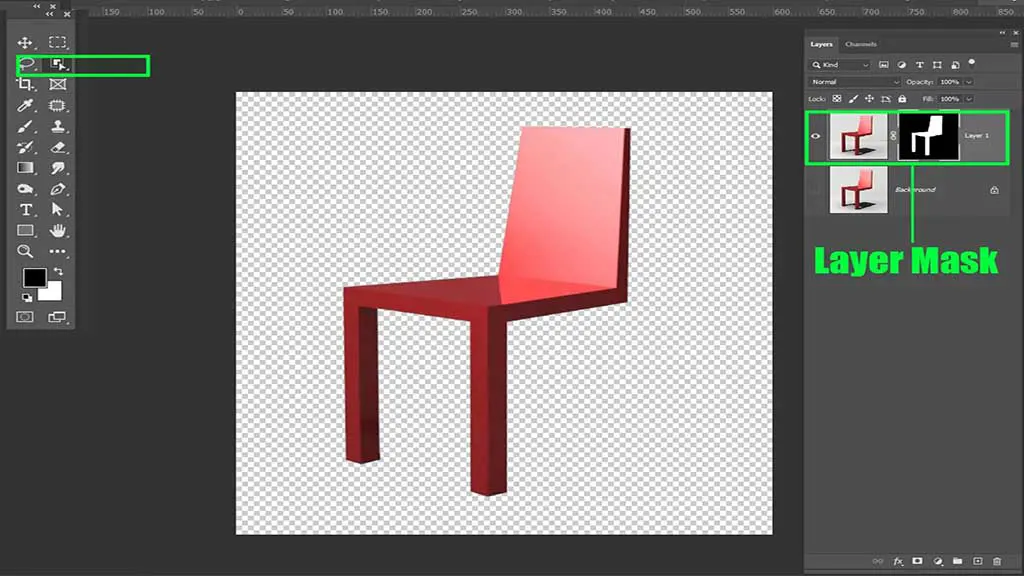
Step 1: Create a Layer Mask of the Object
First, duplicate the original image’s layer, and name it “layer 1.” Then, select the object and create a layer mask. You can mark the object’s areas with a selection tool.
Choose any tool you want. I prefer the Quick Selection Tool. Anyway, choose a tool and select the object. Once you’re done, create a mask of the selection. Keep layer 1 above the original background.
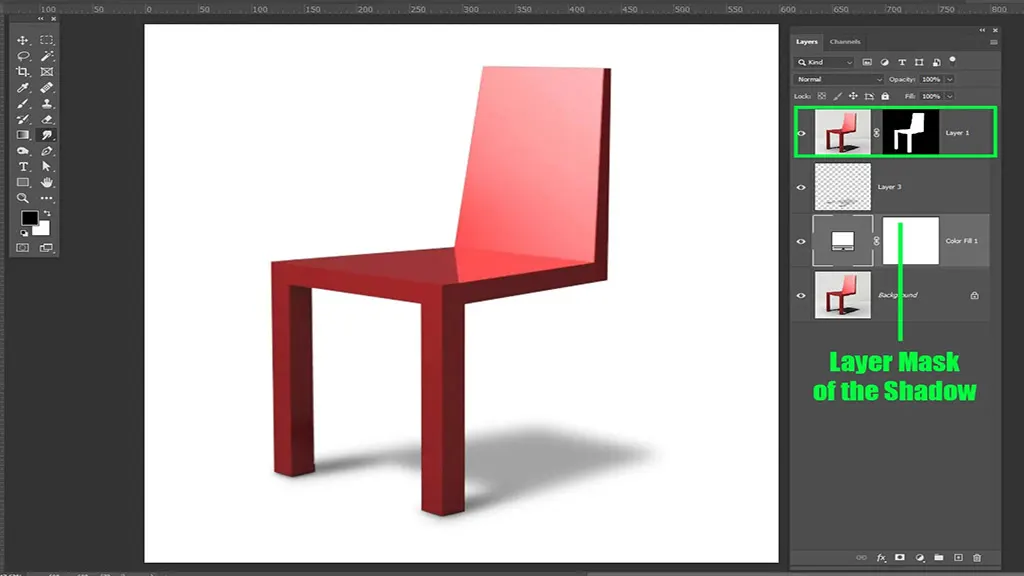
Step 2: Create a Layer Mask of the Shadow
Click the original background, then duplicate the layer again. Afterwards, select the Polygonal Lasso Tool and roughly select the area of the shadow. It doesn’t have to be perfect. Once you’re done selecting, add a layer mask and rename the layer to “layer 2.” Don’t forget to turn off the original layer.
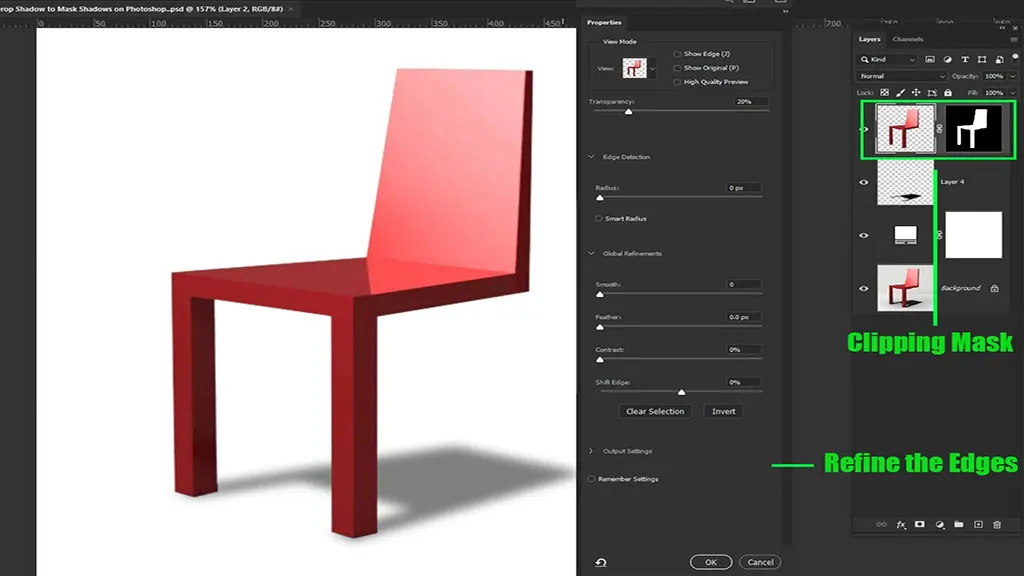
Step 3: Refine the Edges
As you have roughly cut the shadow, the object will only look natural if you refine the edges. Click on layer 2. Go to adjustment, then click Levels to open its layer. And select the Levels layer, then create a Clipping Mask.
All adjustments you make to it will affect only the layer below. Go to properties while still selecting the levels. Then adjust the slider to smooth out the edges.
You need to remove the colour from your shadow. So, apply a black-and-white adjustment layer. Next, right-click the B&W layer and select Clipping Mask.
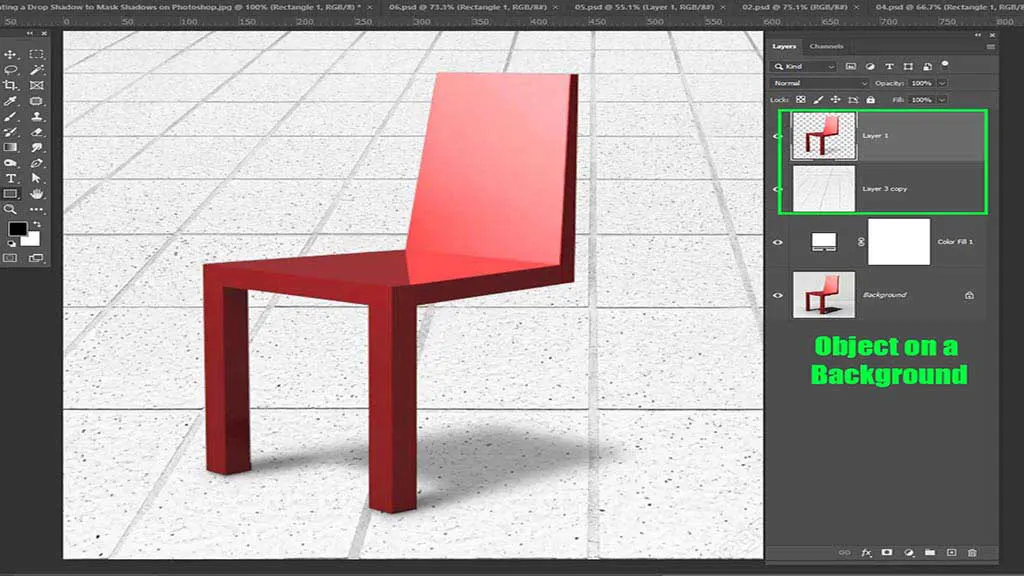
Step 4: Place the Object on a Background
In the 4th and final step of this method, we add the object to a background. The background could be of anything, from solid colours to images. Create a layer of any colour you want. Remember to change the shadow layer’s blend mode.
Select the layer of the shadow. To select it, click the mask’s thumbnail and set the blend mode to Multiply. There you have it, the object with its original shadow on a solid background.
After changing the blend mode on the layer of shadow as before, merge layers 1 and 2 by pressing Command+E or Ctrl+E and then rename it to “layer 3.” Now drag and drop the object to the target background and resize it. This is the end of this method. I hope you successfully did it.
Creating a Drop Shadow to Mask Shadows in Photoshop
As mentioned earlier, use this method if the object is simple and even in shape. Follow the steps I cite below.
Step 1: Create a Composite
The first step of creating a drop shadow is almost identical to the previous methods. You select the object as before, refine the edges and create a layer mask. The only thing you will do differently in this method is drag and drop the object in the background beforehand.
Step 2: Add a Drop Shadow
After placing the object perfectly, select its layer. Open the Layer Option window by double-clicking on the right side of it. Look for the drop shadow option and check it; the shadow shall appear. Create a separate layer for the shadow. To create, go to the layer, select Layer Styles, and click Create Layer.
Step 3: Reshape the Shadow
You now have a different layer for the shadow; open its properties panel. Tweak its settings, play with the options, and make it look as natural as possible. You will find two sliders to adjust—a white one and a black one. Move the white one to merge with the shadow and the black one to improve the highlights. Make the edges of the shadow blurry using any suitable Blur Tool.
Conclusion
We have explained how to perform shadow masking in Photoshop and outlined 2 approaches: using the original shadow and creating a drop shadow. You can choose either depending on the object’s complexity and your comfort.
The primary requirement for adding a shadow is layer masking and mastering the selection tools; otherwise, the shadow won’t give the object realism. Masking a shadow is tricky, and one can easily get worked up and make a mistake if not careful. So, keep on practicing.