How To Fix A Lazy Eye In Photoshop
- October 20, 2025
Have you ever taken a great photo but then noticed that someone’s eye looks a bit funny? Maybe it’s not looking the right way or seems lazy. Well, you are not alone, and the good news is that you don’t have to delete that photo. With Adobe Photoshop, you can make it look perfect! How to fix a lazy eye in Photoshop?
We will show you how to fix a lazy eye in your photos. Are you a professional photographer, or do you just love taking pictures? We are here to help. It is like a magic trick for your photos, and we will explain it all step by step. So, let’s dive in and learn how to make your pictures look even better!
What Is a Lazy Eye?
Before we start learning how to fix a lazy eye in photos using Photoshop, it is essential to know what a lazy eye is. Think of it like this: a lazy eye is when one eye doesn’t see as well as the other because it didn’t grow quite right. It is like having one strong eye and one weaker eye.
In photography, a lazy eye means that in a picture, one eye may not look as lively or may seem like it’s not looking in the right direction compared to the other eye. This can make the person in the photo look a little odd or not at their best.
But the good news is, we can use Photoshop to make this less-perfect eye look just as good as the other one, and it can turn a so-so photo into a great one!
You’ll need,
Let’s talk about the things you’ll need to get started:
Adobe Photoshop: This is like a super tool for fixing pictures. It’s the software we use to make the magic happen. You’ll need to have it on your computer to follow along.
A Good Photo: Pick a picture where the lazy eye is easy to spot, but it’s not too, too bad. It’s kind of like choosing a photo where the lazy eye is saying, Hey, I’m here, but I’m not causing too much trouble.” This will make the fixing process much smoother.
Patience: Think of this like a little project. It might take a bit of time to get everything just right. So, take your time, don’t hurry, and enjoy the process. The more patient you are, the better your photo will turn out in the end.
Easy Steps to How to Fix A Lazy Eye in Photoshop?
Follow the simple steps with us and get started to fix your first lazy eye with an expert.
Step 1: Open Your Photo
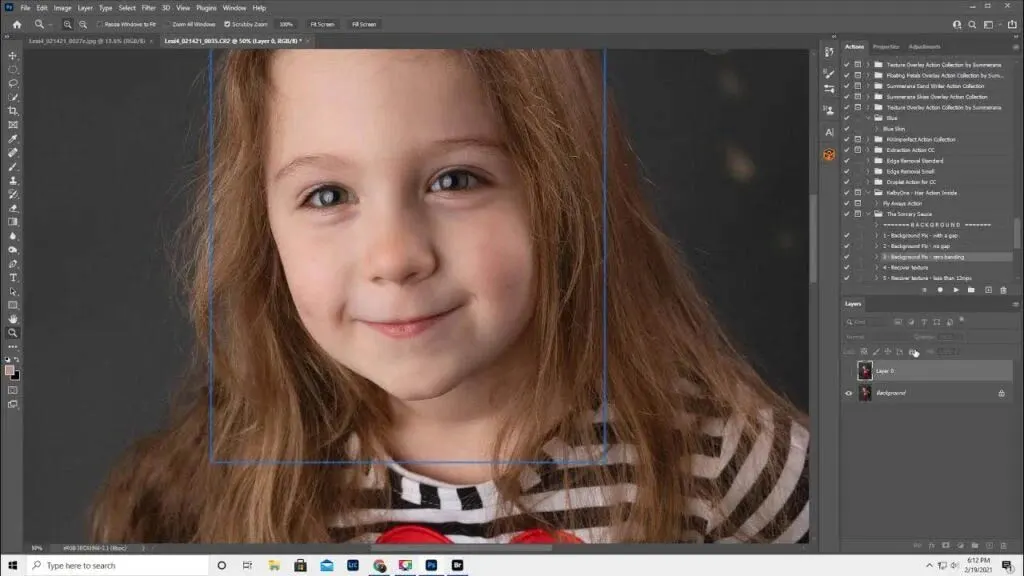
This is where our journey begins. Think of Adobe Photoshop as your magical toolbox. It’s like having a magic wand to make your photos look perfect. First, open your photo in Photoshop. It’s like spreading out a puzzle on a table before you start solving it. You need to have your picture right there in Photoshop to begin working on it.
Step 2: Duplicate the Background Layer
In Photoshop, there’s a place called the Layers panel. It’s like a stack of transparent papers, and each paper has something on it. Your photo starts as the very first paper, called the “background layer.” Now, what we’re going to do is make a copy of that first paper. This copy is like a safety net. It’s there, so if we make a mistake, we can always go back to the original photo.
Step 3: Select the Lasso Tool
The Lasso Tool is like a special magic rope. It helps you select things in your photo. You find it in the left toolbar. When you click on it, it’s like picking up your magic rope, and you’re ready to use it to do something cool.
Step 4: Select the Lazy Eye
Now, it’s time to use your magic rope to select the lazy eye. Imagine drawing a line around the eye, but instead of using a pen, you’re using your magic rope. Try to make the line as close to the eye as possible. Don’t worry if it’s not perfect; we can fix it later.
Step 5: Copy the Selection
Once you’ve drawn a line around the lazy eye with your magic rope, it’s time to make a copy of it. Think of this like cutting out a picture from a magazine. When you’ve got the eye selected, press Ctrl+C on your keyboard (or Command+C if you’re using a Mac). This is like saying, “I want to copy this.
Step 6: Create a New Layer
Now, it’s time to create another paper in our stack. In Photoshop, you have a button to do this, and it’s called “Create a New Layer.” When you press this button, it’s like adding another transparent paper on top of your original photo. This is where you’ll put the eye you copied.
Step 7: Paste the Selection
Remember how we copied the lazy eye with Ctrl+C? Now, we need to paste it on the new paper. To do this, select the new layer, and then press Ctrl+V (or Command+V on a Mac). It’s like saying, “I want to paste the eye here.” You’ll see the eye appear on the new paper.
Step 8: Flip the Eye
This step is like looking at your photo in a mirror. The eye you pasted might be facing the wrong way, so we need to flip it. In Photoshop, we go to a menu called “Edit,” then “Transform,” and finally, “Flip Horizontal.” It’s like saying, “Let’s turn the eye around.”
Step 9: Align the Eye
Now, we need to move the flipped eye to the right spot. Think of it like fixing a puzzle piece. We use a tool called the “Move Tool,” which is like picking up the eye and placing it in the right spot. Make sure it lines up nicely with the good eye.
Step 10: Reduce Opacity
Opacity is a fancy word for how see-through something is. To help us get the eye in the right place, we can make it a bit see-through. In the layer with the eye, there’s a slider that can make it more or less see-through. We slide it down to make the eye a little fainter.
Step 11: Fine-Tune Alignment
Now, we need to be very precise. We want the eyes to match perfectly. Think of this like adjusting the position of your toy cars to make sure they’re just right. Zoom in to get a closer look at the eyes and use the Move Tool to get them lined up perfectly.
Step 12: Add a Layer Mask
A layer mask is like a magic cloak. It can hide or show parts of a picture. In the layer with the eye, there’s a button to add a layer mask. When you click it, it’s like putting on your magic cloak. This cloak will help us hide or reveal parts of the eye as needed.
Step 13: Paint on the Layer Mask
Now, imagine you have a magic brush. This brush can either make things disappear (like using black paint) or reappear (like using white paint). With the magic brush, we start painting on the layer mask. Black makes things disappear, and white makes them come back. We use it to hide and reveal parts of the eye to make it look just right.
Step 14: Refine the Correction
We’re not done yet. This is like fine-tuning a musical instrument. Keep using your magic brush to make the eye look natural and fit perfectly. This might take some patience, but it’s worth it.
Step 15: Zoom Out and Review
Imagine looking at a puzzle from really close up. It can be hard to see the whole picture. So, we zoom out, just like you’d step back from a puzzle. Check whether the eye looks good in the context of the whole face. Make sure it doesn’t look strange.
Step 16: Final Adjustments
Now that the eye looks great, it’s time to add the finishing touches. Think of this step like adding the cherry on top of an ice cream sundae. You can adjust the colors, make the photo sharper, and do some last-minute touch-ups. It’s like giving your photo a little extra love.
Step 17: Save Your Work
Imagine you’re baking a delicious cake. Once it’s all ready and perfect, you need to save it for later. In Photoshop, saving is like putting your photo in a special box so you can open it again whenever you want. Make sure you save your edited photo so you can enjoy it later.
Now, with these easy-to-follow steps, you’re well on your way to fixing a lazy eye in your photos and making them look fantastic!
Remember, practice makes perfect, so keep on exploring and improving your photo-editing skills. Your pictures will look amazing with a little bit of Photoshop magic. You can, in fact, move an entire eye with Photoshop. It’s an amazing tool!
Final Words
Congratulations, you’ve made it through this educational journey of fixing a lazy eye in your photos using Adobe Photoshop! Now you know how to fix a lazy eye in Photoshop. Fixing a lazy eye in Photoshop can make a significant difference in your portrait photography.
By following this user-friendly guide, you’ve learned how to correct this common issue step by step. Remember, practice makes perfect, so don’t hesitate to experiment, try new things, and tackle more challenging photo-editing tasks. Keep honing your skills and creating stunning portraits. Happy editing!