How to Remove Hair Background in Photoshop for the Perfect Background
- September 21, 2025

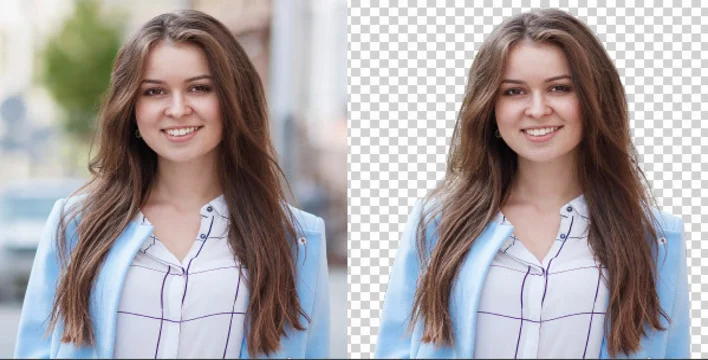
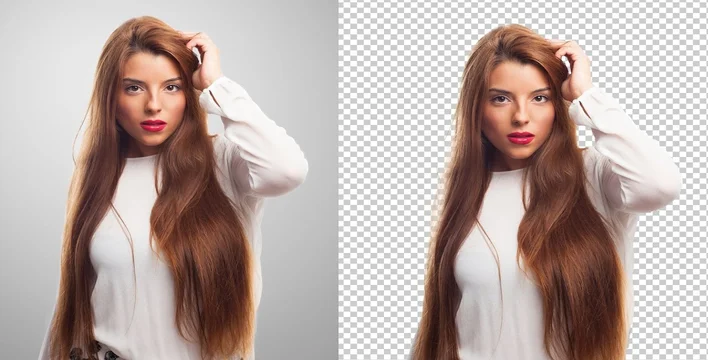
When you’re shooting photos for your portfolio or a client, sometimes you need to remove the hair background from the subject’s head to get the perfect background. This simple act can increase the value of your photos to a great level.
Since Photoshop has made our life easier with its unique tools and features, it has also made sure you can bring utmost perfection to your images by applying many of its simple tricks. Photoshop hair removal tool.
There are a few different ways to do this in Photoshop, and in this post, we’ll walk you through the steps to remove hair using the Clone Stamp and Polygonal Lasso tools.
What Is the Hair Background?
When you’re shooting portraits, you often want to get rid of the hair in the background so that your subject is the only thing that stands out. And while there are a few ways to do this in Photoshop, the method I’m going to show you is my favorite.
The hair background removal technique is a process that takes a little time but is worth it in the end. So let’s get started!
Why Do You Need to Remove Hair in Photoshop?
You usually want a clean hair background without distractions when shooting someone for a portrait. This situation is where Photoshop comes in handy—you can easily remove unwanted hair from the shot.
Follow these small steps to finally accomplish the trick. The first is the lasso tool, which lets you select an area of hair to remove. The second is the magic wand tool, which automatically selects all the hair in the photo. And the third is the pen tool, which lets you create custom selections.
Every method has advantages and disadvantages, hence, it is crucial to experiment until you find the one that works best for your specific photo.
Read more: Outdoor product photoshoot
How to Remove Hair Photoshop
You’ve probably seen those perfect photoshoots where the model’s hair background has been perfectly styled. But you might not know that hair is sometimes removed in Photoshop to achieve that flawless look.
It’s not as hard as you might think, but there are a few tips and tricks to know before you start. Initially, you have to make a selection of the area of hair you have to remove. It is preferable to begin with a smaller region rather than attempting to remove a large portion at once.
Then, go to the Magic Wand tool. Using this tool, you can select the hair that you want to remove. Press the Shift key. Also, select it spontaneously so you get a contiguous selection. Next, watch out for the Edit menu on the toolbar and make a selection for Cut. (Edit> Cut)
Finally, paste the selection onto a new layer and use the Smudge tool to blend the edges to look natural. Voila! You’ve just removed hair from your photo like a pro.
Best Hair Background Removal Tools in Photoshop
There are several ways to remove hair in Photoshop, but the lasso tool and the magic wand are the two most popular.
The lasso tool is excellent for selecting specific areas of hair, while the magic wand tool is suitable for selecting large areas of hair.
Once you’ve selected the area of hair you want to remove, you can then use the eraser tool to delete it.
One can even use the clone stamp option to replicate a portion of some other photo over the hair removal region. This tool is a great way to remove fine hairs without leaving any traces behind.
Select the Right Hair Removal Tool for Your Job
Whenever it comes to hair removal for portraits, you have a variety of tools that are available. Therefore, what should you go with? It is determined by your requirements.
For example, the Pen tool removes tiny, fine hairs. On the other hand, if you’re looking to remove a large area of hair, the Clone Stamp tool might be a better choice. And if you need to get rid of hair around the edges of an image, the Magic Wand tool is your best bet.
However, regardless of which tool you choose, the key is to be patient and take your time. This tool isn’t a process that you want to rush. Don’t worry if you screw up; you could always use the Eraser tool to correct it.
Pro Tips for Removing Hair in Photoshop
Here are a few pro tips for removing hair background in Photoshop:
- Select the hair using the lasso tool to remove the unexpected hair.
- Look out for the menu bar. Then, follow these steps, Image > Adjustments > Desaturate. This method will remove the color from the hair, making it easier to remove.
- Zoom in closely on the hair you’re removing, and use the eraser tool to delete it. Take care not to remove none of the surrounding background pixels.
- In order to exclude them, make use of the clone stamp tool. If stray hairs are left over, it will take care of them.
- Save your work as a .psd file so that you may go back and later, take strategic modifications.
In a Nutshell:
To begin, clone over the hair with the Clone Stamp tool. Next, use the Healing Brush to clean up any remaining patches. And finally, use the Gaussian Blur filter to soften the edges of the cloned area.
You can take a few steps to remove hair in Photoshop and get the perfect background for your photo. We all want perfection in our creations. Spending a few minutes to create a neat and clean image is all you need before making the final delivery.
Everything you need to know about using the hair background removal tool has been addressed in our article. However, if we missed anything, do let us know. Kindly share this post with others who enjoy learning new Photoshop skills.
For more tricks like that, follow our blog section here.