Clipping Path Figma Tutorial − Learn to Crop, Mask, and Remove Backgrounds
- February 1, 2026

Like Adobe Photoshop, Figma is another highly popular image editing software that allows you to edit images with great results. Whether it’s cropping, masking images in different shapes, removing the background, or enhancing the colour of images, Figma enables you to do most kinds of editing easily. However, in this guide, we’ll be walking you through an in-depth, step-by-step guide on clipping path Figma Tutorial. Therefore, if you’re interested in learning background removal, cropping, and masking in Figma, don’t miss out on this guide.
Step-by-Step Guide to Clipping Path in Figma
To do a clipping path (Removing background), you’ll need to be familiar with the pen tool. This tool is found in many image editing software such as Adobe Photoshop, Illustrator, Figma, etc. The pen tool works the same in all software. If you’re new to clipping paths or background removal, you’d better select an image that’ll be easy to clip.
You can choose an image containing a smartphone, a laptop, or a TV. Just pick an image subject that has straight edges. However, here we’ll be looking at how you can easily remove the background from an image or extract the subject from an image.

Step 1: Open the Image in Figma
The first thing to do is load the image on the Figma canvas.
How do you do that?
There are a few ways to load an image, and the simplest one is to drag the image from the folder and drop it over the canvas. If that’s not an option, go to the “File” option, where you should find another option named “Place Image.” Click on that to open an image in Figma.
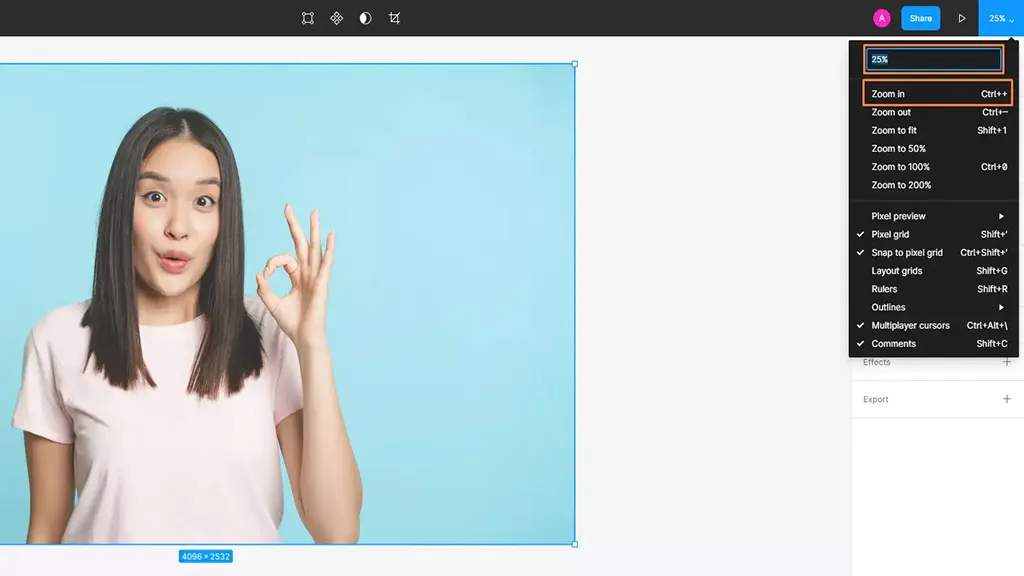
Step 2: Zoom the Image
The more you zoom in on the image, the easier it’ll be for you to clip the subject properly. That being said, if the image quality is poor, then zooming in much won’t do any good. In that case, keep the image at a range where you can do the clipping easily.
Step 3: Using the Pen tool
After importing the image and zooming in on it, it’s time to use the Pen tool. And this is where the actual clipping path process starts. Select the pen tool from the left of the top column; the pen icon you see is what you’re looking for.
After selecting the pen tool, you are now ready to do the clipping. What you have to do is draw along with the subject edge. Place the cursor at the edge of the image subject, press the right button of the mouse, keep it pressed and trace along the edge. You don’t have to draw long paths or lines; just draw short paths. And when you connect the ending point to the starting one, the path is closed.
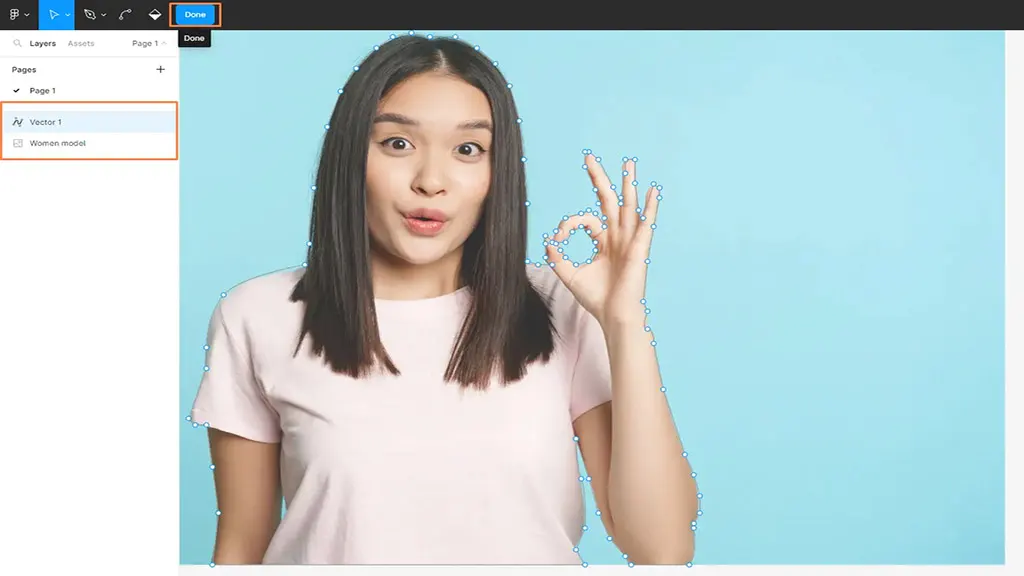
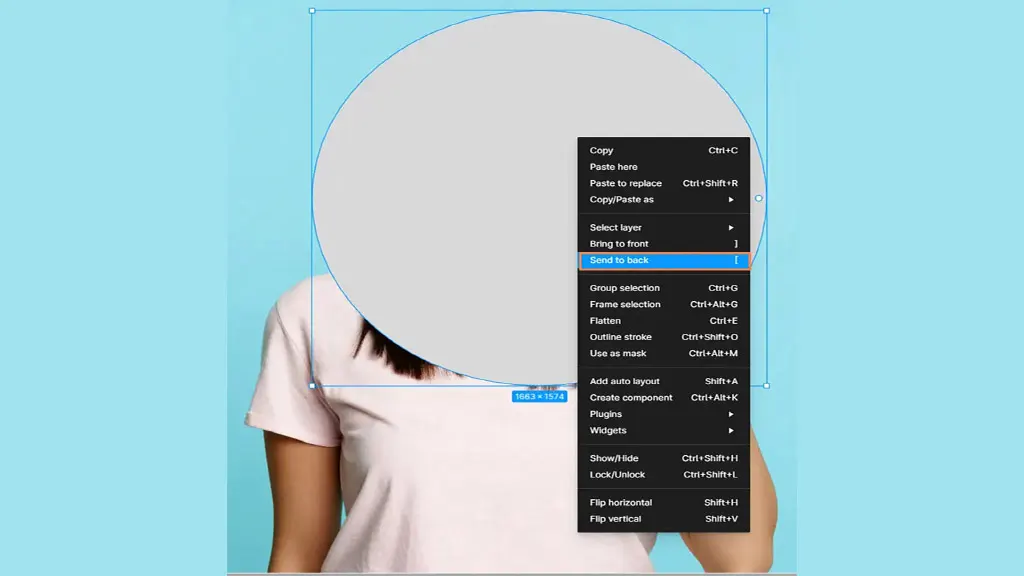
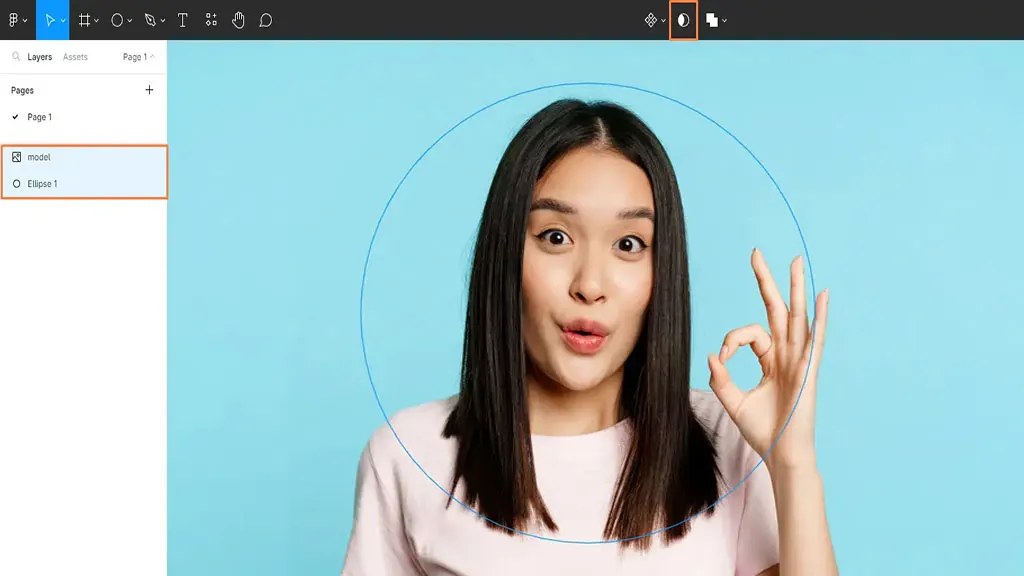
Step 4: Select the Layers
You should see an option named “Mask Group” on the left side of the screen. Check how many layers there are under the mask group. If your canvas has only one image over which you’ve used the pen tool, then there should be two layers.
The layer names would be “Vector 1,” and another would be the name of the image. Now, to remove the background of the subject you just clipped around, you’ll have to drag the vector layer under the image.
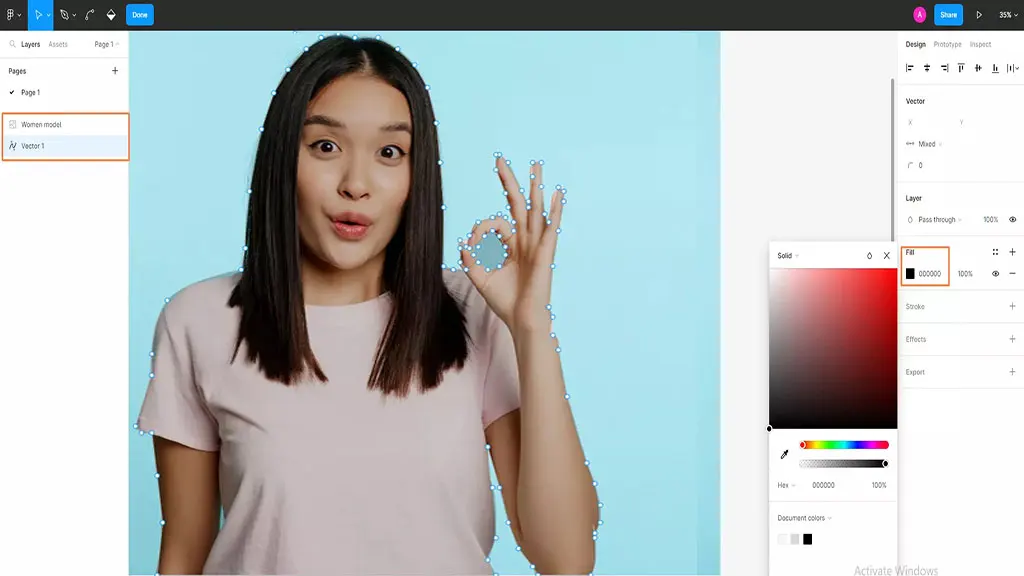
Simply left-click on the “Vector” layer, keep the mouse button pressed and drag that layer under the image layer. To select both layers, keep the “CTRL” button pressed and right-click on both layers.
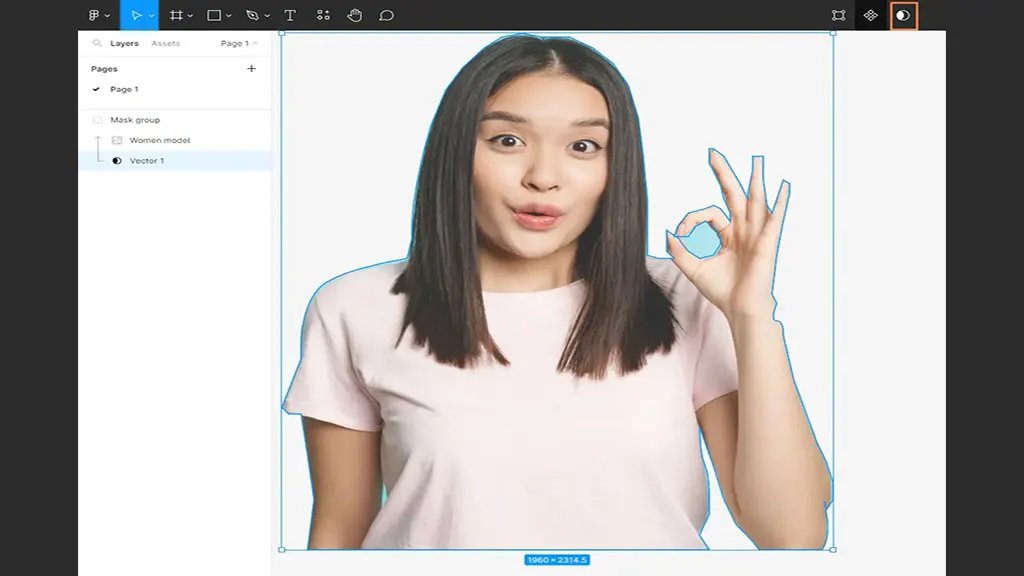
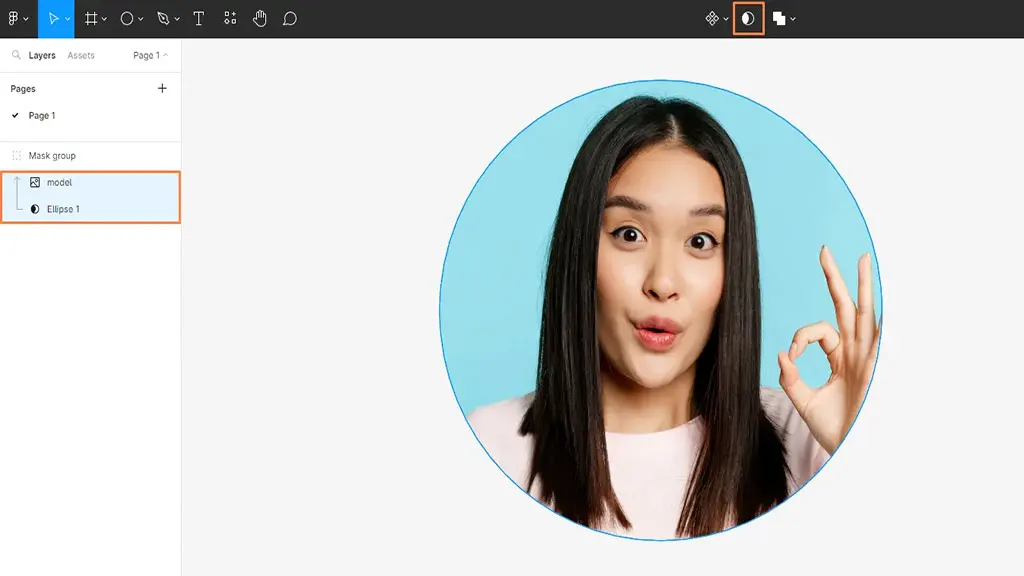
Step 5: Removing the Background
When you’ve selected both layers, click on the icon (Looks like a moon) in the middle of the top column. That’s it! You have successfully removed the background.
Tip: If you’re a beginner, it might feel a little hard for you to draw a clipping path around the subject accurately in the beginning. All you need to do is keep repeating the process until you achieve accuracy. Things get sweatier when the image subject has hundreds of curves and holes. Tracing those edges requires a great grip on the pen tool.
How to Crop a Shape in Figma?
Every designing tool has an image cropping feature, but the use process differs in tools. Cropping a shape in Figma is very simple, and here we’ll be taking you through the steps that’ll easily teach you how to do it.

Step 1 − Select the Shape
First, determine in what shape you want to crop the image. Right after opening the Figma, you should see a rectangle icon along with a downward arrow located on the left of the top column. Clicking on that icon will drop a list that has different shape options. Choose the shape you need from the list.
Step 2 − Draw the Shape
Once you’ve selected a shape, it’s time to draw it. To do that, you’ll have to take the cursor to the canvas, right-click on the mouse, and drag. This should draw the shape you selected earlier. You can increase and decrease the size according to your needs.
Step 3 − Select the Image
Go to the “Fill” option. You’ll find it in the right column. Upon clicking on that, you will see another option popping up named “Choose Image.” Click on that, and you’ll be able to pick the image you want to crop.
Step 4 − Crop the Image
After selecting an image from the file, you’ll see your desired image in the canvas. You’ll also notice 4 points in the corners of the image. If you take the cursor to any of the points, press the left button on the mouse (Keep the button pressed), and move, you’ll see the size increasing and decreasing, but the image won’t crop; it will keep on filling into the different sizes.
To crop the image, you’ll have to go to the small tab opened on your right (from where you chose the “Image” option). Click on the down arrow, and you’ll see four options in the list from which you’ll have to choose crop.
When you select the “Crop” option, a new rectangle shape with 8 blue points will appear on the image. Those points will allow you to crop the image according to your needs.
How to Do a Clipping Mask in Figma?
Masking an image in Figma is very easy; it’s just a matter of a few clicks. In the guide below, we’ll take you through a step-by-step guide on how you can create text masks easily within a few minutes.
Step 1 − Creating Text
First, create a text on the canvas. To do that, you’ll have to select the “T” option found in the top left column. Select your desired font and then write the text you want to use as a mask. Increase the size according to the need. Usually, people keep the size between 200 – 400. Keep the text you just created in the centre of the canvas.
Step 2 − Load the Image
There are several ways to load an image into Figma, and you can drag the image from the file and paste it over the canvas. Or you can install plugins that’ll allow you to import images from different sources. The most widely used plugin is Unsplash. Here’s how you can add the Unsplash plugin to Figma:
- Go to the Figma plugin page from the “Menu” option at the top.
- Select “Install a Plugin”, which will open a new window allowing you to search for the plugin.
- Search for your desired plugin and hit “Install”.
You can also import images from the “Choose Image” option that’s found in the “Fill” section. After loading the image, the text will be underneath the image.
Step 3 − Select the Layers
If you’ve only created a single text (YES, for example), that’s one layer. And the image that you have just loaded, that’s another layer. That means, right now, you have only two layers on the canvas. You can check that in the left column under “Mask Group.”Now, to mask the image, you’ll have to select both layers. There are two ways to select them.
You can put the cursor on a blank space in the canvas, press the left button of the mouse, and drag through the entire canvas. Doing so will select all the layers you have on the canvas. Another way is to keep the “CTRL” button on the keyboard pressed and click on both the layers displayed in the left column.
Step 4 − Masking
Once you’ve selected both layers, you’re just a single click away from witnessing the magic. There is an icon that looks like a moon, located in the middle of the top column. Click on that, and it’s done.
Conclusion
Wrapping up this article on the clipping path Figma tutorial with a few last words. Before you start editing the image, make sure you understand every step. A silly mistake is enough to frustrate you to the extent that you would end up giving up. You’ll require time to get a decent hold of Figma or any other image editing tool. Hence, be patient and keep practising!!!